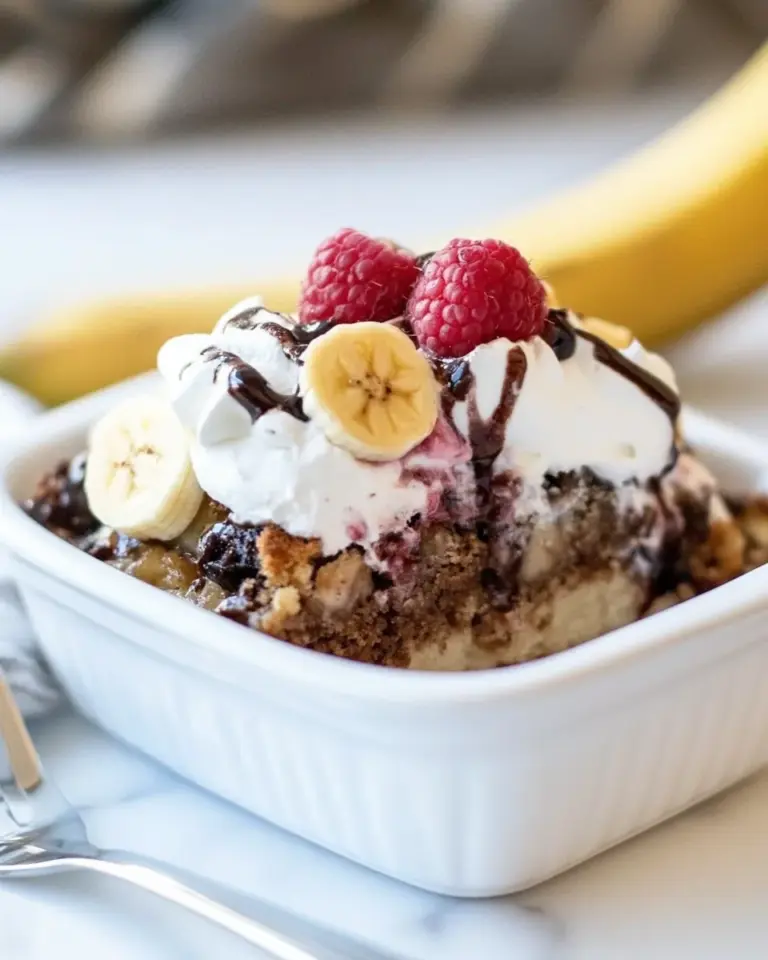
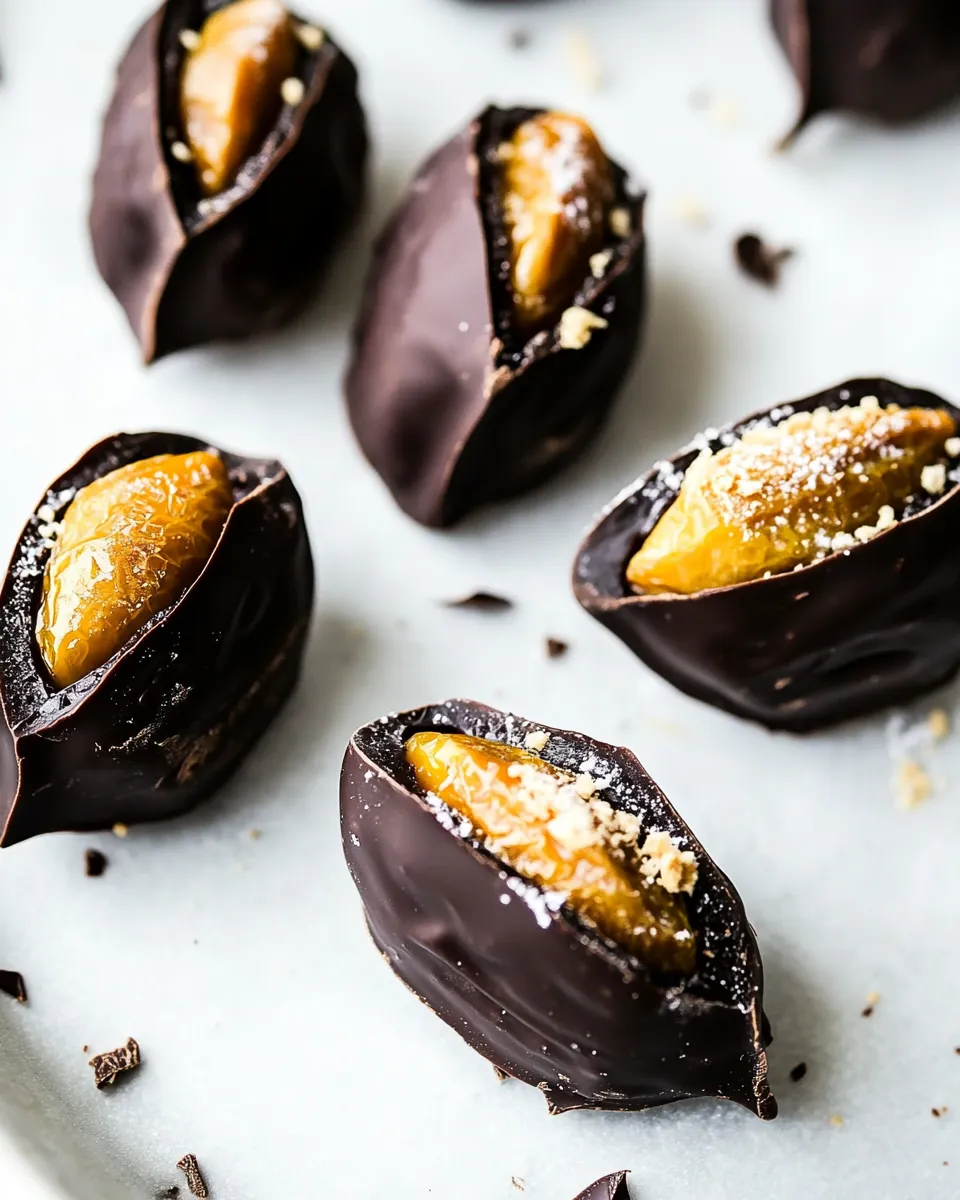
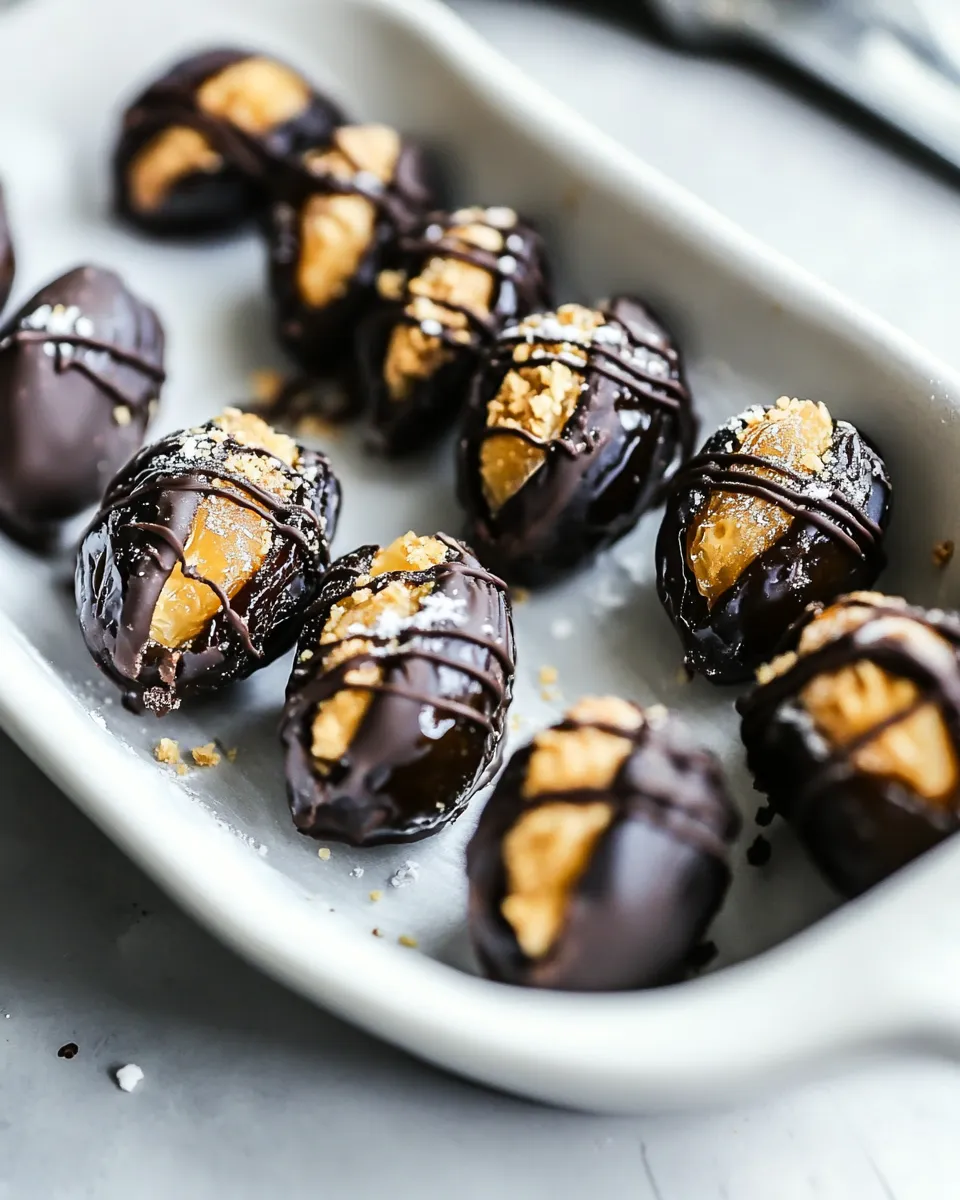
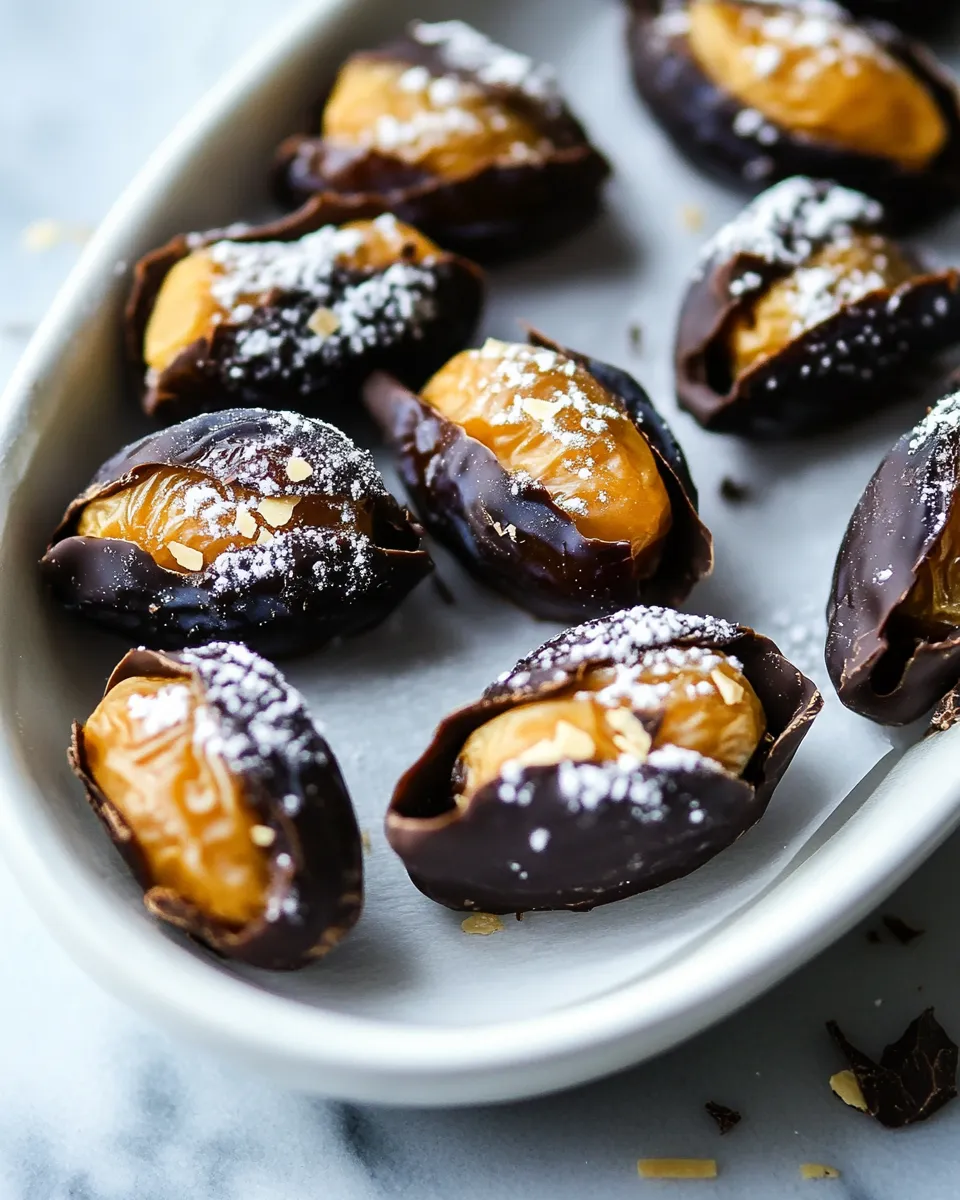
Chocolate Covered Stuffed Dates
If you’re on the hunt for a delectable treat that not only satisfies your sweet tooth but also keeps things healthy, look no further than Chocolate Covered Stuffed Dates. These little gems are the perfect balance of rich chocolate, creamy peanut butter, and the natural sweetness of dates. They are incredibly easy to make and are sure to impress friends, family, or even yourself on a quiet afternoon. Let’s dive into the details of this delightful snack that offers both indulgence and nutrition!
Why It’s Crowd-Pleasing
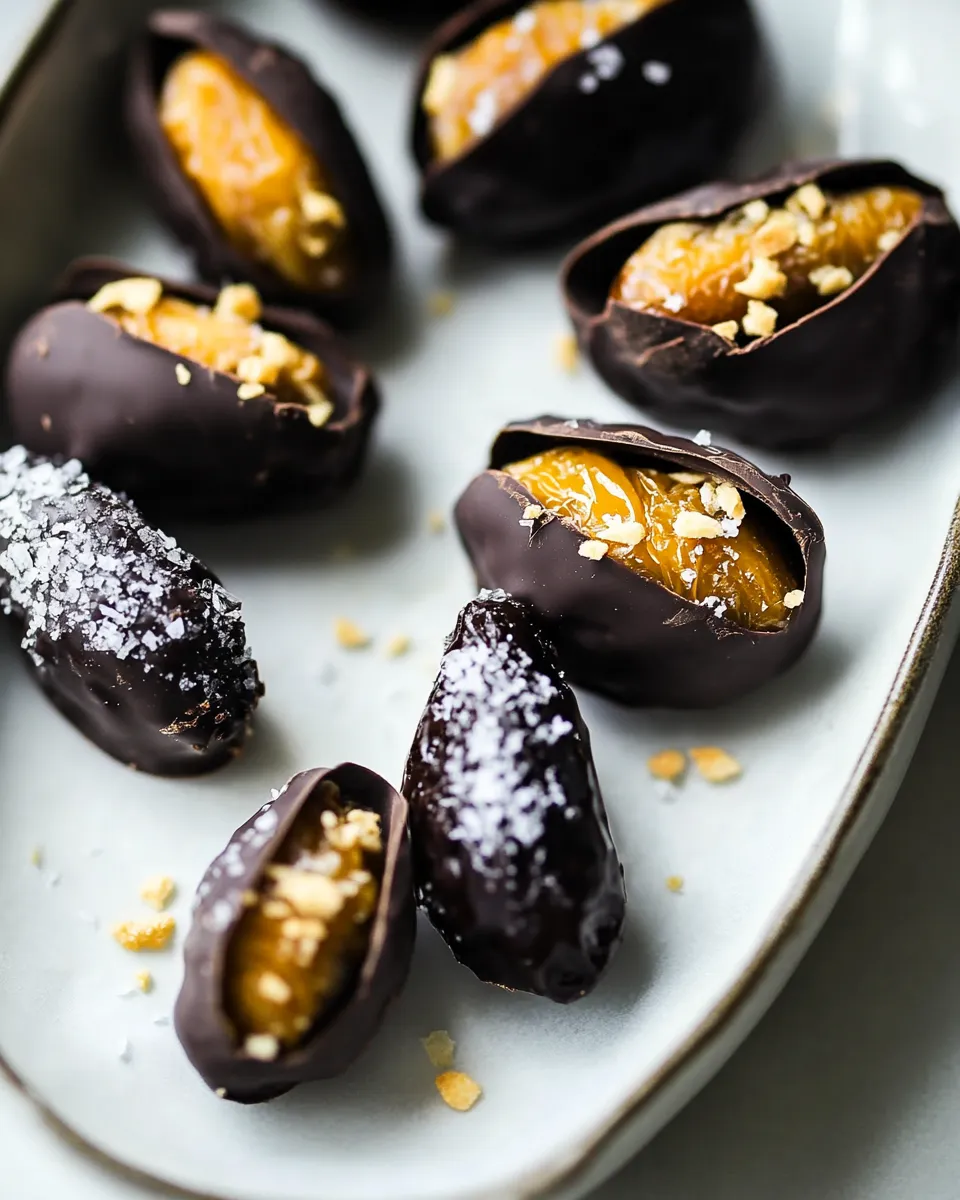
Chocolate Covered Stuffed Dates are a crowd-pleasing treat for several reasons. For starters, they combine the deep, luxurious flavor of dark chocolate with the chewy sweetness of Medjool dates, which are often considered nature’s candy. The addition of peanut butter adds a creamy and savory element that perfectly complements the sweetness of the dates.
These treats are also incredibly versatile. They can be served as a simple dessert, a delicious snack, or even as an energy-boosting pre-workout bite. With their beautiful presentation, they can easily be dressed up for parties or gatherings. Plus, they are gluten-free and can be made dairy-free, accommodating a wide range of dietary preferences.
Ingredient List
To create these delightful Chocolate Covered Stuffed Dates, you will need the following ingredients:
- 6 large Medjool dates, pitted – The star of the show, offering natural sweetness and a chewy texture.
- 3 tablespoons sugar-free natural peanut butter – Adds creaminess and healthy fats; feel free to use almond butter or any nut butter if preferred.
- 3 ounces dark chocolate or dairy-free chocolate – Choose a high-quality chocolate for the best flavor; dark chocolate adds a rich depth.
- Sea salt – Optional, but a sprinkle on top enhances the flavors beautifully.
Recommended Tools
Before you get started, gather these handy tools:
- Microwave-safe bowl – For melting the chocolate easily.
- Fork or toothpick – For dipping the dates into the melted chocolate.
- Parchment paper – To line the baking tray for easy cleanup.
- Small spoon – For filling the dates with peanut butter.
How to Prepare Chocolate Covered Stuffed Dates
Follow these simple steps to create your own Chocolate Covered Stuffed Dates:
Step 1: Prep Your Dates
Start by carefully pitting the Medjool dates if they aren’t already pitted. Make a small slit on one side of each date and remove the pit. This will create a little pocket for the peanut butter.
Step 2: Stuff with Peanut Butter
Using a small spoon, fill each date with approximately half a tablespoon of natural peanut butter. Press gently to close the date around the filling, ensuring it stays inside.
Step 3: Melt the Chocolate
In a microwave-safe bowl, break the dark chocolate into small pieces. Heat it in the microwave in 30-second intervals, stirring in between, until fully melted and smooth.
Step 4: Dip the Dates
Using a fork or toothpick, carefully dip each stuffed date into the melted chocolate. Make sure it’s well-coated, then lift it out and let any excess chocolate drip off.
Step 5: Set on Parchment
Place the chocolate-covered dates on a lined baking tray. If you like, sprinkle a tiny pinch of sea salt on top of each date before the chocolate sets.
Step 6: Chill and Serve
Refrigerate the tray for about 15-20 minutes or until the chocolate hardens. Once set, your Chocolate Covered Stuffed Dates are ready to enjoy!
Variations by Season
These stuffed dates can be easily adapted to celebrate the flavors of each season. Consider these delicious variations:
- Fall: Add a sprinkle of cinnamon or nutmeg in the peanut butter before stuffing.
- Winter: Mix in some crushed peppermint candies or a drop of peppermint extract in the chocolate.
- Spring: Top with crushed pistachios or coconut flakes for a fresh, vibrant look.
- Summer: Use a fruity nut butter like cashew or almond with a dash of vanilla to lift the flavors.
Notes from the Test Kitchen
- Feel free to experiment with different nut butters or even seed butters for a nut-free version.
- Make sure the chocolate is tempered well to avoid it becoming too soft at room temperature.
- You can use a double boiler instead of a microwave to melt the chocolate for more control.
- For added texture, consider mixing in some crushed nuts or seeds into the peanut butter filling.
Storage Pro Tips
To keep your Chocolate Covered Stuffed Dates fresh and delicious:
- Store them in an airtight container in the refrigerator for up to a week.
- If you want to keep them longer, freeze the chocolate-covered dates. They can last up to three months in the freezer.
- When freezing, layer them between parchment paper in a container to prevent sticking.
Reader Questions
Can I use other fillings besides peanut butter?
Absolutely! Almond butter, sunflower seed butter, or even cream cheese can be delightful alternatives for stuffing the dates.
What type of chocolate works best?
High-quality dark chocolate is recommended for its rich flavor, but dairy-free chocolate works perfectly if you prefer a vegan option.
Can I make these dates ahead of time?
Yes! You can prepare them a few days in advance. Just store them in the refrigerator until you’re ready to serve.
Are these dates suitable for kids?
Yes, these are a healthier alternative to traditional candy and are generally well-received by kids. Just watch for any nut allergies!
The Last Word
In the world of snacks and treats, Chocolate Covered Stuffed Dates stand out as a deliciously simple option that satisfies both sweet cravings and nutritional needs. With their rich flavors and satisfying textures, these treats can be enjoyed any time of day. Whether you’re prepping for a party, looking for a quick dessert, or simply indulging in a personal treat, these stuffed dates are versatile, easy to make, and absolutely delightful.
With just a few ingredients and minimal effort, you can whip up a batch of these indulgent bites that are sure to impress anyone who tries them. So, gather your ingredients, follow the steps, and enjoy the deliciousness that awaits you!
Chocolate Covered Stuffed Dates
Ingredients
Equipment
Method
- Start by carefully pitting the Medjool dates if they aren’t already pitted. Make a small slit on one side of each date and remove the pit. This will create a little pocket for the peanut butter.
- Using a small spoon, fill each date with approximately half a tablespoon of natural peanut butter. Press gently to close the date around the filling, ensuring it stays inside.
- In a microwave-safe bowl, break the dark chocolate into small pieces. Heat it in the microwave in 30-second intervals, stirring in between, until fully melted and smooth.
- Using a fork or toothpick, carefully dip each stuffed date into the melted chocolate. Make sure it’s well-coated, then lift it out and let any excess chocolate drip off.
- Place the chocolate-covered dates on a lined baking tray. If you like, sprinkle a tiny pinch of sea salt on top of each date before the chocolate sets.
- Refrigerate the tray for about 15-20 minutes or until the chocolate hardens. Once set, your Chocolate Covered Stuffed Dates are ready to enjoy!
Notes
- Experiment with different nut butters or seed butters for a nut-free version.
- Ensure the chocolate is tempered well to avoid it becoming too soft at room temperature.
- A double boiler can be used instead of a microwave for melting chocolate.