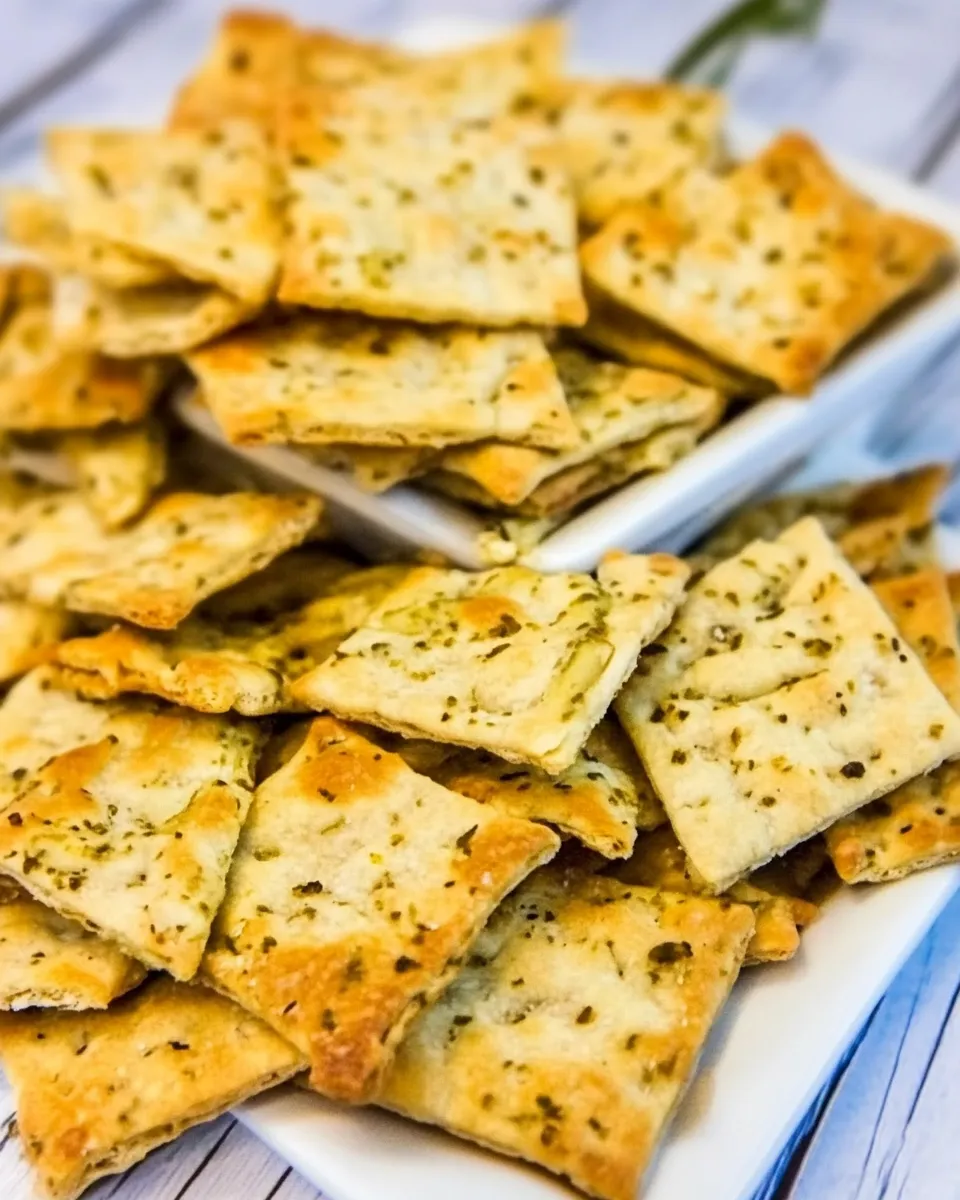
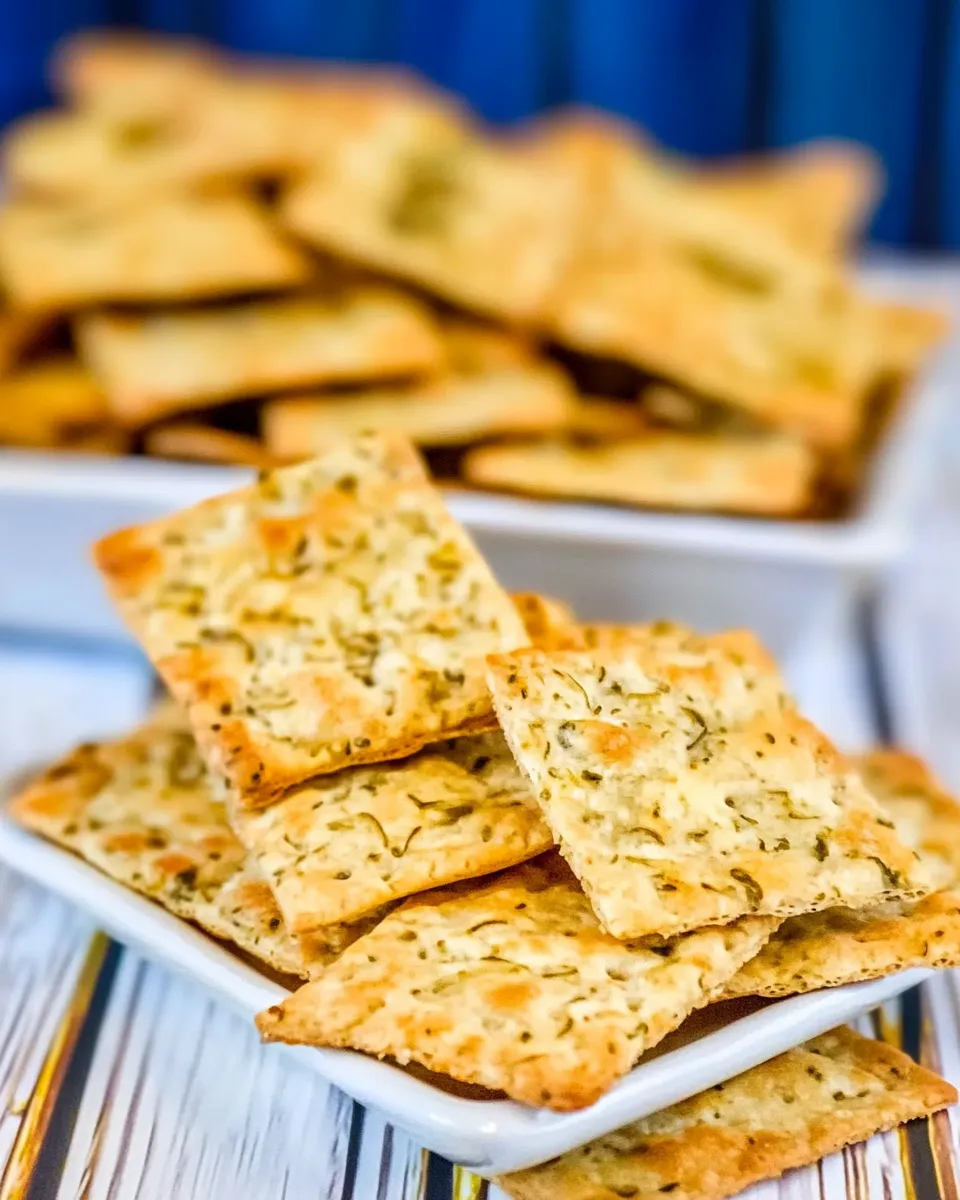
Dill Pickle Saltines
Are you ready to elevate your snacking game with a tangy twist? Dill Pickle Saltines are the perfect combination of crunchy, savory, and zesty goodness that will keep you reaching for more. These little delights are incredibly easy to whip up and make for an irresistible snack at any gathering or just for your personal enjoyment. Imagine the satisfying crunch of a Saltine cracker, infused with the bold flavors of dill, ranch, and a hint of garlic. Whether served at a party or enjoyed during a cozy night in, these Dill Pickle Saltines will quickly become a staple in your snack rotation.
Why This Recipe Belongs in Your Rotation

Dill Pickle Saltines are not just a trendy snack; they’re a true crowd-pleaser. They combine familiar flavors with a fun twist, making them perfect for any occasion. The best part? They require minimal effort and ingredients, making them a go-to recipe for busy days. Plus, these crackers pair perfectly with dips, soups, or just on their own, ensuring that there’s always a reason to make a batch. With a delightful crunch and a burst of flavor, Dill Pickle Saltines are sure to impress family and friends alike.
What Goes Into Dill Pickle Saltines
To create these tasty treats, you’ll need the following ingredients:
- 4 sleeves Saltine crackers – The base of our recipe, providing that satisfying crunch.
- 1 stick butter, melted – Adds richness and helps the seasoning adhere.
- 2 tablespoons Ranch seasoning – The flavor powerhouse that gives these crackers a savory kick.
- 1 tablespoon dill pickle juice – The secret ingredient that brings the dill flavor to life.
- 1 heaping teaspoon dried dill – Enhances the pickle flavor and adds aromatic depth.
- 1 teaspoon garlic powder – Infuses a savory note that balances the tanginess.
- ½ teaspoon crushed red pepper flakes – A hint of heat to tantalize your taste buds.
Must-Have Equipment
Before you start making your Dill Pickle Saltines, gather these essential kitchen tools:
- Baking sheet – A large, flat surface to spread out the crackers for even coating.
- Parchment paper (optional) – Makes for easy clean-up and prevents sticking.
- Mixing bowl – For combining the melted butter and seasonings.
- Whisk or spoon – To mix the ingredients thoroughly.
- Oven – You’ll need it to toast your crackers to perfection.
Mastering Dill Pickle Saltines: How-To

Step 1: Preheat the Oven
Begin by preheating your oven to 350°F (175°C). This ensures that your crackers will get crispy and delicious.
Step 2: Prepare the Baking Sheet
Line your baking sheet with parchment paper for easier clean-up. If you don’t have parchment paper, you can place the crackers directly on the baking sheet.
Step 3: Arrange the Crackers
Lay out the Saltine crackers in a single layer on the prepared baking sheet. Make sure they are not overlapping to allow for even seasoning.
Step 4: Mix the Seasoning
In a mixing bowl, combine the melted butter, Ranch seasoning, dill pickle juice, dried dill, garlic powder, and crushed red pepper flakes. Whisk the ingredients together until well combined.
Step 5: Coat the Crackers
Using a pastry brush or spoon, generously coat each Saltine cracker with the butter and seasoning mixture. Make sure every cracker is well-covered for the best flavor.
Step 6: Bake
Place the baking sheet in the preheated oven and bake for 10-12 minutes, or until the crackers are golden brown and crispy. Keep an eye on them to avoid burning.
Step 7: Cool and Enjoy
Once baked, remove the crackers from the oven and let them cool on the baking sheet for a few minutes. This will help them crisp up even more. Once cooled, serve them immediately or store them for later!
Swap Guide
If you’re looking to customize your Dill Pickle Saltines or use what you have on hand, consider these substitutions:
- Saltine crackers – Try using other types of crackers such as Ritz or Town House for a different texture.
- Ranch seasoning – Homemade ranch seasoning can be made with dried herbs and spices if you prefer a natural option.
- Dill pickle juice – If you’re out of pickle juice, a splash of apple cider vinegar can provide a similar tang.
- Dried dill – Fresh dill weed can be used if you have it available; just increase the amount slightly.
Easy-to-Miss Gotchas
While making Dill Pickle Saltines is straightforward, here are some common pitfalls to avoid:
- Not allowing the crackers enough time to cool after baking can result in a less crispy texture.
- Be careful not to oversaturate the crackers with the butter mixture; a light coating is sufficient for maximum flavor.
- Adjust the baking time based on your oven; some ovens may cook faster than others, leading to burnt crackers.
- Ensure the crackers are spread out evenly on the baking sheet to promote even baking.
Keep-It-Fresh Plan
To keep your Dill Pickle Saltines fresh and crunchy, follow these tips:
- Store the crackers in an airtight container at room temperature. This will prevent them from becoming stale.
- For optimal freshness, consume within one week, although they rarely last that long!
- If you have made a large batch, consider freezing a portion. Just make sure to seal them tightly in a freezer-safe container.
Ask & Learn
Can I make Dill Pickle Saltines ahead of time?
Absolutely! You can prepare the seasoning and coat the crackers a day in advance. Just store them in an airtight container after they have cooled.
What can I serve with Dill Pickle Saltines?
These crackers are perfect on their own, but they also pair wonderfully with dips like hummus, guacamole, or a creamy ranch dip.
Can I use different seasonings for variety?
Yes! Feel free to experiment with other seasoning blends like taco seasoning, Italian herbs, or even a sprinkle of Parmesan for a unique flavor twist.
How can I make these crackers spicier?
If you enjoy a bit of heat, simply increase the amount of crushed red pepper flakes or add a dash of cayenne pepper to the seasoning mixture.
Next Steps
Now that you know how to make these delightful Dill Pickle Saltines, it’s time to get in the kitchen and whip up a batch! Gather your ingredients, follow the steps, and enjoy the satisfying crunch of these flavorful snacks. Whether you’re entertaining friends or enjoying a quiet night at home, Dill Pickle Saltines are sure to be a hit. So, what are you waiting for? Let’s get snacking!
Dill Pickle Saltines
Ingredients
Equipment
Method
- Step 1: Preheat the oven to 350°F (175°C) to ensure crispy crackers.
- Step 2: Line the baking sheet with parchment paper for easier clean-up.
- Step 3: Lay out the Saltine crackers in a single layer on the baking sheet.
- Step 4: In a mixing bowl, combine the melted butter, Ranch seasoning, dill pickle juice, dried dill, garlic powder, and crushed red pepper flakes. Whisk until well combined.
- Step 5: Coat each Saltine cracker with the butter and seasoning mixture using a pastry brush or spoon.
- Step 6: Bake for 10-12 minutes until golden brown and crispy, keeping an eye on them.
- Step 7: Remove from the oven, let cool briefly, then serve or store for later.
Notes
- Store in an airtight container to keep them crunchy.
- Consume within a week for best flavor.
- Freeze leftovers in a freezer-safe container for longer storage.