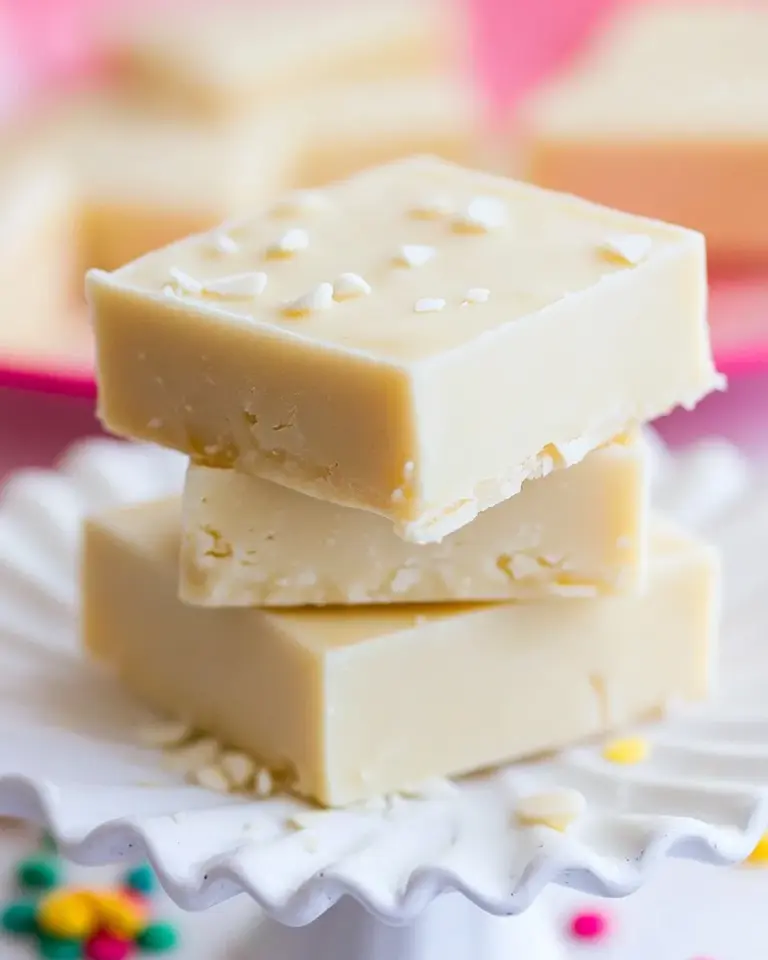
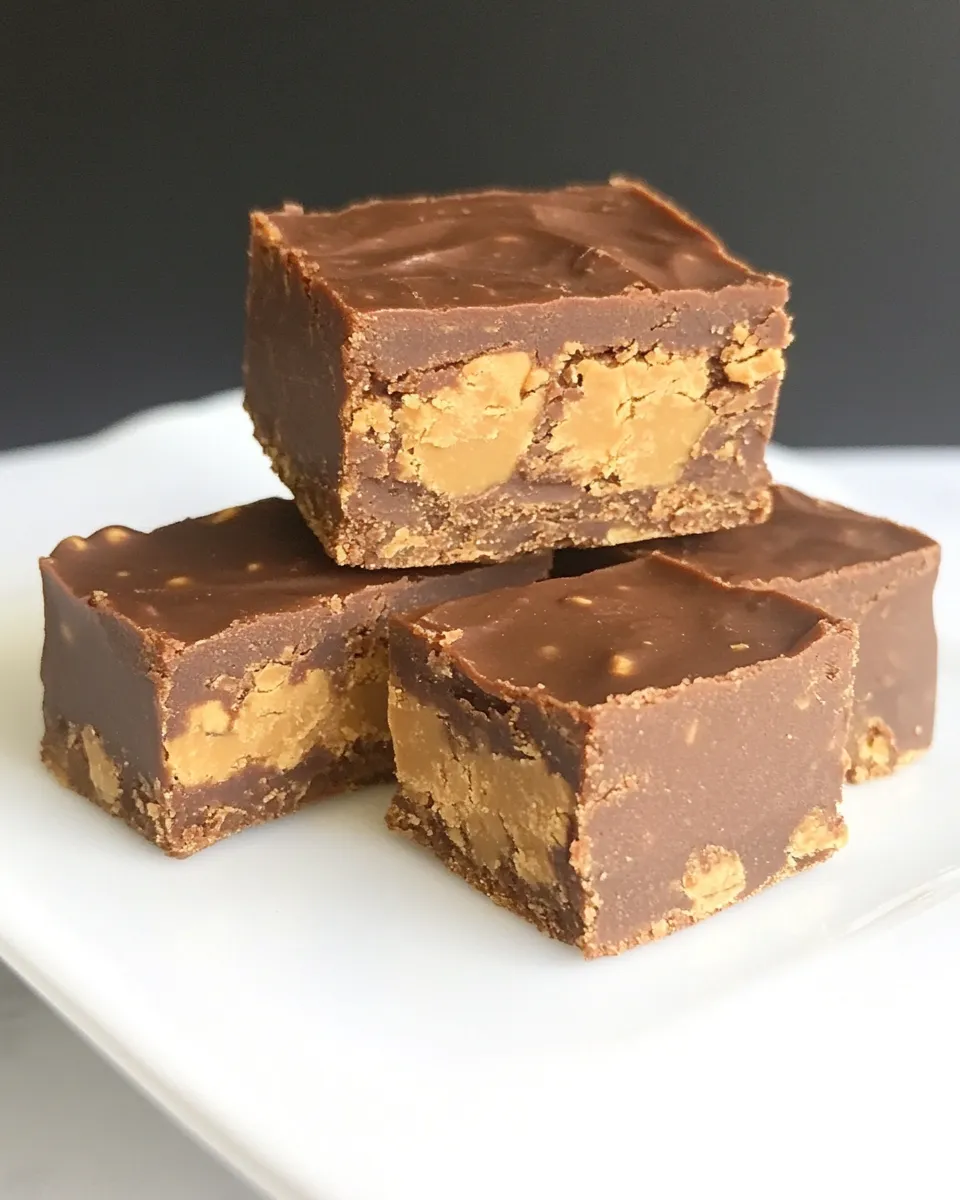
Butterfinger Fudge
If you’re on the hunt for a delightful treat that merges creamy, rich chocolate with a crunchy, peanut buttery twist, look no further than this Butterfinger Fudge recipe. It’s a dreamy dessert that’s easy to whip up and perfect for sharing—or keeping all to yourself! With just a handful of ingredients, you can create a fudge that’s both indulgent and incredibly satisfying. Let’s dive into the delicious world of Butterfinger Fudge!
Why You’ll Keep Making It
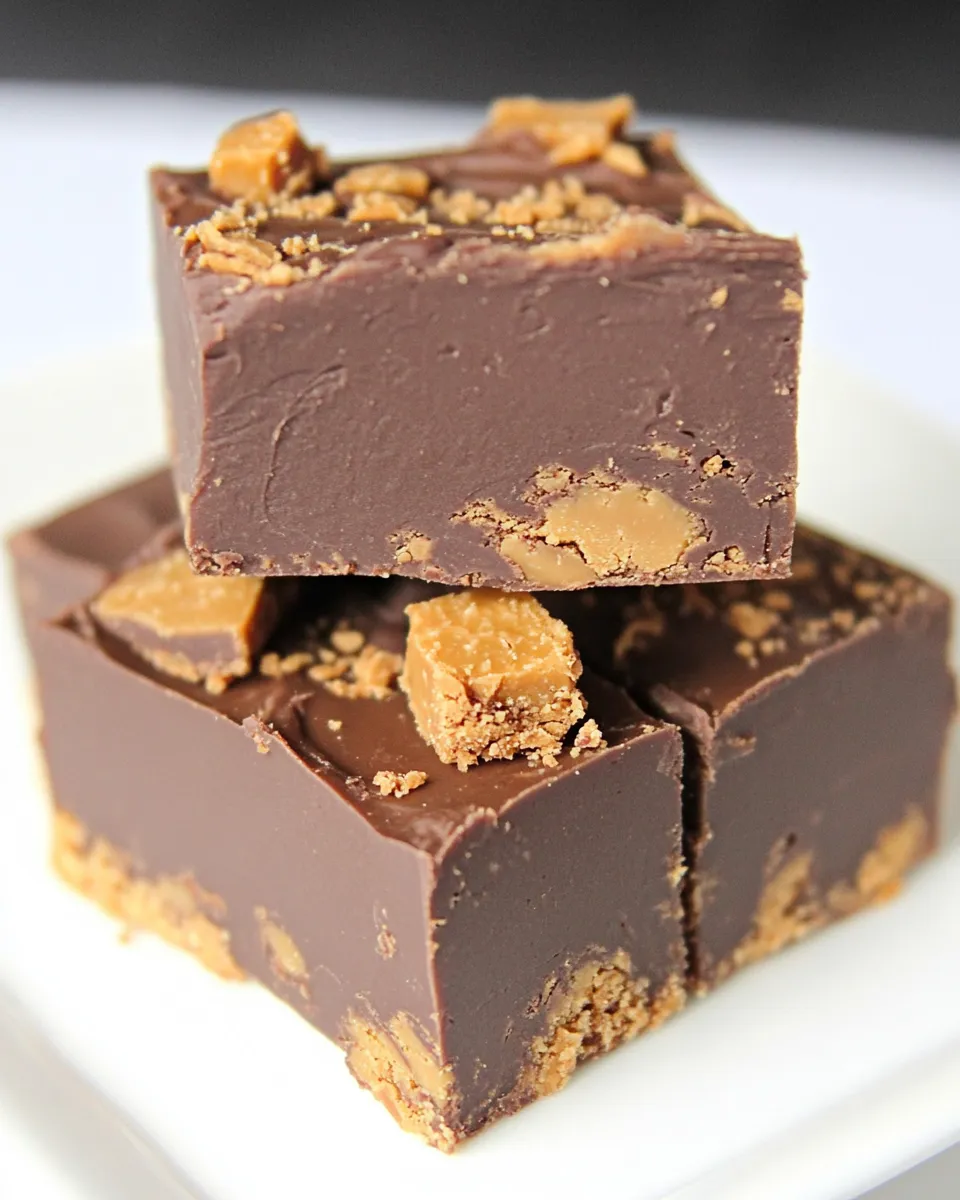
Butterfinger Fudge is not only a showstopper in flavor but also a breeze to prepare. Its velvety texture and the delightful crunch of Butterfinger candy bars make it an instant crowd-pleaser. You’ll find yourself coming back to this recipe time and again, whether you’re hosting a party, looking for a sweet snack, or wanting to impress your family with a homemade treat. Plus, it’s a wonderful way to enjoy the nostalgic flavor of Butterfinger in a new and exciting way.
What Goes Into Butterfinger Fudge
To create this delicious Butterfinger Fudge, you’ll need just four simple ingredients:
- 12 oz. semi-sweet chocolate chips – This is the base of your fudge, giving it that rich chocolate flavor.
- 14 oz. sweetened condensed milk – This adds creaminess and sweetness, making the fudge melt-in-your-mouth good.
- 2 tablespoons butter – A touch of butter adds richness and helps achieve that perfect texture.
- 1 cup chopped Butterfinger candy bars (about 6 mini bars) – The star of the show! This gives your fudge that irresistible crunchy and peanut buttery flavor.
What You’ll Need (Gear)
Before you start, gather the following items to make your fudge-making process seamless:
- Microwave-safe bowl – For melting your chocolate and mixing the ingredients.
- Rubber spatula – Ideal for scraping down the sides and ensuring everything is well mixed.
- 8×8 inch baking dish – A perfect size for setting your fudge.
- Parchment paper – To line the baking dish for easy removal of the fudge.
- Knife or chef’s knife – To chop the Butterfinger bars into bite-sized pieces.
Butterfinger Fudge: How It’s Done
Now that you have your ingredients and gear ready, let’s get started! Follow these simple steps to create your mouthwatering Butterfinger Fudge:
Step 1: Prepare the Baking Dish
Line an 8×8 inch baking dish with parchment paper, leaving some overhang on the sides. This will help you lift the fudge out easily later.
Step 2: Melt the Chocolate Mixture
In a microwave-safe bowl, combine the semi-sweet chocolate chips, sweetened condensed milk, and butter. Microwave in 30-second intervals, stirring in between, until the mixture is fully melted and smooth.
Step 3: Mix in the Butterfinger Bars
Once your chocolate mixture is melted and smooth, fold in the chopped Butterfinger candy bars. Stir until they’re evenly distributed throughout the fudge mixture.
Step 4: Pour and Spread
Pour the fudge mixture into the prepared baking dish. Use your spatula to spread it evenly across the surface.
Step 5: Chill to Set
Refrigerate the fudge for at least 2 hours or until fully set. This is the hardest part, but trust us, it’s worth the wait!
Step 6: Slice and Serve
Once set, lift the fudge out of the dish using the parchment paper overhang. Cut into squares and enjoy your homemade Butterfinger Fudge!
Seasonal Spins

Butterfinger Fudge is delicious all year round, but you can easily switch things up for the seasons:
- Fall Spice – Add a pinch of cinnamon or pumpkin spice to the fudge for a fall-inspired treat.
- Holiday Cheer – Mix in some crushed peppermint candies during the winter holidays for a festive twist.
- Spring Delight – Incorporate pastel-colored candy pieces for a cheerful spring presentation.
- Summer Treat – Serve with ice cream or alongside fresh fruit for a refreshing summer dessert.
Easy-to-Miss Gotchas
While Butterfinger Fudge is simple to make, here are a few tips to avoid common pitfalls:
- Make sure not to overheat the chocolate mixture. Stir frequently and heat in small increments to prevent burning.
- Let the fudge set completely before cutting; otherwise, it may be too soft to slice neatly.
- Use a sharp knife to cut the fudge for clean edges.
- Store any leftovers in an airtight container to keep the fudge fresh.
Keep It Fresh: Storage Guide
To maintain the freshness and flavor of your Butterfinger Fudge, follow these helpful storage tips:
- Store the fudge in an airtight container at room temperature for up to one week.
- If you want to keep it longer, refrigerate it, where it can last for about two weeks.
- For longer storage, you can freeze the fudge. Wrap it tightly in plastic wrap and place it in a freezer-safe container for up to three months.
- To thaw, simply leave it at room temperature for a few hours before serving.
Helpful Q&A
Can I use milk chocolate instead of semi-sweet chocolate chips?
Yes, you can use milk chocolate chips if you prefer a sweeter fudge. Just keep in mind that it will alter the flavor profile slightly, making it more sugary than chocolatey.
What if I can’t find Butterfinger bars?
If Butterfinger bars are unavailable, you can substitute them with any similar peanut butter candy bars or even crushed peanut brittle for that crunchy texture.
Can I add nuts to the fudge?
Absolutely! Chopped peanuts or walnuts can be mixed in for added crunch and flavor. Just adjust the amount of Butterfinger bars accordingly.
Is it necessary to refrigerate the fudge?
Refrigerating the fudge helps it set properly, but once it’s set, you can store it at room temperature if you prefer a softer texture. Just be mindful of the temperature in your kitchen!
See You at the Table
Once you’ve prepared this Butterfinger Fudge, you’ll be excited to share it with friends and family. Its creamy, chocolatey goodness and the delightful crunch of Butterfinger pieces make it an irresistible treat that’s sure to bring smiles all around. Whether you’re enjoying it at a party or as a cozy night snack, this fudge is the perfect indulgence for any occasion.
Treat yourself to the delightful experience of Butterfinger Fudge. With its simple preparation, rich flavors, and endless possibilities for customization, it’s bound to become a staple in your dessert repertoire. Whip up a batch today and savor every delicious bite!

Butterfinger Fudge
Ingredients
Equipment
Method
- Line an 8x8 inch baking dish with parchment paper, leaving some overhang on the sides.
- In a microwave-safe bowl, combine the semi-sweet chocolate chips, sweetened condensed milk, and butter. Microwave in 30-second intervals, stirring in between, until fully melted and smooth.
- Fold in the chopped Butterfinger candy bars until evenly distributed.
- Pour the fudge mixture into the prepared baking dish and spread it evenly.
- Refrigerate for at least 2 hours or until fully set.
- Lift the fudge out using the parchment paper overhang, cut into squares, and enjoy!
Notes
- Don't overheat the chocolate mixture; stir frequently to avoid burning.
- Ensure the fudge is fully set before cutting for neat slices.
- Store leftovers in an airtight container to keep fresh.