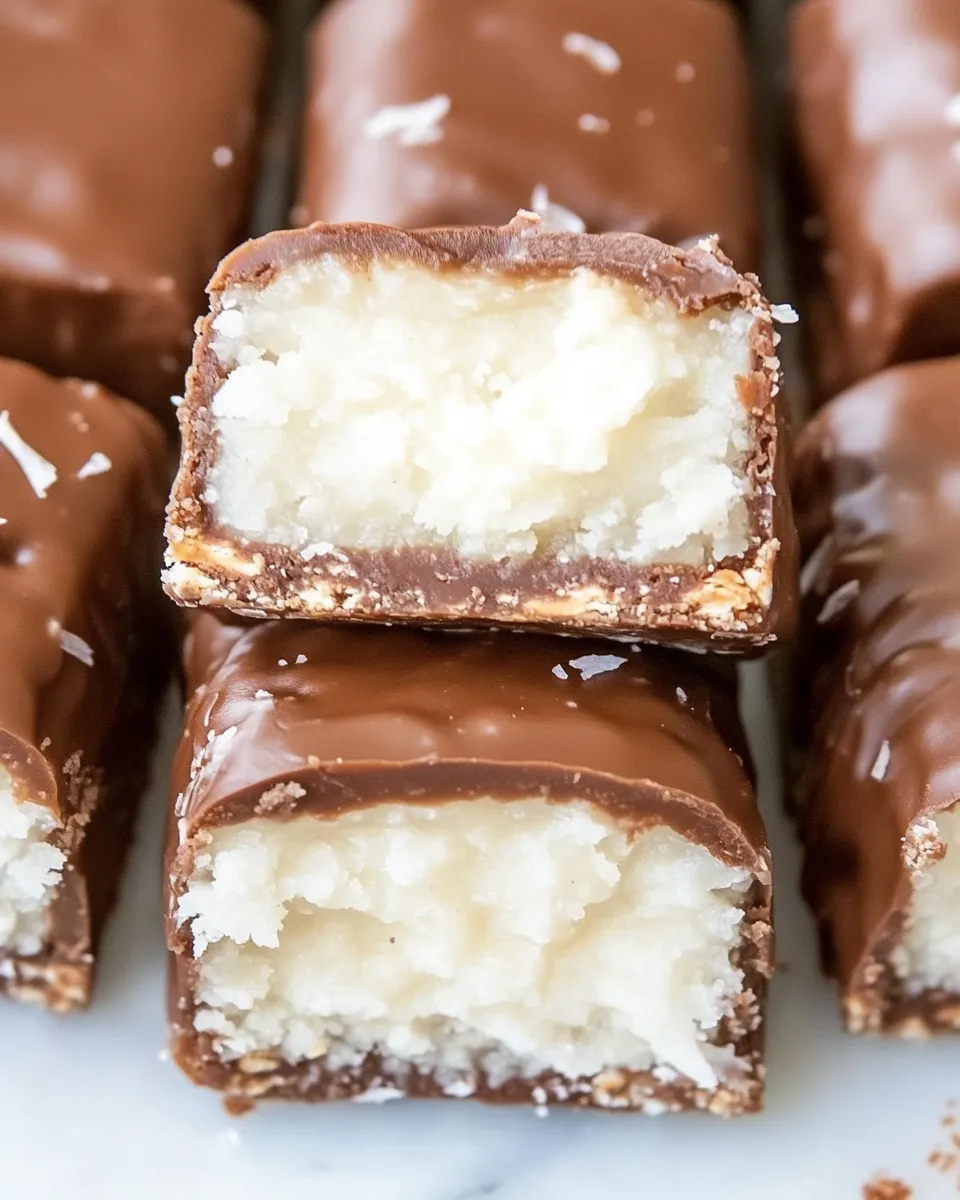
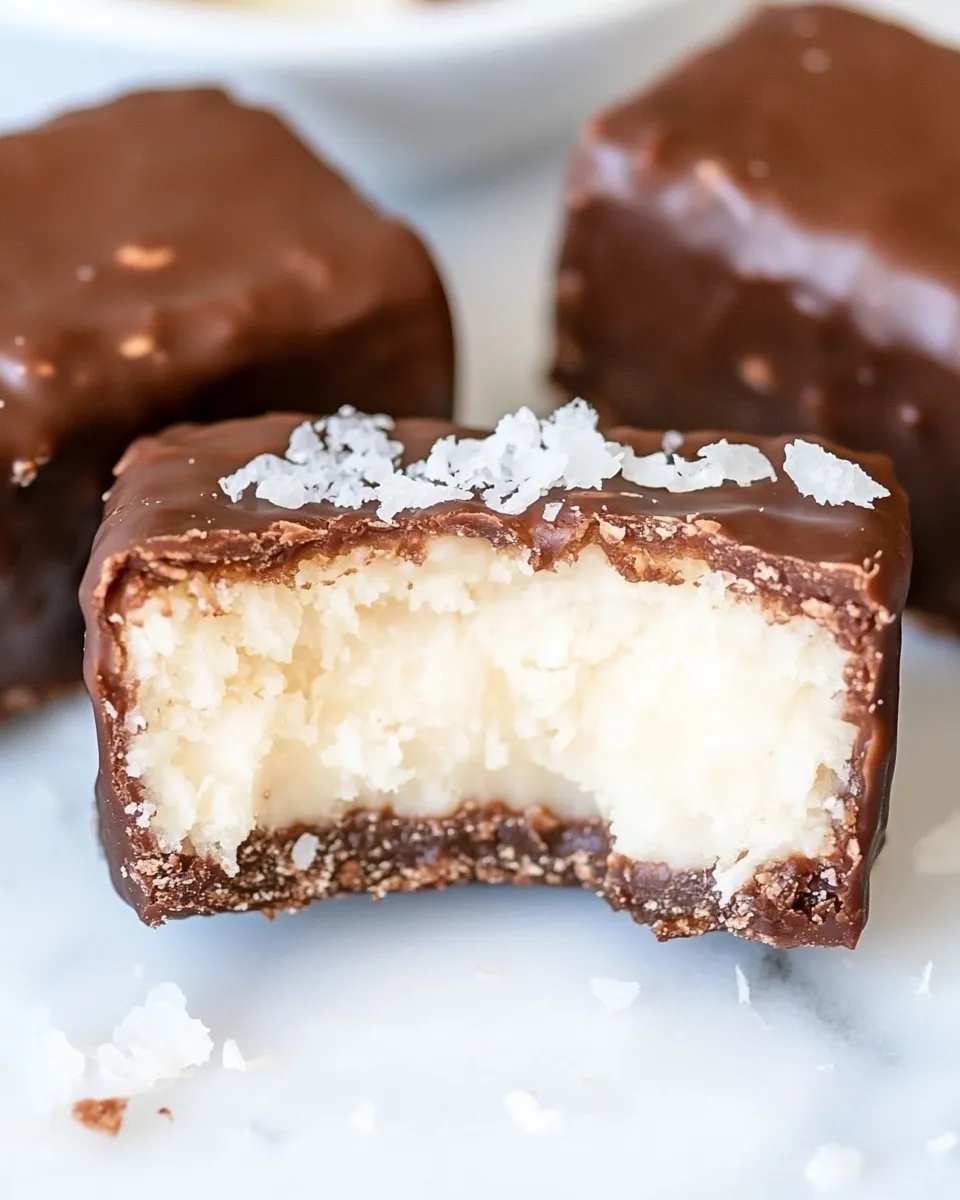
Homemade Bounty Bars
If you’ve ever bitten into a Bounty bar and savored the sweet combination of chocolate and coconut, you know just how delightful this treat can be. Now, imagine the satisfaction of making your very own Homemade Bounty Bars right in your kitchen! These indulgent snacks are surprisingly simple to whip up and can be customized to suit your taste. With just a few ingredients, you’ll be on your way to enjoying these delicious chocolate-coated coconut delights.
Why This Recipe is a Keeper
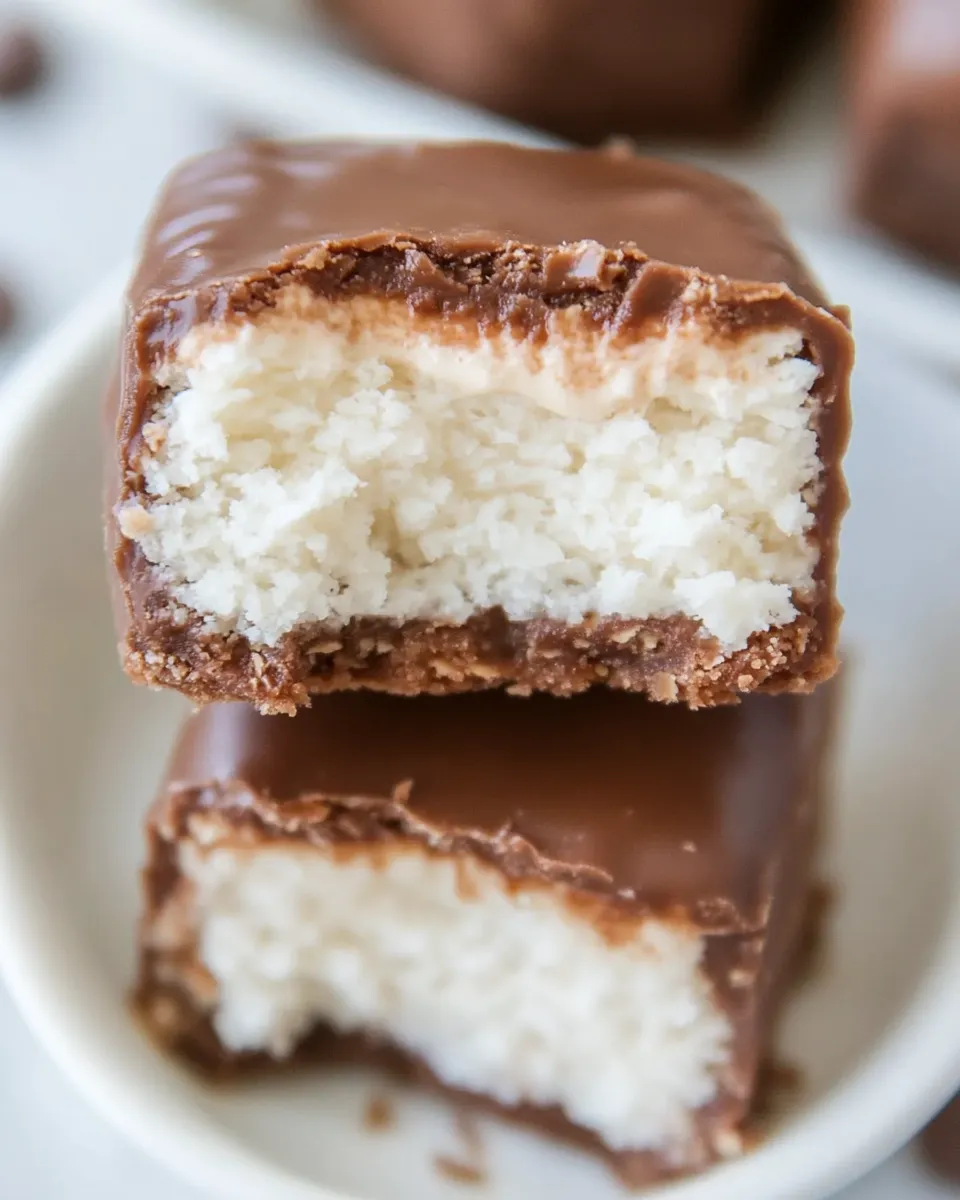
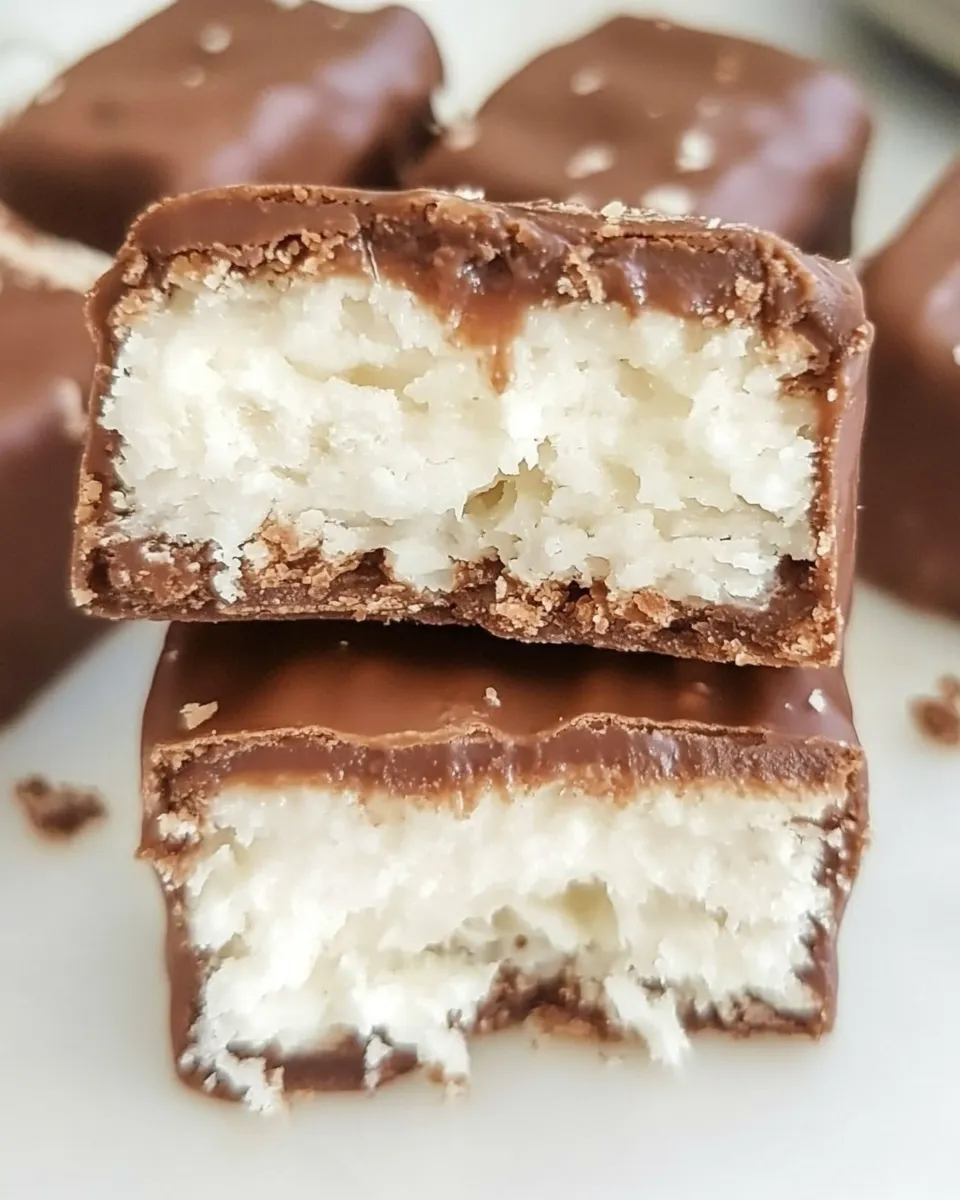
Homemade Bounty Bars are not only a fantastic treat to enjoy but also a great way to impress friends and family. The blend of shredded coconut and sweetened condensed milk creates a rich, chewy center that’s encased in smooth chocolate. Plus, this recipe is incredibly versatile; you can adjust the sweetness or chocolate coating to make it just right for you. Whether you’re hosting a gathering, looking for a sweet snack, or preparing a special dessert, this recipe is a true keeper.
What We’re Using
To create your Homemade Bounty Bars, you’ll need just a handful of ingredients:
- 3 cups shredded coconut – This forms the base of our bars and provides that signature coconut flavor.
- 1/2 cup powdered sugar – This adds sweetness and helps bind the coconut together.
- 2/3 cup coconut condensed milk or standard condensed milk – This acts as a sticky component, keeping everything together and adding creaminess.
- 1-2 cups chocolate, chopped – This will be melted and used to coat the bars, providing that delicious chocolate exterior.
Toolbox for This Recipe
Before you start, gather these essential tools:
- Mixing bowl – For combining all your ingredients.
- Spatula – To ensure every bit of coconut mixture is incorporated.
- Baking pan – A square or rectangular pan works best for shaping the bars.
- Microwave-safe bowl – For melting the chocolate smoothly.
- Parchment paper – To line your pan and prevent sticking.
- Knife – For cutting the bars into perfect squares.
Homemade Bounty Bars — Do This Next
Now, let’s dive into the step-by-step process of making your own Homemade Bounty Bars.
Step 1: Prepare the Pan
Start by lining your baking pan with parchment paper, leaving some overhang on the sides. This will make it easier to lift out the bars once they’re set.
Step 2: Mix the Coconut Filling
In a mixing bowl, combine the shredded coconut, powdered sugar, and coconut condensed milk. Use a spatula to mix them thoroughly until the mixture is well combined and sticky.
Step 3: Shape the Bars
Transfer the coconut mixture into the prepared pan. Press it down firmly and evenly to create a smooth layer. Make sure the mixture is tightly packed, as this will help the bars hold their shape. Once flattened, place the pan in the refrigerator for at least 30 minutes to allow it to set.
Step 4: Melt the Chocolate
While the coconut mixture is chilling, melt your chopped chocolate in a microwave-safe bowl. Heat in 30-second intervals, stirring in between until the chocolate is completely smooth and melted.
Step 5: Cut the Bars
Once the coconut mixture has set, remove it from the fridge and lift it out of the pan using the parchment overhang. Place it on a cutting board and cut it into bars or squares, depending on your preference.
Step 6: Coat the Bars in Chocolate
Dip each bar into the melted chocolate, ensuring it’s fully coated. Allow any excess chocolate to drip off before placing the bars on a wire rack or a plate lined with parchment paper.
Step 7: Let Them Set
Once all bars are coated, place them back in the fridge for about 15-20 minutes, or until the chocolate has fully hardened.
Season-by-Season Upgrades
Looking to switch things up? Here are some fun seasonal variations to your Homemade Bounty Bars:
- Spring: Add a touch of lime zest to the coconut mixture for a refreshing twist.
- Summer: Incorporate crushed pineapple for a tropical flavor explosion.
- Fall: Mix in a pinch of pumpkin spice to the coconut for a seasonal flavor.
- Winter: Drizzle with white chocolate and sprinkle crushed peppermint for a festive treat.
Behind the Recipe
This recipe for Homemade Bounty Bars is inspired by the classic chocolate-and-coconut combination that has delighted taste buds for decades. The original Bounty bar was created in the 1950s and has since become a favorite around the world. The beauty of making these bars at home is that you can control the ingredients and customize them to your liking. Whether you’re a coconut lover or just looking to satisfy your sweet tooth, this recipe delivers a rich and satisfying treat that’s sure to please.
Keep It Fresh: Storage Guide
To keep your Homemade Bounty Bars fresh and delicious, follow these storage tips:
- Refrigerate: Store in an airtight container in the refrigerator for up to two weeks.
- Freeze: For longer storage, wrap bars individually in plastic wrap and place them in a freezer-safe container. They can last up to three months in the freezer.
- Thaw: When ready to enjoy, simply let them sit at room temperature for a few minutes before indulging.
Popular Questions
Can I use fresh coconut instead of shredded coconut?
Yes, you can use fresh coconut, but make sure to finely grate it. It may change the texture slightly, but it will add a fresh flavor.
Is there a vegan option for the chocolate coating?
Absolutely! Look for vegan chocolate chips or bars that are dairy-free to keep your Homemade Bounty Bars completely plant-based.
What can I use if I don’t have powdered sugar?
You can make your own powdered sugar by blending granulated sugar in a blender until it becomes a fine powder. Alternatively, you can use a sugar substitute that measures like powdered sugar.
Can I add nuts to my Homemade Bounty Bars?
Yes! Chopped nuts can be added to the coconut mixture for added crunch and flavor. Almonds or cashews work particularly well.
The Takeaway
Homemade Bounty Bars are the perfect blend of coconut sweetness and chocolate richness. This delightful treat is easy enough to make for any occasion and allows for plenty of creativity in the kitchen. Whether you choose to stick with the classic recipe or add your own spin, these bars are sure to become a favorite in your household. So gather your ingredients, roll up your sleeves, and get ready to enjoy the deliciousness of your very own Homemade Bounty Bars!
Homemade Bounty Bars
Ingredients
Equipment
Method
- Step 1: Prepare the Pan - Line your baking pan with parchment paper, leaving some overhang on the sides.
- Step 2: Mix the Coconut Filling - In a mixing bowl, combine the shredded coconut, powdered sugar, and coconut condensed milk. Mix thoroughly until sticky.
- Step 3: Shape the Bars - Transfer the mixture into the prepared pan and press it down firmly. Refrigerate for at least 30 minutes.
- Step 4: Melt the Chocolate - Melt the chopped chocolate in a microwave-safe bowl, heating in 30-second intervals until smooth.
- Step 5: Cut the Bars - Remove the coconut mixture from the pan and cut into bars or squares.
- Step 6: Coat the Bars in Chocolate - Dip each bar into the melted chocolate and allow excess to drip off.
- Step 7: Let Them Set - Refrigerate the coated bars for about 15-20 minutes until the chocolate hardens.
Notes
- For a tropical flavor, add crushed pineapple to the coconut mixture.
- Store bars in an airtight container in the refrigerator for up to two weeks.
- Wrap bars individually in plastic wrap for freezing; they last up to three months.