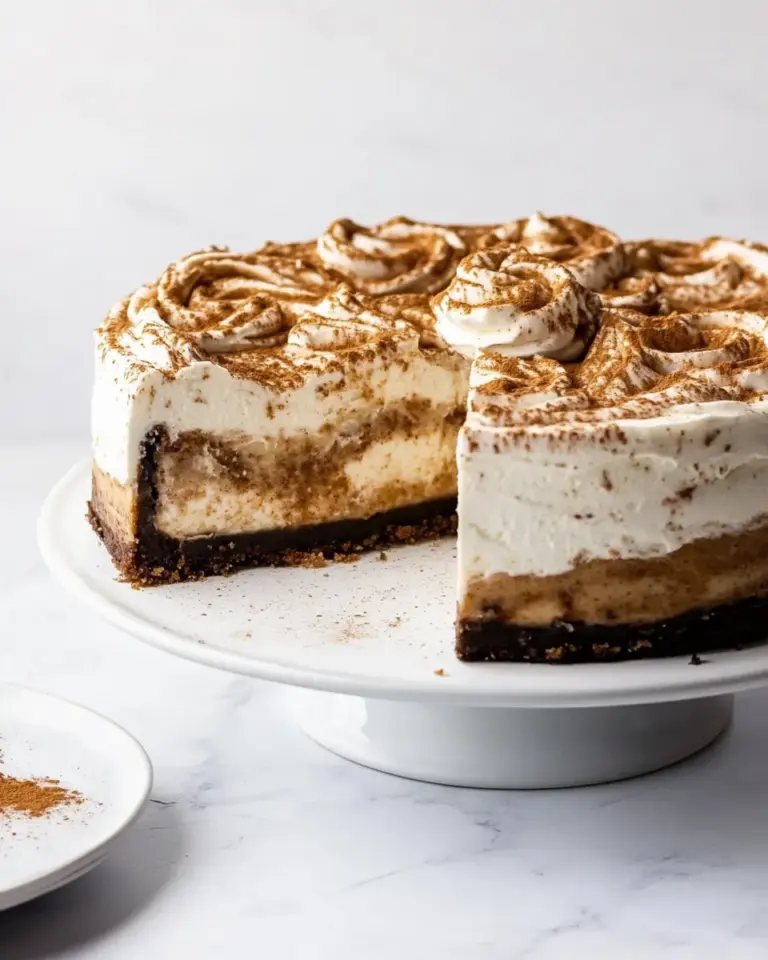
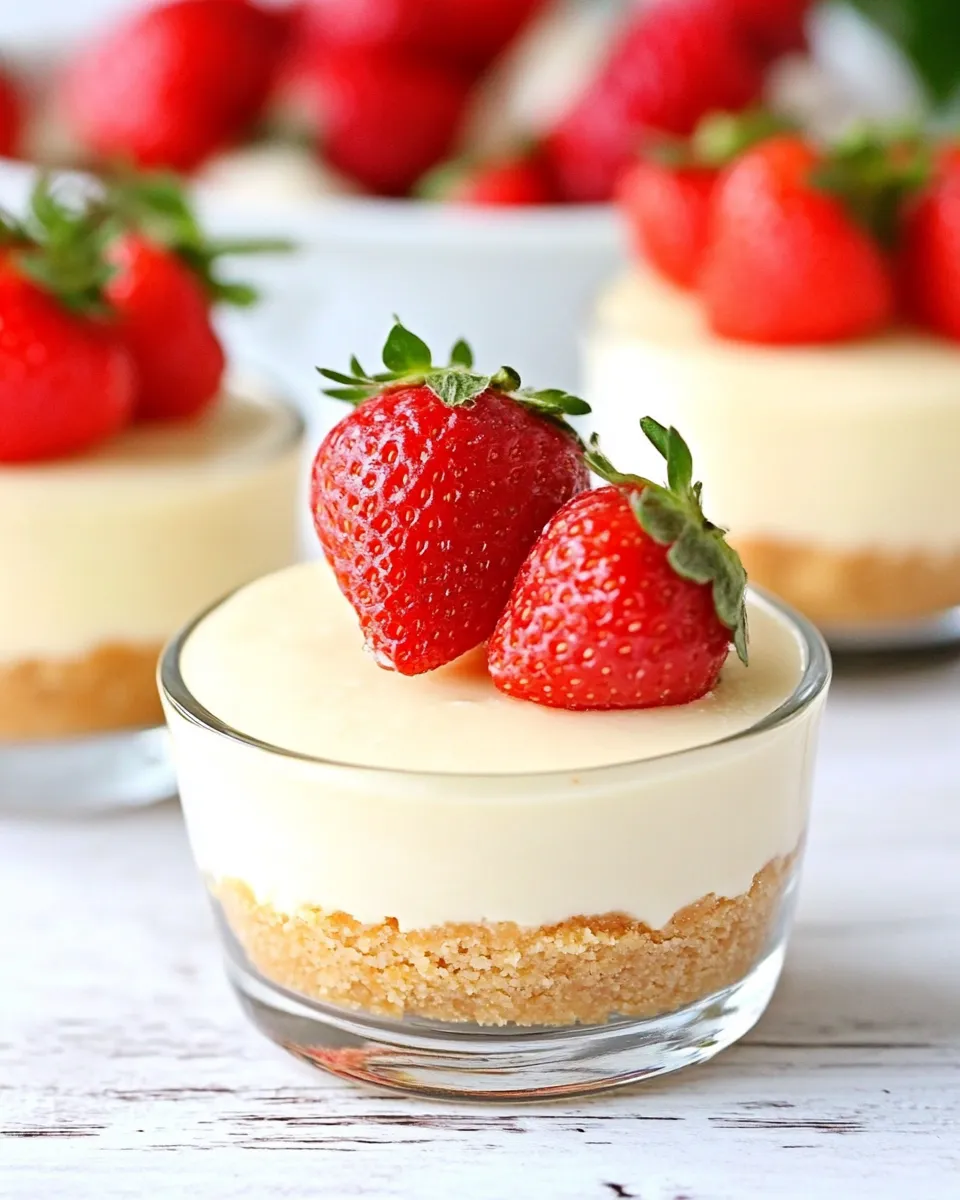
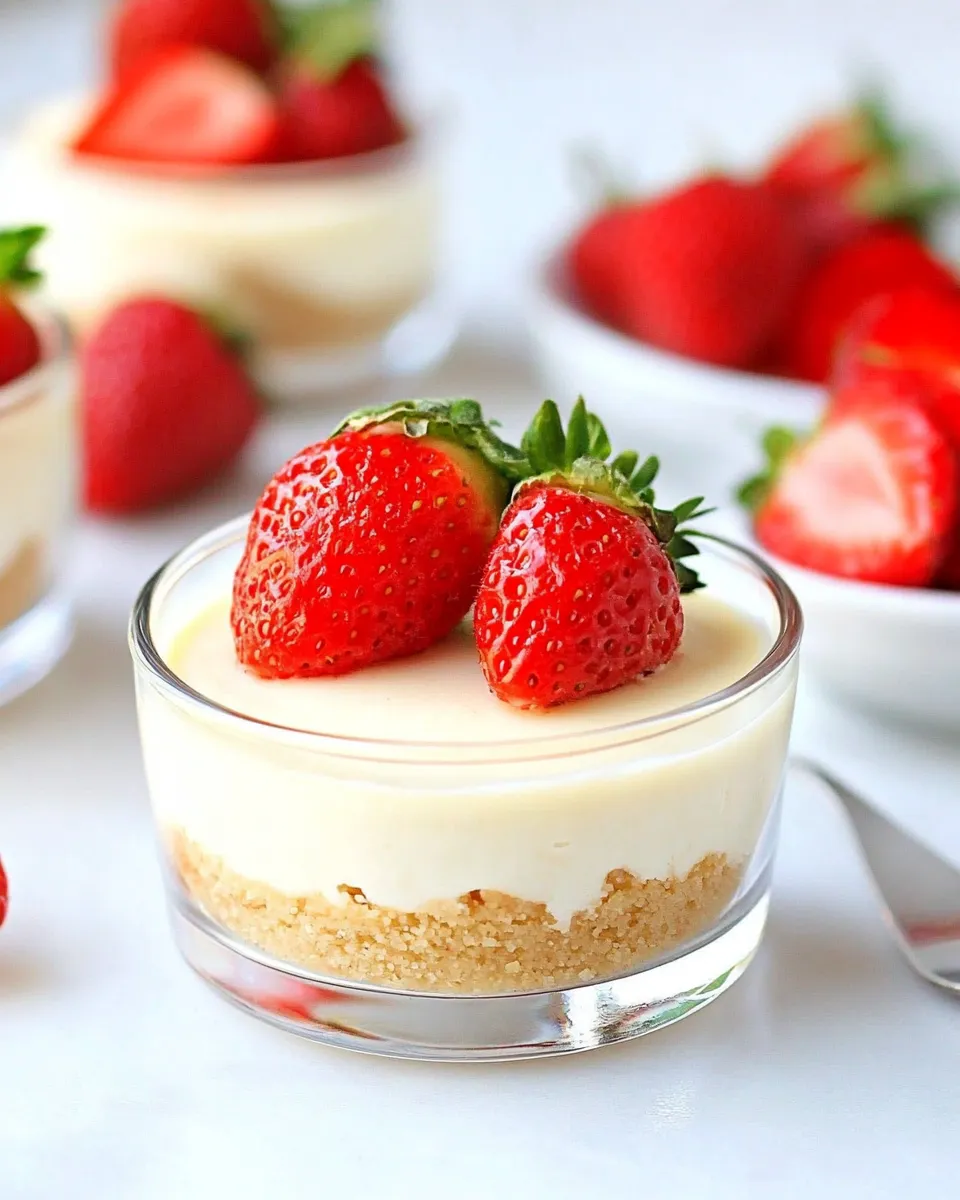
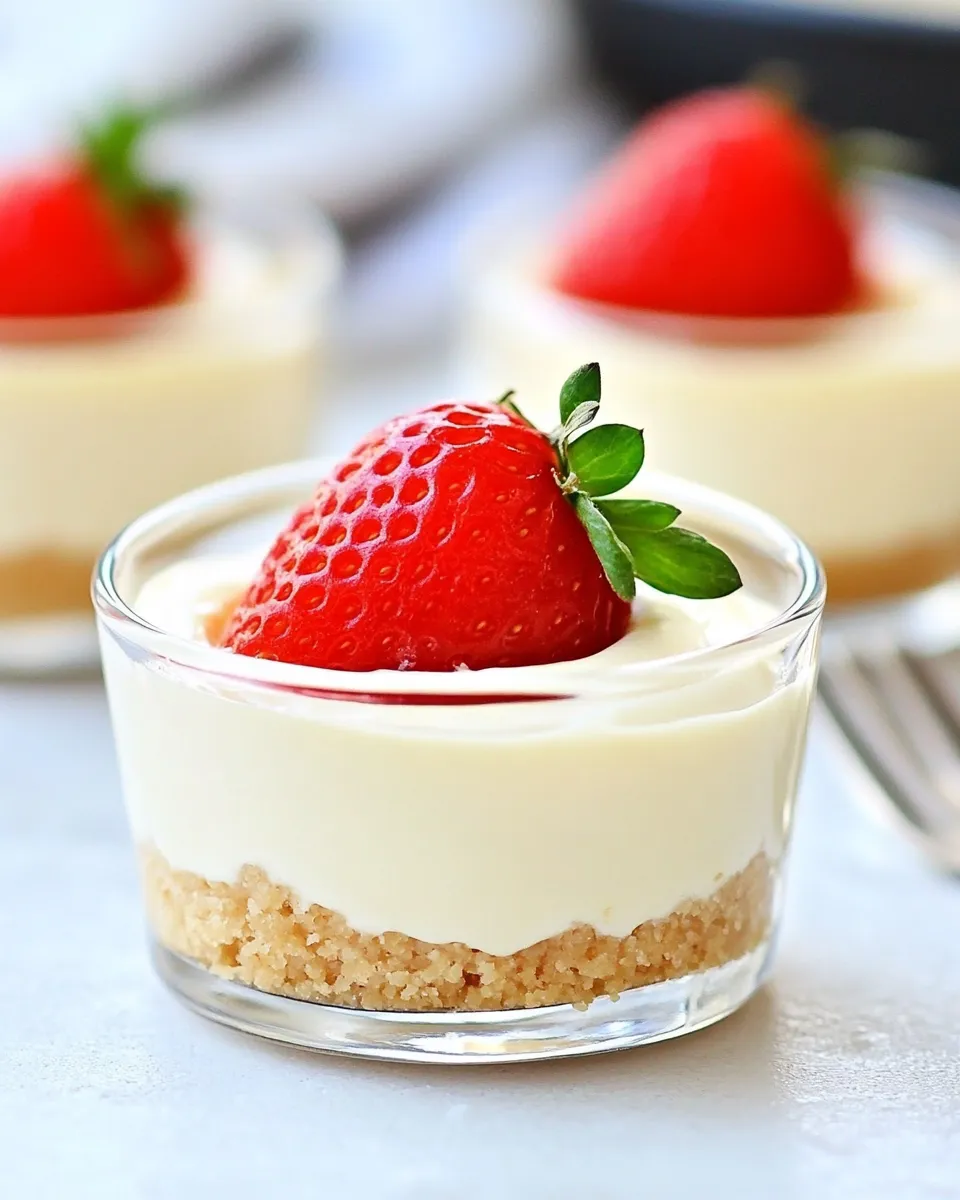
Mini No-Bake Cheesecakes
Have you ever craved a dessert that is rich, creamy, and utterly satisfying but doesn’t require you to turn on the oven? If so, then you’re in for a treat with these delightful Mini No-Bake Cheesecakes. Perfect for parties, picnics, or a cozy night in, these mini desserts are not only easy to make, but they’re also customizable, allowing you to add your favorite toppings. Let’s dive into this deliciously simple recipe that will surely impress your friends and family.
Why Mini No-Bake Cheesecakes is Worth Your Time
Mini No-Bake Cheesecakes are the ultimate dessert solution for those warm days when the last thing you want to do is preheat the oven. Not only do they eliminate the stress of baking, but they also provide an adorable single-serving option that allows everyone to indulge guilt-free. Each bite is a creamy explosion of flavor, and the best part? They can be made in advance, making them a stress-free choice for any occasion. Plus, there’s something inherently charming about mini desserts that just makes them more enjoyable!
What Goes In
To create these delectable Mini No-Bake Cheesecakes, you will need the following ingredients:
- 1 1/2 cups graham cracker crumbs
- 2 tablespoons brown sugar
- 1/2 cup unsalted butter, melted
- 28 ounces cream cheese, at room temperature
- 3 tablespoons granulated sugar
- 1 1/2 teaspoons vanilla extract
- 14 oz can sweetened condensed milk
- 1 tablespoon fresh lemon juice
- Sliced strawberries, fresh berries, cherry pie filling, or salted caramel sauce for topping
Recommended Tools
To make your experience seamless, gather the following tools:
- Mixing Bowls: For combining your ingredients smoothly.
- Hand Mixer or Stand Mixer: To whip the cream cheese into a creamy consistency.
- Measuring Cups and Spoons: For accurate ingredient measurements.
- Mini Cheesecake Pans or Muffin Tin: For creating beautiful mini cheesecakes.
- Spatula: To scrape down the sides of the bowl and mix thoroughly.
Directions: Mini No-Bake Cheesecakes
Step 1: Prepare the Crust
In a medium bowl, combine the graham cracker crumbs and brown sugar. Pour in the melted butter and mix until the crumbs are fully coated and resemble wet sand.
Step 2: Press into Pans
Using your fingers or the back of a spoon, firmly press the crumb mixture into the bottom of your mini cheesecake pans or muffin tin. Aim for an even layer to create a solid base for your cheesecakes.
Step 3: Make the Filling
In a large mixing bowl, beat the cream cheese with a hand mixer on medium speed until smooth and creamy. Add in the granulated sugar and vanilla extract, mixing until fully incorporated.
Step 4: Incorporate the Condensed Milk
Gradually add the sweetened condensed milk to the cream cheese mixture, continuing to beat until it is well combined. Finally, add the fresh lemon juice and mix until everything is smooth and creamy.
Step 5: Fill the Crusts
Spoon the cheesecake filling over the crusts in the mini pans, smoothing the tops with a spatula.
Step 6: Chill
Cover the pans with plastic wrap and refrigerate for at least 4 hours, or until the cheesecakes are set. For best results, overnight chilling is recommended.
Step 7: Serve
Once set, carefully remove the mini cheesecakes from the pans. Top with your favorite toppings such as sliced strawberries, fresh berries, cherry pie filling, or a drizzle of salted caramel sauce. Enjoy your delicious bites of heaven!
Low-Carb/Keto Alternatives
If you’re looking to enjoy these Mini No-Bake Cheesecakes while keeping your carbohydrate intake low, consider these alternatives:
- Crust: Use almond flour or coconut flour instead of graham cracker crumbs.
- Sweeteners: Replace granulated sugar with erythritol or stevia to lower sugar content.
- Condensed Milk: Look for sugar-free sweetened condensed milk options available in stores or online.
- Flavoring: Add unsweetened cocoa powder for a chocolate twist without adding extra carbs.
Avoid These Traps
When making your Mini No-Bake Cheesecakes, keep an eye out for the following common pitfalls:
- Not Softening Cream Cheese: Always ensure your cream cheese is at room temperature to avoid lumps in your filling.
- Overmixing: Avoid overmixing the cheesecake filling, as it can lead to a denser texture. Just mix until combined.
- Skipping the Chill Time: Patience is key! Chilling helps the cheesecakes set properly, so don’t rush this step.
- Using the Wrong Toppings: Choose toppings that complement the cheesecake flavor; avoid overly sweet or heavy options that might overwhelm the delicate taste.
Make Ahead Like a Pro
Want to impress your guests without the last-minute rush? Here’s how to make these Mini No-Bake Cheesecakes ahead of time:
- Prep the Crusts: You can prepare the crusts a day in advance and store them in the refrigerator.
- Make Filling Ahead: The cheesecake filling can be made and stored in the fridge for up to 2 days before filling the crusts.
- Freeze for Later: These cheesecakes freeze beautifully! Just wrap them tightly after they’ve set and store them in the freezer for up to 2 months. Thaw in the refrigerator before serving.
- Top Before Serving: For the freshest taste, add toppings right before serving to keep them from getting soggy.
Helpful Q&A
Can I use a different type of crust?
Absolutely! You can substitute graham cracker crumbs with crushed cookies, such as Oreos or digestive biscuits, for a different flavor profile.
What can I use instead of cream cheese?
If you’re looking for a non-dairy alternative, try using vegan cream cheese or a thick cashew cream for a similar texture.
Can I make these gluten-free?
Yes! Simply use gluten-free graham crackers or a gluten-free cookie alternative for the crust.
How long do these cheesecakes last in the fridge?
These Mini No-Bake Cheesecakes can last up to 5 days in the refrigerator. Just make sure they are well-covered to prevent drying out.
Hungry for More?
If you’re in love with these Mini No-Bake Cheesecakes, you’ll be thrilled to know there are endless variations to explore! Try incorporating different flavors like chocolate, matcha, or pumpkin spice for seasonal delights. You can also experiment with various toppings and crusts to create your signature cheesecake.
Indulging in a creamy, dreamy dessert doesn’t have to be complicated. With this Mini No-Bake Cheesecakes recipe, you can enjoy a delicious treat any time you like. The best part is that they’re easy to personalize, allowing you to create a dessert that perfectly aligns with your taste preferences. So, gather your ingredients, roll up your sleeves, and let’s create some mini magic in the kitchen!

Mini No-Bake Cheesecakes
Ingredients
Equipment
Method
- Step 1: Prepare the Crust - In a medium bowl, combine the graham cracker crumbs and brown sugar. Pour in the melted butter and mix until the crumbs are fully coated and resemble wet sand.
- Step 2: Press into Pans - Using your fingers or the back of a spoon, firmly press the crumb mixture into the bottom of your mini cheesecake pans or muffin tin. Aim for an even layer.
- Step 3: Make the Filling - In a large mixing bowl, beat the cream cheese with a hand mixer on medium speed until smooth and creamy. Add in the granulated sugar and vanilla extract, mixing until fully incorporated.
- Step 4: Incorporate the Condensed Milk - Gradually add the sweetened condensed milk to the cream cheese mixture, continuing to beat until well combined. Add the fresh lemon juice and mix until smooth.
- Step 5: Fill the Crusts - Spoon the cheesecake filling over the crusts in the mini pans, smoothing the tops with a spatula.
- Step 6: Chill - Cover the pans with plastic wrap and refrigerate for at least 4 hours, or until set. For best results, chill overnight.
- Step 7: Serve - Once set, carefully remove the mini cheesecakes from the pans. Top with your favorite toppings and enjoy!
Notes
- Always soften cream cheese to avoid lumps in the filling.
- Avoid overmixing to maintain a light texture.
- Chill the cheesecakes adequately for best results.