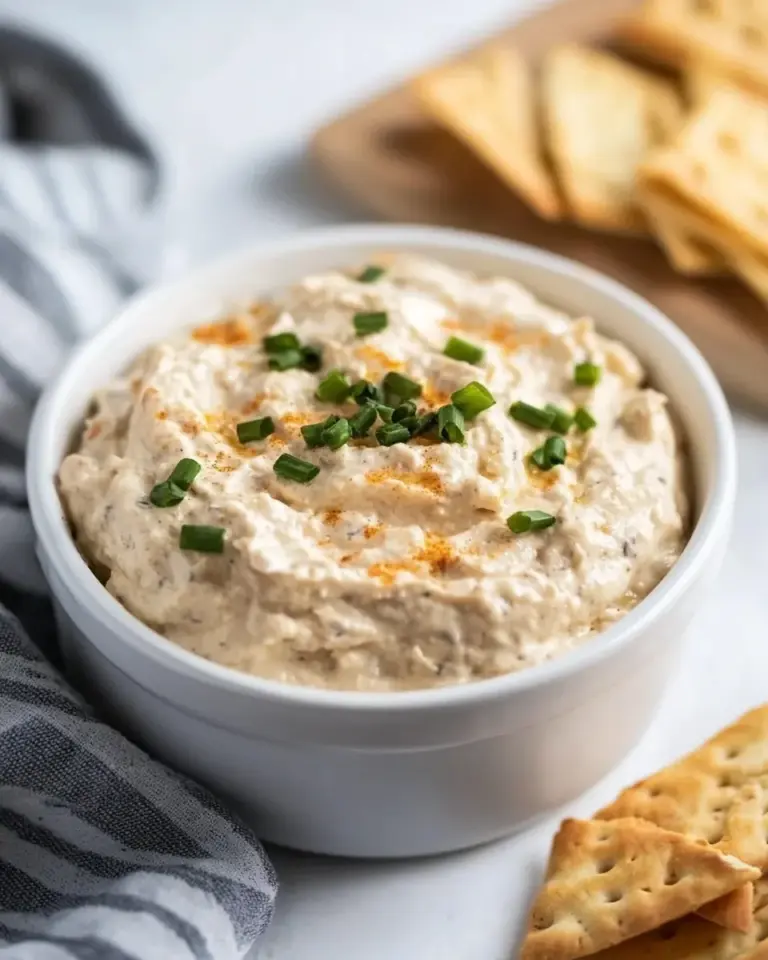
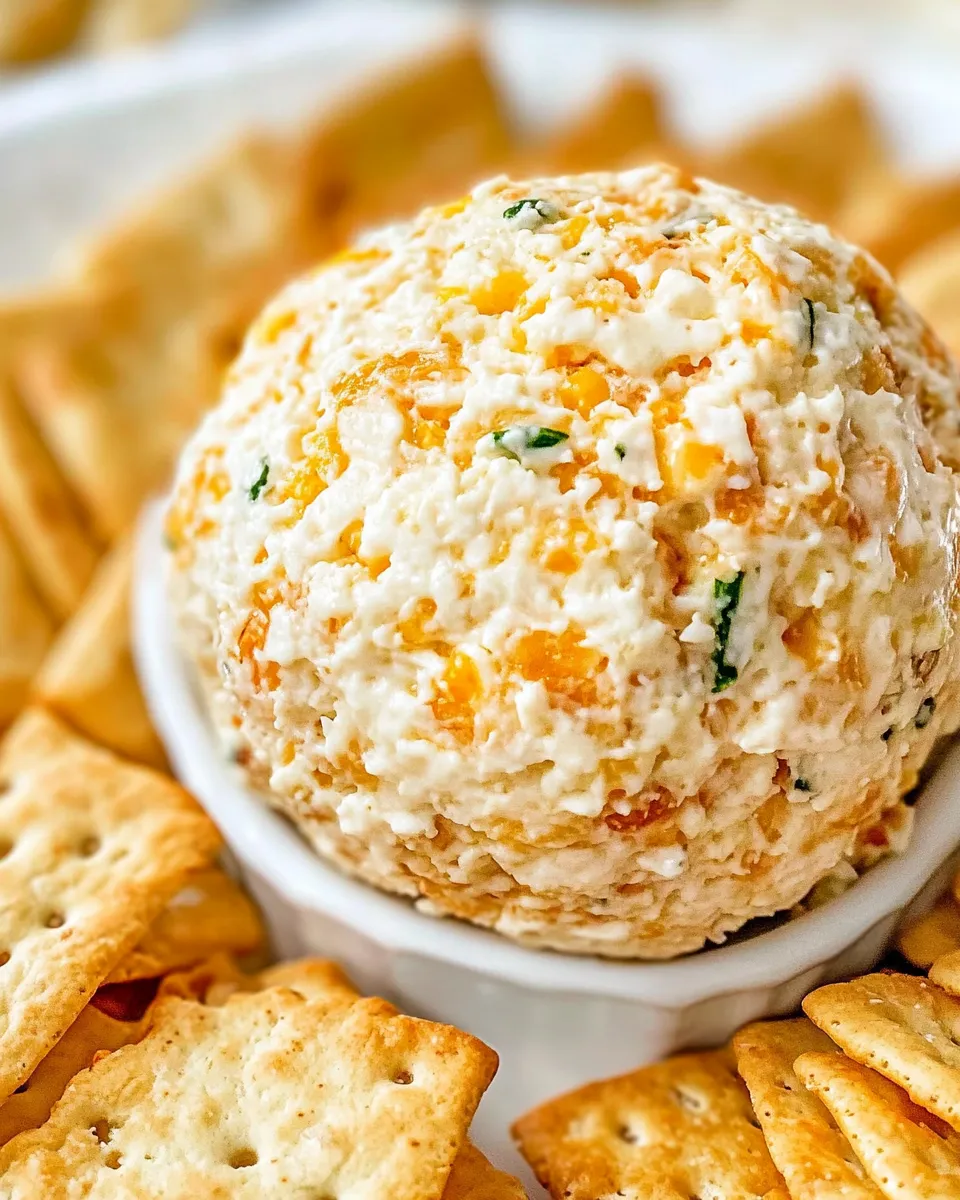
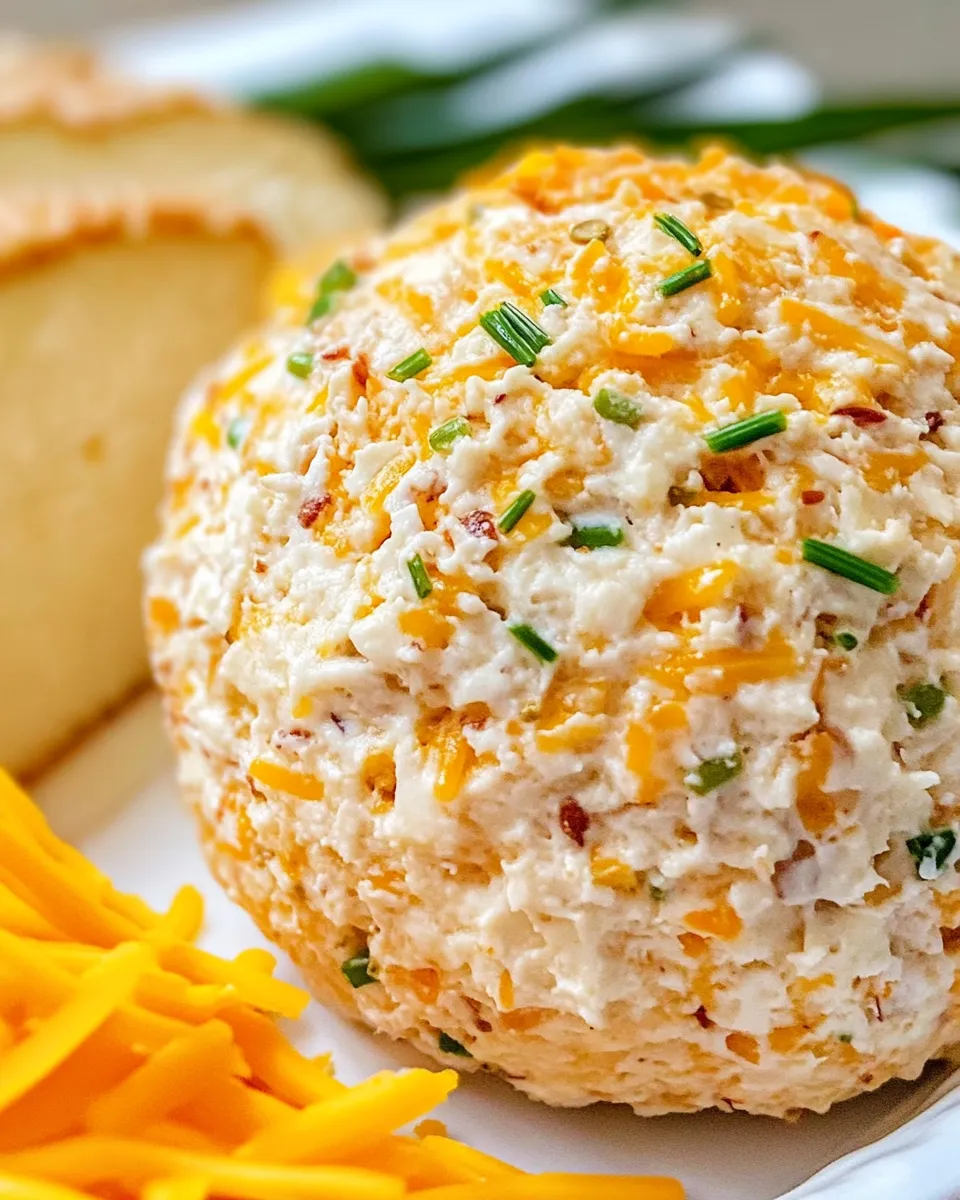
Classic Cheese Ball
When it comes to party appetizers, nothing quite compares to a Classic Cheese Ball. This timeless creation has graced holiday tables and gatherings for decades, bringing smiles and satisfied taste buds with every bite. The creamy texture, combined with savory and tangy flavors, makes it an irresistible treat that pairs perfectly with crackers, fresh veggies, or even sliced meats. Whether you’re hosting a game day bash or a cozy holiday gathering, this Classic Cheese Ball is sure to become the star of the show.
Why This Classic Cheese Ball Stands Out
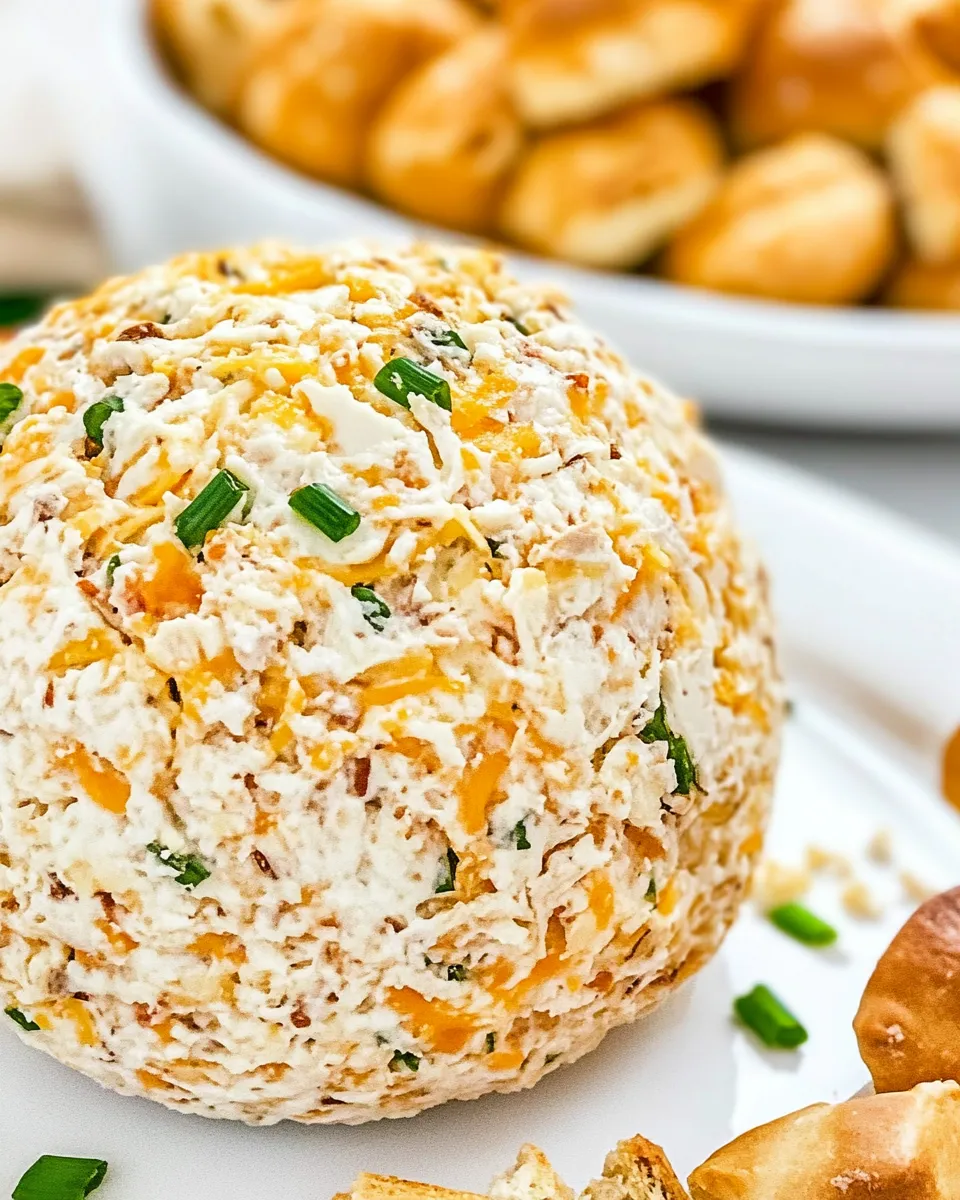
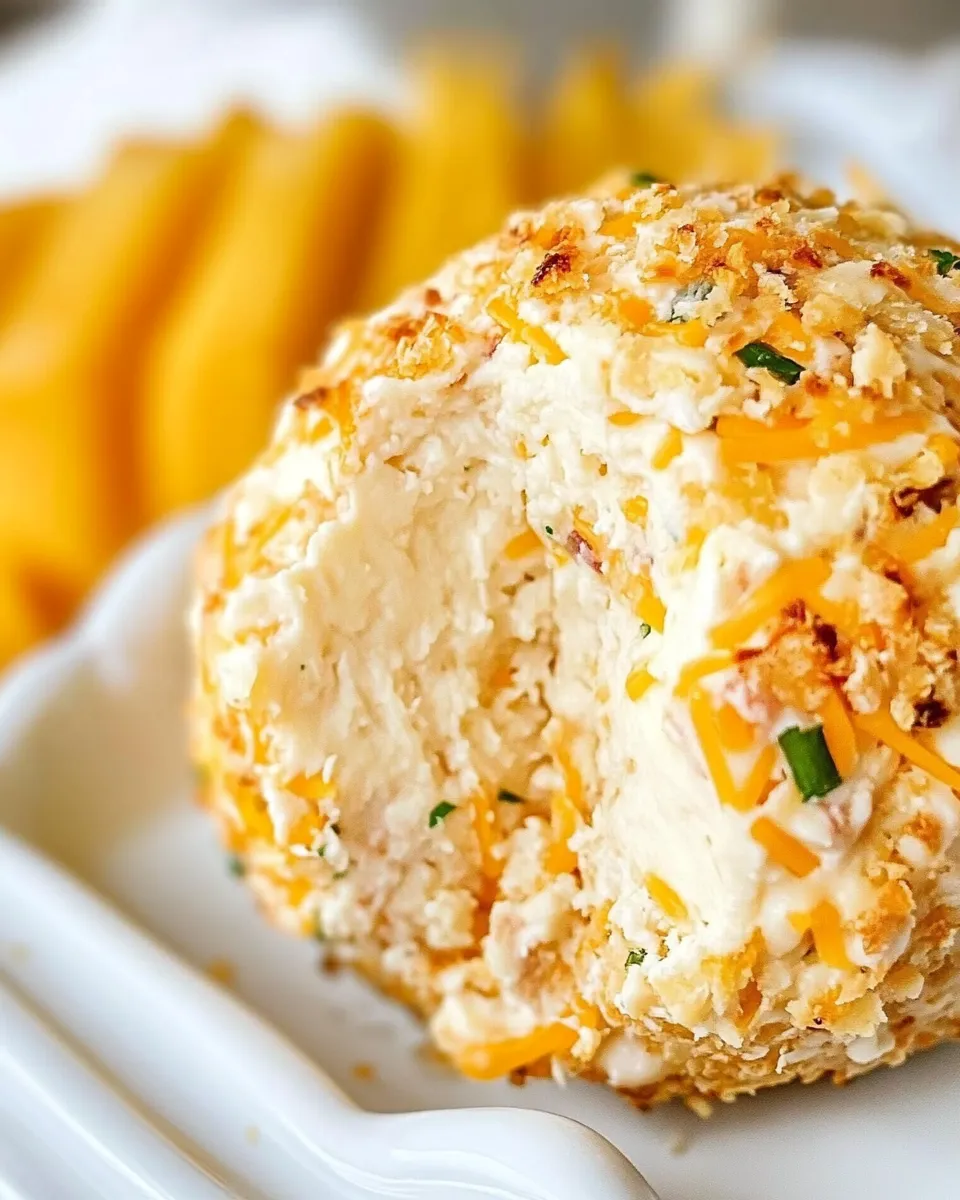
What sets this Classic Cheese Ball apart from others is the perfect balance of flavors and textures. The rich creaminess of the cream cheese melds beautifully with the sharpness of freshly shredded cheddar cheese, while the green onions add a burst of freshness. The addition of Worcestershire sauce brings a hint of umami, and the spices elevate the taste to a whole new level. Plus, rolling the cheese ball in finely chopped pecans not only adds crunch but also a delightful nutty flavor that complements the cheeses perfectly. This Classic Cheese Ball is not just a dip; it’s an experience.
The Ingredient Lineup
To whip up this delightful Classic Cheese Ball, you’ll need the following ingredients:
- 16 ounces cream cheese, softened – This is the base of your cheese ball, providing creaminess.
- 8 ounces freshly shredded cheddar cheese – For a sharp and rich flavor.
- 3 green onions, finely sliced – Adds a fresh, oniony kick.
- 1 teaspoon Worcestershire sauce – A touch of umami to enhance the flavor.
- 1 teaspoon dried chives – For a mild onion flavor and color.
- 1 teaspoon garlic powder – Adds depth and savoriness.
- 1 teaspoon dried parsley – For a hint of herbaceous flavor.
- 1 teaspoon fine sea salt – To enhance all the flavors.
- 1 cup finely chopped pecans – For rolling the cheese ball, adding crunch and nuttiness.
Must-Have Equipment
Before you dive into preparing your Classic Cheese Ball, gather the following equipment:
- Mixing bowl – For combining the ingredients.
- Rubber spatula – To ensure you get every bit of cheese mixed thoroughly.
- Plastic wrap – For shaping and chilling the cheese ball.
- Serving platter – To beautifully present your cheese ball.
Mastering Classic Cheese Ball: How-To
Follow these simple steps to create your own Classic Cheese Ball:
Step 1: Prepare the Ingredients
Start by gathering all of your ingredients. Make sure the cream cheese is softened; this will make it easier to mix.
Step 2: Mix the Cheese
In a large mixing bowl, combine the softened cream cheese, shredded cheddar cheese, green onions, Worcestershire sauce, dried chives, garlic powder, dried parsley, and fine sea salt. Use a rubber spatula to mix everything together until well combined.
Step 3: Shape the Cheese Ball
Once the mixture is well blended, place a large piece of plastic wrap on your countertop. Scoop the cheese mixture onto the center of the plastic wrap and gather the edges to form a ball. Twist the plastic wrap tightly around the cheese ball to hold its shape.
Step 4: Chill the Cheese Ball
Refrigerate the wrapped cheese ball for at least 2 hours, or until it’s firm and set. This step is crucial as it allows the flavors to meld and the cheese to firm up.
Step 5: Roll in Pecans
Once chilled, remove the cheese ball from the plastic wrap and roll it in the finely chopped pecans until completely coated. This adds a delightful crunch and makes the cheese ball visually appealing.
Step 6: Serve and Enjoy
Transfer your Classic Cheese Ball to a serving platter. Serve it with an assortment of crackers, sliced vegetables, or even pretzel crisps for dipping. Enjoy the compliments from your guests!
Dietary Customizations
This Classic Cheese Ball can be easily customized to suit various dietary preferences. Consider the following modifications:
- Vegan Option: Use vegan cream cheese and a vegan cheese blend.
- Nut-Free: Substitute the pecans with finely chopped sunflower seeds or omit them entirely.
- Spicy Kick: Add a dash of hot sauce or finely chopped jalapeños to the cheese mixture.
- Herb Variations: Experiment with different herbs such as dill or thyme for a unique flavor twist.
Mistakes Even Pros Make
Even seasoned cooks can stumble when making a Classic Cheese Ball. Here are some common pitfalls to avoid:
- Using cold cream cheese: Always ensure your cream cheese is softened to avoid lumps.
- Not chilling long enough: Chilling is essential for the cheese ball to hold its shape.
- Overmixing: While you want a smooth mixture, overmixing can lead to a dense cheese ball.
- Skipping the nuts: The pecans add not only flavor but also texture, so don’t skip this step!
Storage Pro Tips
Proper storage will keep your Classic Cheese Ball fresh and delicious. Here are some tips:
- Wrap tightly: Store any leftover cheese ball in plastic wrap or an airtight container to prevent drying out.
- Refrigerate: Keep the cheese ball in the refrigerator for up to a week.
- Freeze for later: You can freeze the uncoated cheese ball for up to three months. Thaw in the refrigerator before serving.
Your Top Questions
Can I make the cheese ball ahead of time?
Absolutely! You can prepare the cheese ball a day or two in advance and store it in the refrigerator until you’re ready to serve. This actually allows the flavors to develop even more!
What can I serve with a cheese ball?
A Classic Cheese Ball pairs wonderfully with an array of items. Consider serving with assorted crackers, fresh vegetable sticks, pretzel crisps, or even slices of baguette. The options are endless!
How do I know when the cheese ball is ready to serve?
Your cheese ball is ready to serve when it has chilled for at least two hours and is firm to the touch. If it holds its shape when you press it gently, it’s perfect!
Can I use different cheeses in this recipe?
Definitely! While cheddar is a classic choice, you can mix in other cheeses such as cream cheese, gouda, or even blue cheese for a unique flavor profile. Just ensure the texture remains creamy.
Time to Try It
Now that you have all the tips and tricks to create a Classic Cheese Ball, it’s time to roll up your sleeves and make this delightful appetizer. Perfect for any occasion, this cheese ball is sure to impress your guests and keep them coming back for more. With its creamy texture, robust flavors, and crunchy exterior, it’s bound to become a favorite in your appetizer repertoire.
There’s something truly special about gathering with friends and family, sharing delicious food, and enjoying each other’s company. This Classic Cheese Ball embodies that spirit, making every bite a celebration. So go ahead, make it, serve it, and watch it disappear from the platter in no time!
Classic Cheese Ball
Ingredients
Equipment
Method
- Start by gathering all of your ingredients. Make sure the cream cheese is softened; this will make it easier to mix.
- In a large mixing bowl, combine the softened cream cheese, shredded cheddar cheese, green onions, Worcestershire sauce, dried chives, garlic powder, dried parsley, and fine sea salt. Use a rubber spatula to mix everything together until well combined.
- Once the mixture is well blended, place a large piece of plastic wrap on your countertop. Scoop the cheese mixture onto the center of the plastic wrap and gather the edges to form a ball. Twist the plastic wrap tightly around the cheese ball to hold its shape.
- Refrigerate the wrapped cheese ball for at least 2 hours, or until it’s firm and set. This step is crucial as it allows the flavors to meld and the cheese to firm up.
- Once chilled, remove the cheese ball from the plastic wrap and roll it in the finely chopped pecans until completely coated. This adds a delightful crunch and makes the cheese ball visually appealing.
- Transfer your Classic Cheese Ball to a serving platter. Serve it with an assortment of crackers, sliced vegetables, or even pretzel crisps for dipping. Enjoy the compliments from your guests!
Notes
- Ensure the cream cheese is softened for easy mixing.
- Store leftovers tightly wrapped in the refrigerator for up to a week.
- Try adding different herbs or spices for a unique flavor twist.