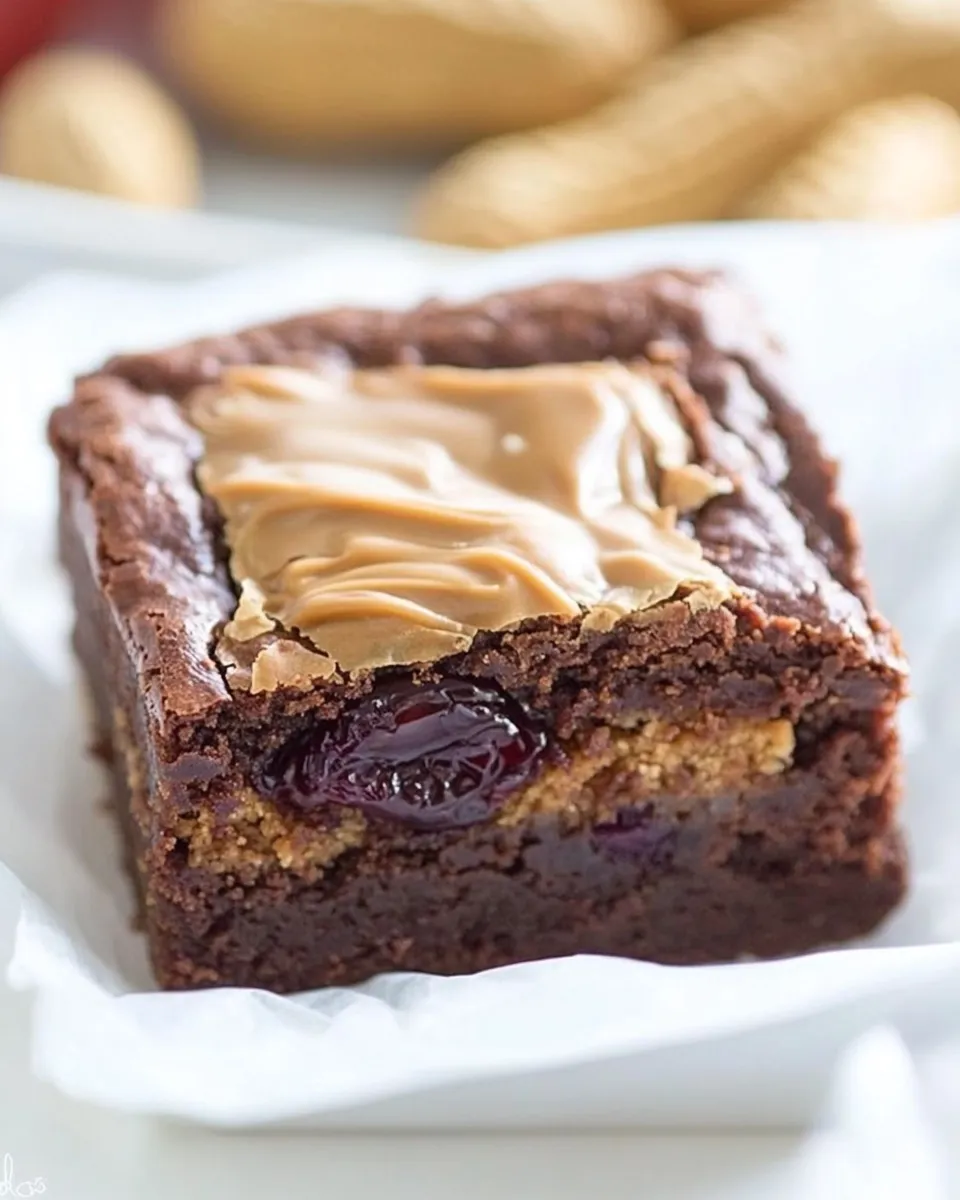
Peanut Butter and Jelly Brownies
If you’re searching for the ultimate indulgence that combines nostalgia with rich, decadent flavors, look no further than these Peanut Butter and Jelly Brownies. They’re the perfect blend of fudgy brownie goodness with a delightful swirl of peanut butter and your favorite jelly. Whether you’re reminiscing about childhood lunches or simply craving a dessert that delivers on flavor and satisfaction, these brownies will not disappoint.
The best part? They’re easy to make and are sure to impress anyone who takes a bite. So, roll up your sleeves, and let’s dive into this deliciously sweet adventure!
Why It Works Every Time
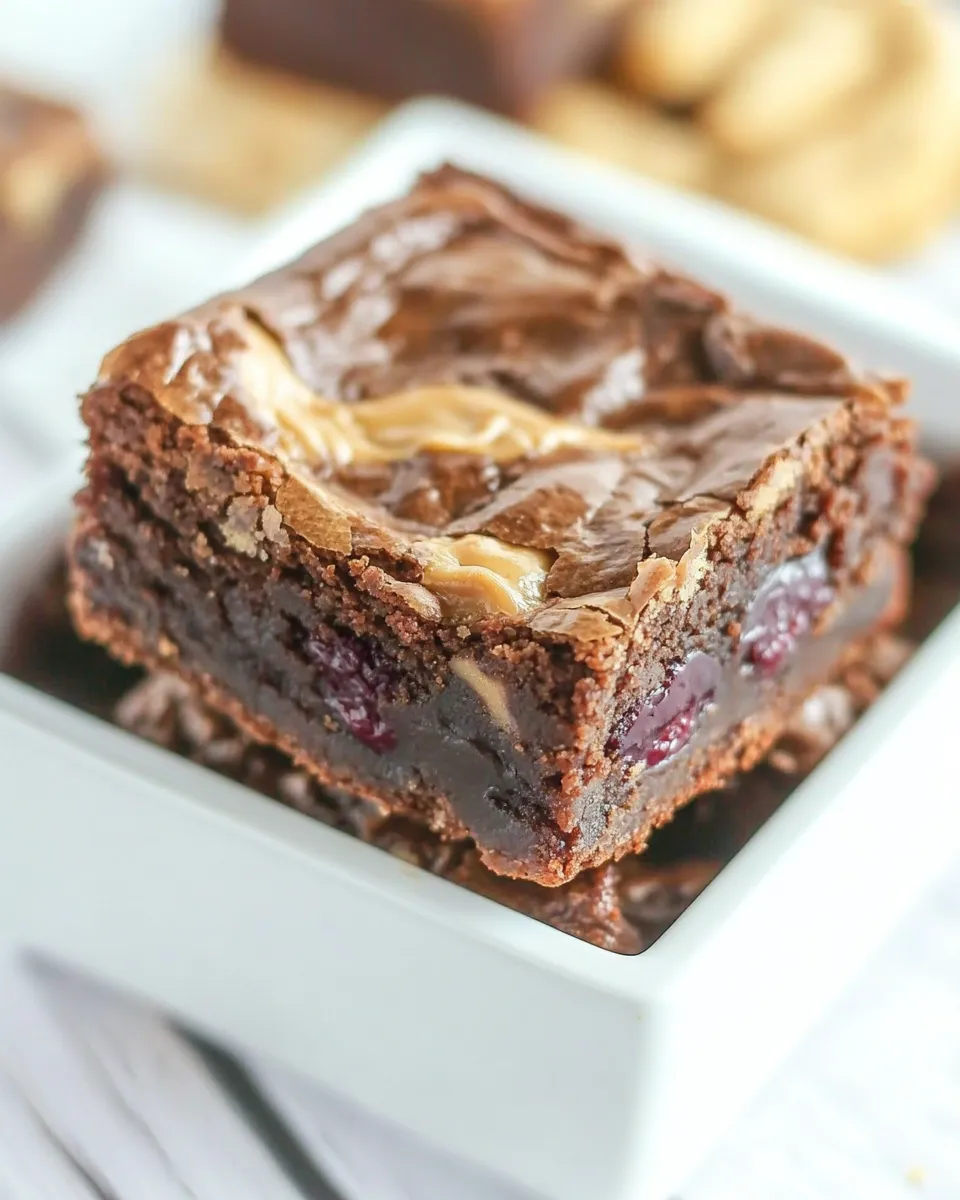
The magic of these Peanut Butter and Jelly Brownies lies in the balance of flavors and textures. The chewy, fudgy brownies serve as a perfect base, while the creamy peanut butter adds a nutty richness that complements the sweetness of the jelly. The combination of unsweetened and semi-sweet baking chocolate creates a deep chocolate flavor that elevates the entire dessert. Plus, the swirl of jelly on top not only adds a pop of color but also a fruity freshness that brightens each bite.
What to Buy
- 2 ounces unsweetened baking chocolate, coarsely chopped
- 2 ounces semi-sweet baking chocolate, coarsely chopped
- 3/4 cup butter (1 ½ sticks)
- 1 ¾ cups sugar
- 3 large eggs
- 1 tablespoon vanilla extract
- 2 tablespoons unsweetened cocoa powder (Hershey’s Dark recommended)
- 1/4 teaspoon salt
- 1 cup all-purpose flour
- 1/4 cup peanut butter (creamy or crunchy, your choice)
- 1 tablespoon butter, melted (for peanut butter mixture)
- 3 tablespoons powdered sugar
- 1 teaspoon vanilla (for peanut butter mixture)
- 1/2 cup jelly (strawberry, grape, or your favorite flavor)
Hardware & Gadgets
- Mixing Bowls: For combining ingredients smoothly.
- Whisk: To mix the wet ingredients thoroughly.
- Spatula: Perfect for folding in the flour and spreading the peanut butter mixture.
- 9×9-inch Baking Pan: Ideal size for thick brownies.
- Parchment Paper: Helps with easy removal and cleanup.
- Oven: Essential for baking to perfection.
Peanut Butter and Jelly Brownies: From Prep to Plate
Step 1: Preheat and Prepare
Preheat your oven to 350°F (175°C). Line a 9×9-inch baking pan with parchment paper, leaving some overhang for easy removal later.
Step 2: Melt the Chocolates and Butter
In a medium saucepan over low heat, combine the unsweetened and semi-sweet baking chocolate with the butter. Stir continuously until melted and smooth. Remove from heat and allow to cool slightly.
Step 3: Combine Sugar and Eggs
In a large mixing bowl, whisk together the sugar and eggs until well combined. Add the vanilla extract and melted chocolate mixture, stirring until smooth.
Step 4: Add Dry Ingredients
Sift in the cocoa powder, salt, and flour, mixing gently with a spatula until just combined. Be careful not to overmix to ensure fudgy brownies.
Step 5: Prepare the Peanut Butter Mixture
In a separate bowl, combine the peanut butter, melted butter, powdered sugar, and vanilla extract. Mix until smooth and creamy.
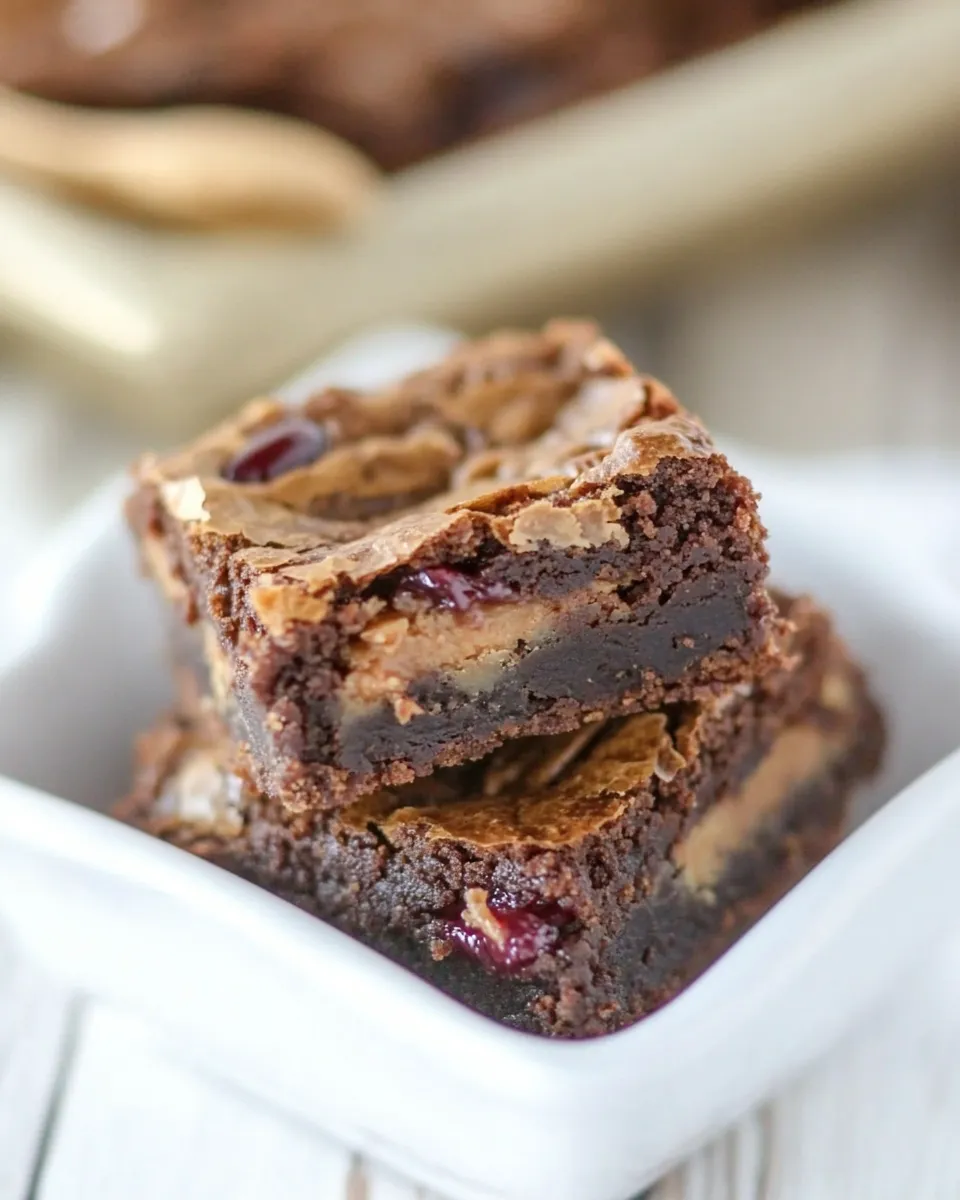
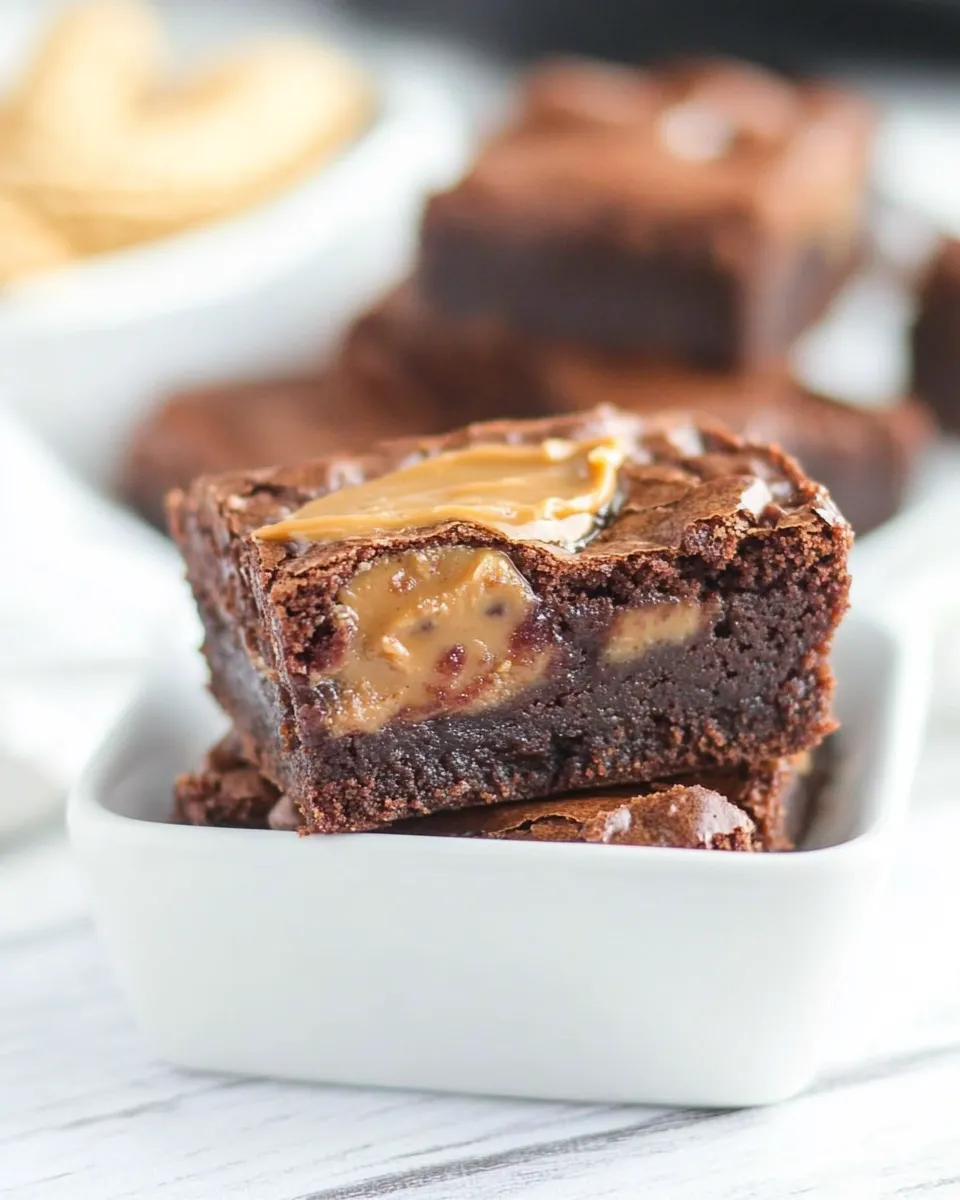
Step 6: Layer and Swirl
Pour half of the brownie batter into the prepared pan, spreading it evenly. Drop spoonfuls of the peanut butter mixture over the brownie batter, then pour the remaining brownie batter on top. Finally, add dollops of your jelly on top of the brownie batter. Use a knife or skewer to swirl everything together gently; don’t overdo it—aim for a marbled effect.
Step 7: Bake
Bake the brownies in the preheated oven for 25-30 minutes or until a toothpick inserted into the center comes out with a few moist crumbs attached.
Step 8: Cool and Cut
Allow the brownies to cool in the pan for about 15 minutes before lifting them out using the parchment paper. Let them cool completely on a wire rack, then cut into squares and serve!
Dietary Swaps & Alternatives
- Butter: Substitute with coconut oil or vegan butter for a dairy-free version.
- Peanut Butter: Swap with almond butter or sun butter for a nut-free option.
- Jelly: Use fruit preserves or homemade fruit compote for a fresher taste.
- Flour: For a gluten-free version, try using almond flour or a gluten-free all-purpose blend.
Notes from the Test Kitchen
For the best results, ensure your ingredients are at room temperature before beginning. This helps everything combine more smoothly. If you prefer a more intense chocolate flavor, feel free to substitute the semi-sweet chocolate for dark chocolate. Just keep an eye on the sweetness level of your brownies; dark chocolate can be richer!
Keep It Fresh: Storage Guide
These Peanut Butter and Jelly Brownies can be stored in an airtight container at room temperature for up to 3 days or in the refrigerator for up to a week. If you want to keep them longer, freeze the brownies in a single layer, then transfer them to a freezer-safe container. They can last up to 3 months in the freezer. Just thaw them in the fridge overnight before enjoying!
Reader Questions
Can I make these brownies ahead of time?
Absolutely! These brownies actually taste better the next day, as the flavors have more time to meld together. Just ensure they are stored properly to maintain freshness.
What’s the best way to cut brownies cleanly?
For clean cuts, use a sharp knife and run it under hot water before slicing. Wipe the knife after each cut to prevent sticking and ensure neat edges.
Can I add nuts or other mix-ins to the recipe?
Yes! Chopped nuts, chocolate chips, or even crushed pretzels can be added to the brownie batter for extra texture and flavor. Just fold them in gently after combining the dry ingredients.
What’s the best jelly flavor to use?
It really depends on your preference! Strawberry and grape are classic choices, but raspberry, blueberry, or even peach jelly can add a unique twist. Experiment and find your favorite combination!
See You at the Table
With these Peanut Butter and Jelly Brownies, you’re not just making a dessert; you’re creating a sweet memory that brings joy to every bite. Whether enjoyed after a long day or shared at a gathering, these brownies are sure to become a favorite. So go ahead, indulge yourself, and enjoy the delightful fusion of flavors that these brownies bring to your table!
Peanut Butter and Jelly Brownies
Ingredients
Equipment
Method
- Step 1: Preheat and Prepare - Preheat your oven to 350°F (175°C). Line a 9x9-inch baking pan with parchment paper, leaving some overhang for easy removal later.
- Step 2: Melt the Chocolates and Butter - In a medium saucepan over low heat, combine the unsweetened and semi-sweet baking chocolate with the butter. Stir continuously until melted and smooth. Remove from heat and allow to cool slightly.
- Step 3: Combine Sugar and Eggs - In a large mixing bowl, whisk together the sugar and eggs until well combined. Add the vanilla extract and melted chocolate mixture, stirring until smooth.
- Step 4: Add Dry Ingredients - Sift in the cocoa powder, salt, and flour, mixing gently with a spatula until just combined. Be careful not to overmix to ensure fudgy brownies.
- Step 5: Prepare the Peanut Butter Mixture - In a separate bowl, combine the peanut butter, melted butter, powdered sugar, and vanilla extract. Mix until smooth and creamy.
- Step 6: Layer and Swirl - Pour half of the brownie batter into the prepared pan, spreading it evenly. Drop spoonfuls of the peanut butter mixture over the brownie batter, then pour the remaining brownie batter on top. Finally, add dollops of your jelly on top of the brownie batter. Use a knife or skewer to swirl everything together gently; don’t overdo it—aim for a marbled effect.
- Step 7: Bake - Bake the brownies in the preheated oven for 25-30 minutes or until a toothpick inserted into the center comes out with a few moist crumbs attached.
- Step 8: Cool and Cut - Allow the brownies to cool in the pan for about 15 minutes before lifting them out using the parchment paper. Let them cool completely on a wire rack, then cut into squares and serve!
Notes
- Ensure your ingredients are at room temperature for better mixing.
- For a richer chocolate flavor, substitute semi-sweet chocolate with dark chocolate.
- Store brownies in an airtight container at room temperature for up to 3 days.