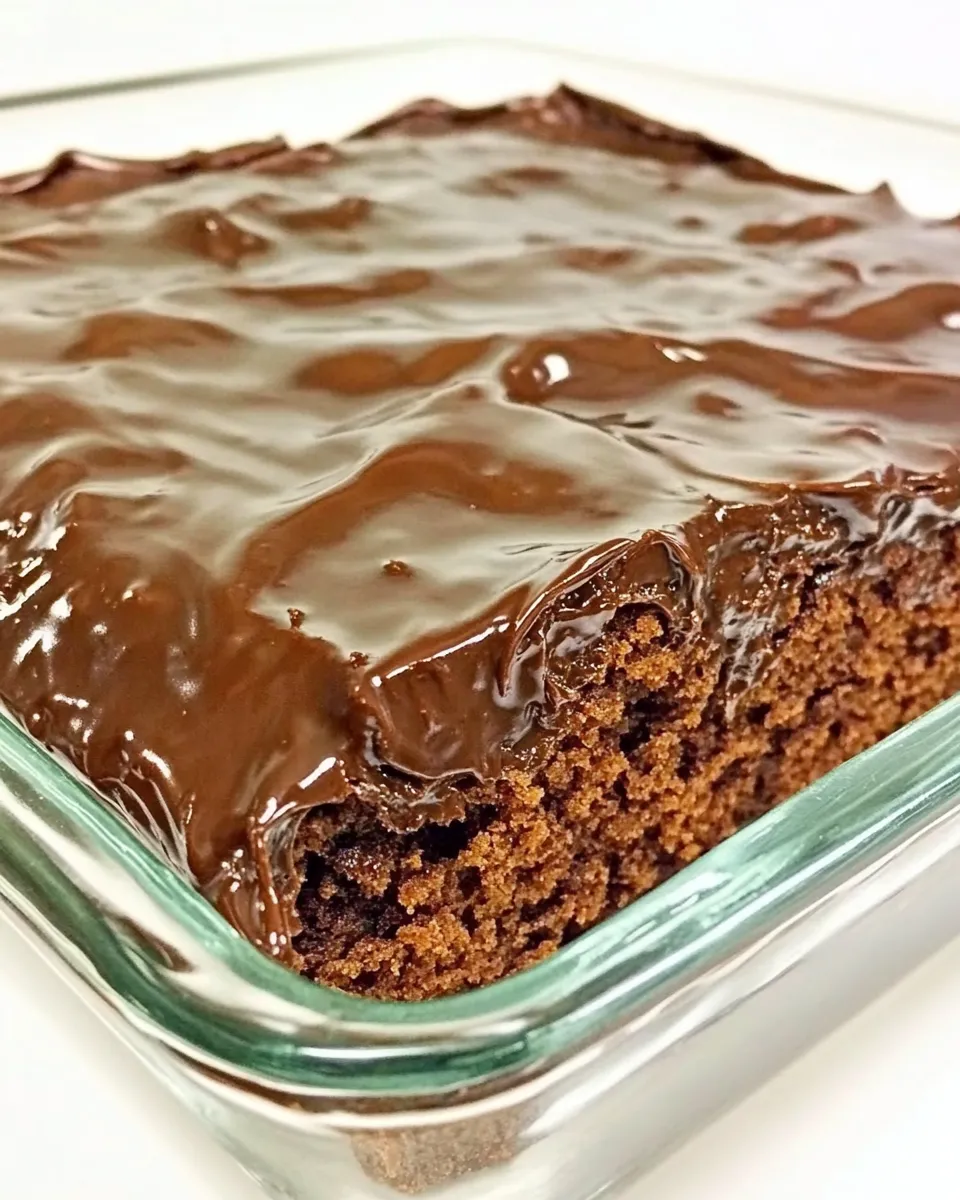
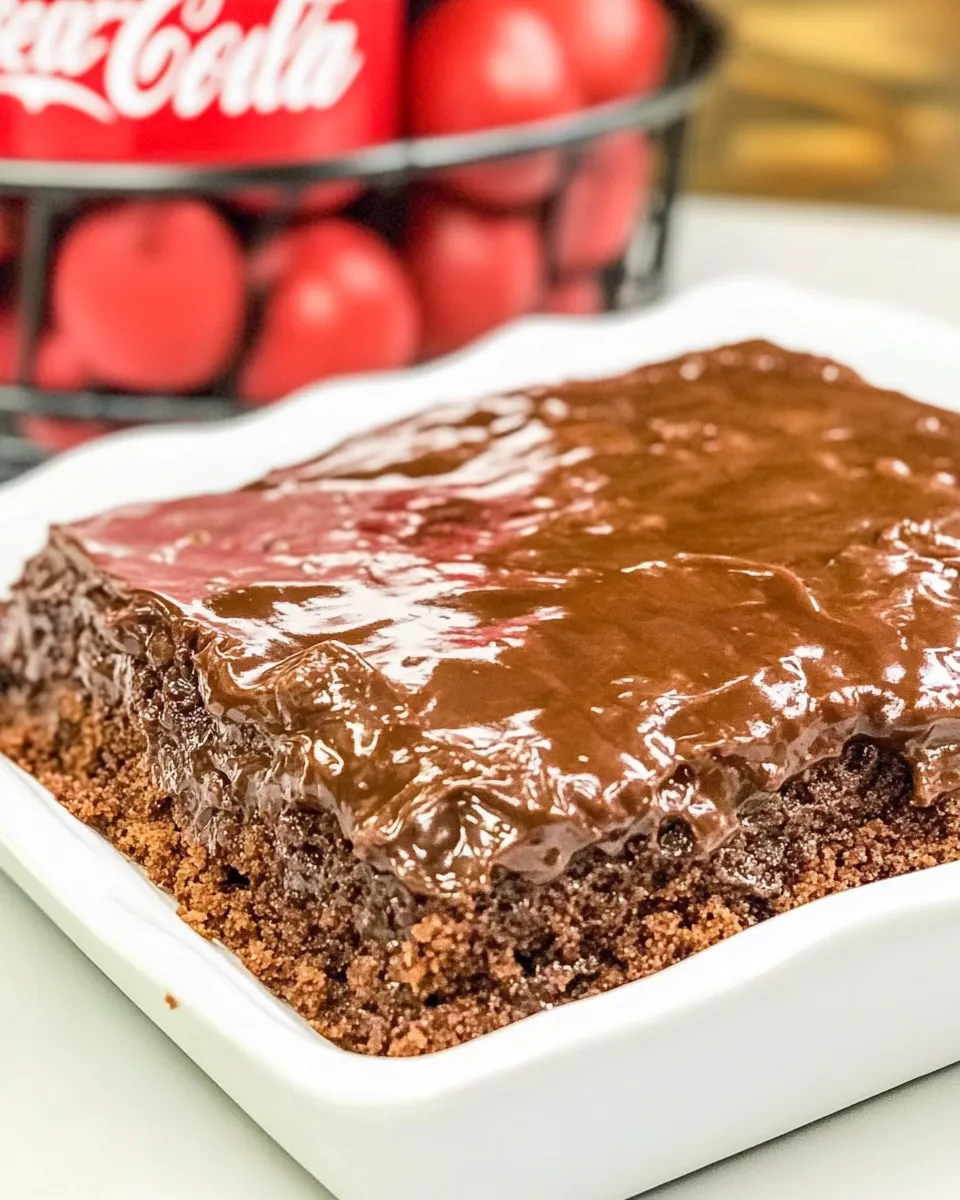
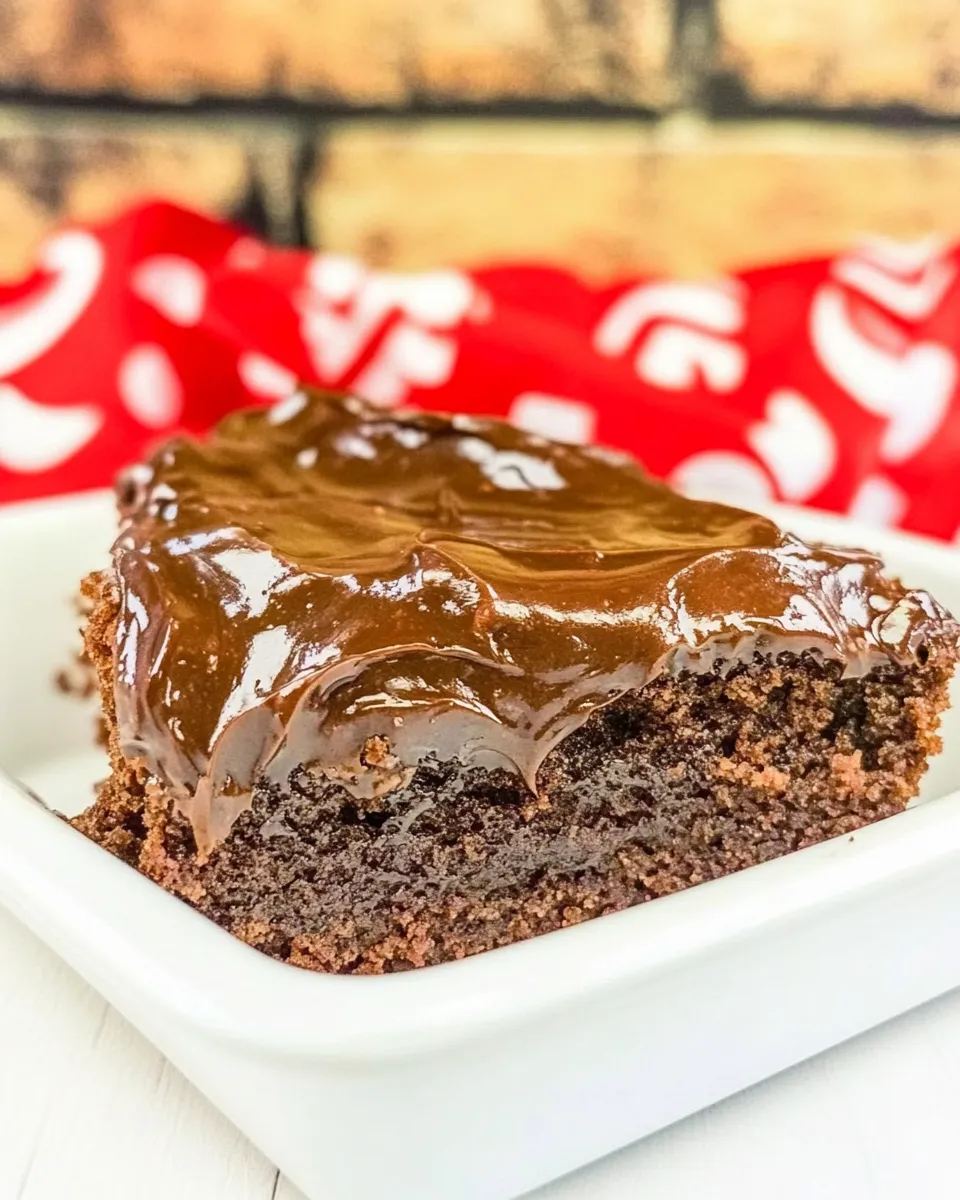
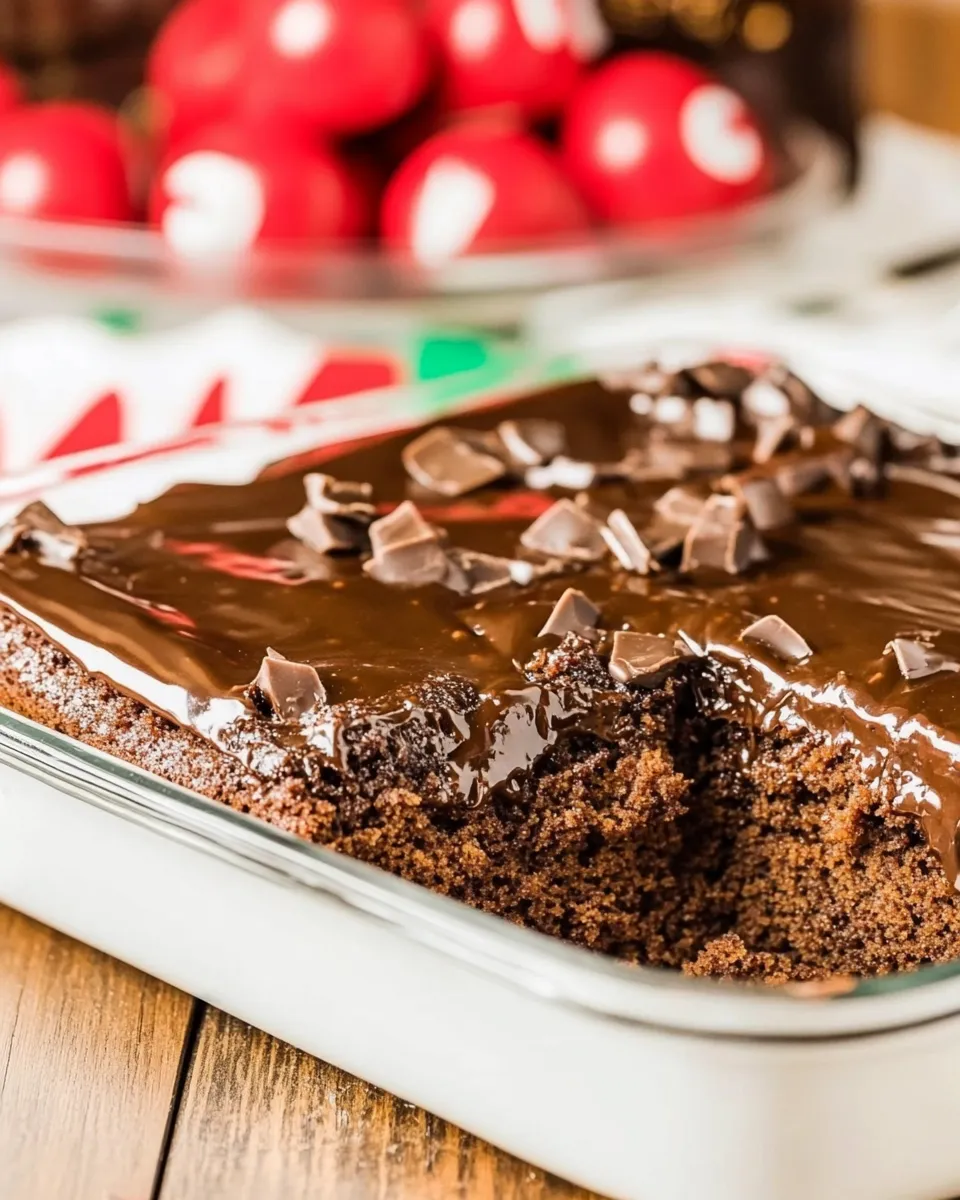
Cheerwine Chocolate Cake
There’s something irresistibly charming about a cake that surprises you at every bite. The Cheerwine Chocolate Cake is just that—a delightful blend of rich chocolate and the unique cherry flavor of Cheerwine that takes your taste buds on a joyful ride. This cake is perfect for celebrations, casual get-togethers, or just a sweet treat after dinner. With its moist texture and decadent frosting, it quickly becomes a favorite among friends and family.
Why It’s My Go-To
What makes this Cheerwine Chocolate Cake my go-to recipe? It’s simple yet sophisticated, combining familiar chocolate cake elements with a twist that brings a burst of flavor. The addition of Cheerwine not only adds moisture but also infuses a subtle cherry flavor that complements the chocolate perfectly. Whether you’re a novice baker or a seasoned pro, this recipe is easy to follow and yields consistent, delicious results. Plus, it’s a great conversation starter at any gathering!
What Goes In
To create this delightful cake, you’ll need the following ingredients:
- 2 cups all-purpose flour
- 2 cups granulated sugar
- 1 teaspoon baking soda
- 1/2 teaspoon salt
- 1 (12-ounce) can Cheerwine
- 1 cup unsalted butter, cut into cubes
- 1/4 cup unsweetened cocoa powder
- 2 large eggs
- 1/2 cup whole buttermilk
- 1 teaspoon vanilla extract
- 1 ounce unsweetened chocolate, chopped
- 3 tablespoons butter
- 1 1/2 cups powdered sugar
- 1 tablespoon whole milk
- 2 tablespoons Cheerwine
Tools of the Trade
Before you start baking, gather these essential tools:
- Mixing Bowls: A good set of mixing bowls in various sizes will help you combine your ingredients efficiently.
- Electric Mixer: While you can mix by hand, an electric mixer saves time and ensures a smooth batter.
- Measuring Cups and Spoons: Accurate measurements are crucial for baking success.
- 9×13-inch Baking Pan: This size is perfect for baking your Cheerwine Chocolate Cake evenly.
- Cooling Rack: Allow your cake to cool properly before frosting to avoid melting your icing.
Method: Cheerwine Chocolate Cake
Ready to dive into the baking process? Let’s walk through the steps to create this delicious Cheerwine Chocolate Cake.
Step 1: Preheat Your Oven
Start by preheating your oven to 350°F (175°C). This ensures that your cake bakes evenly and rises beautifully.
Step 2: Prepare Your Pan
Grease your 9×13-inch baking pan with butter or cooking spray, and set it aside.
Step 3: Combine Dry Ingredients
In a large mixing bowl, whisk together the all-purpose flour, granulated sugar, baking soda, and salt. This combination is the foundation of your cake.
Step 4: Melt Butter and Mix with Cheerwine
In a saucepan over medium heat, melt the cubed butter. Once melted, add the Cheerwine and cocoa powder. Stir until the mixture is well combined and heated through, but do not bring it to a boil.
Step 5: Combine Wet Ingredients
In another bowl, whisk together the eggs, buttermilk, and vanilla extract. Once mixed, pour the warm Cheerwine mixture into the wet ingredients and stir to combine.
Step 6: Combine Wet and Dry Ingredients
Gradually pour the wet mixture into the dry ingredients, stirring until just combined. Be careful not to overmix; a few lumps are perfectly fine!
Step 7: Bake the Cake
Pour the batter into the prepared baking pan and spread it out evenly. Bake in the preheated oven for 30-35 minutes, or until a toothpick inserted into the center comes out clean.
Step 8: Cool the Cake
Once baked, remove the cake from the oven and let it cool in the pan for about 10 minutes. Then transfer it to a cooling rack to cool completely.
Step 9: Prepare the Frosting
While the cake cools, you can prepare the frosting. In a small saucepan, melt the chopped unsweetened chocolate and 3 tablespoons of butter together over low heat. Once melted, remove from heat and let it cool slightly.
In a mixing bowl, combine the powdered sugar, whole milk, and Cheerwine. Gradually add the melted chocolate mixture, stirring until smooth and creamy.
Step 10: Frost the Cake
Once the cake has completely cooled, spread the frosting evenly over the top. You can also add decorative sprinkles or a drizzle of melted chocolate if desired.
Tailor It to Your Diet
Want to make this Cheerwine Chocolate Cake even more versatile? Here are some dietary adaptations:
- Gluten-Free: Substitute all-purpose flour with a gluten-free flour blend.
- Dairy-Free: Use coconut oil or a dairy-free butter alternative and substitute buttermilk with almond milk mixed with a tablespoon of vinegar.
- Reduced Sugar: You can use a sugar substitute or reduce the amount of sugar in the recipe, although this may affect the cake’s texture.
- Egg-Free: Replace the eggs with flaxseed meal mixed with water (1 tablespoon flaxseed meal + 2.5 tablespoons water = 1 egg).
Common Errors (and Fixes)
Baking is a science, and sometimes things don’t go as planned. Here are a few common errors and how to fix them:
- Dry Cake: Ensure you’re measuring your flour correctly—too much flour can lead to a dry texture. Use the spoon and level method for accuracy.
- Dense Cake: Overmixing can create a dense cake. Mix until just combined to keep it light and airy.
- Cracked Top: This can occur if the oven temperature is too high. Always double-check your oven’s accuracy with an oven thermometer.
- Frosting Too Runny: If your frosting is too thin, add more powdered sugar to thicken it up.
How to Store & Reheat
To keep your Cheerwine Chocolate Cake fresh and delicious, follow these storage tips:
- Room Temperature: Store the cake in an airtight container at room temperature for up to three days.
- Refrigerator: If you want to keep it longer, you can refrigerate it for up to a week. Just make sure it’s covered well to prevent it from drying out.
- Freezer: For longer storage, wrap individual slices in plastic wrap and place them in a freezer-safe bag. They can last for up to three months.
- Reheating: To reheat, simply place a slice in the microwave for 15-20 seconds or warm it in a 350°F oven for about 10 minutes.
Helpful Q&A
Can I use diet Cheerwine for this recipe?
Yes, you can use diet Cheerwine, but keep in mind that it may alter the texture and sweetness of the cake slightly.
What can I substitute for buttermilk?
If you don’t have buttermilk, you can make your own by mixing 1/2 cup of milk with 1/2 tablespoon of vinegar or lemon juice. Let it sit for 5-10 minutes before using.
Can I make this cake ahead of time?
Absolutely! This cake stores well. You can bake it a day or two in advance and frost it just before serving for the best flavor and texture.
How do I know when my cake is done baking?
The best way to check is by inserting a toothpick in the center of the cake. If it comes out clean or with a few moist crumbs, your cake is ready!
Time to Try It
Now that you have the recipe, tips, and tricks for making the perfect Cheerwine Chocolate Cake, it’s time to roll up your sleeves and get baking! This cake not only satisfies your chocolate cravings but also adds a unique twist that everyone will love. Don’t forget to share your baking adventures and the smiles this cake brings to your loved ones.
The Cheerwine Chocolate Cake is truly a celebration of flavors, and I can’t wait for you to experience it. Happy baking!
Cheerwine Chocolate Cake
Ingredients
Equipment
Method
- Step 1: Preheat Your Oven - Start by preheating your oven to 350°F (175°C). This ensures that your cake bakes evenly and rises beautifully.
- Step 2: Prepare Your Pan - Grease your 9x13-inch baking pan with butter or cooking spray, and set it aside.
- Step 3: Combine Dry Ingredients - In a large mixing bowl, whisk together the all-purpose flour, granulated sugar, baking soda, and salt.
- Step 4: Melt Butter and Mix with Cheerwine - In a saucepan over medium heat, melt the cubed butter. Add the Cheerwine and cocoa powder, stirring until well combined.
- Step 5: Combine Wet Ingredients - In another bowl, whisk together the eggs, buttermilk, and vanilla extract. Pour the warm Cheerwine mixture into the wet ingredients and stir.
- Step 6: Combine Wet and Dry Ingredients - Gradually pour the wet mixture into the dry ingredients, stirring until just combined.
- Step 7: Bake the Cake - Pour the batter into the prepared baking pan and bake for 30-35 minutes, or until a toothpick comes out clean.
- Step 8: Cool the Cake - Let the cake cool in the pan for about 10 minutes, then transfer it to a cooling rack to cool completely.
- Step 9: Prepare the Frosting - Melt the unsweetened chocolate and 3 tablespoons of butter together. In a bowl, combine powdered sugar, whole milk, and Cheerwine, then mix in the chocolate mixture.
- Step 10: Frost the Cake - Once cooled, spread the frosting evenly over the cake and add any desired decorations.
Notes
- For a gluten-free version, use a gluten-free flour blend.
- To make it dairy-free, use coconut oil and substitute buttermilk with almond milk and vinegar.
- Store in an airtight container at room temperature for up to three days.