Homemade Naan (with step-by-step photos)
There’s something truly magical about the warm, pillowy goodness of naan straight from your kitchen. This homemade naan recipe is not only easy to follow, but it also brings the taste of authentic Indian cuisine right to your dining table. Imagine dipping this soft bread into your favorite curry or enjoying it with a spread of garlic butter—heavenly! Get ready to impress your family and friends with your baking skills as we walk through the process of making Homemade Naan (with step-by-step photos).
Top Reasons to Make Homemade Naan (with step-by-step photos)
Making naan at home comes with a plethora of benefits. Here are the top reasons why you should try it:
- Freshness: Nothing beats the taste of freshly baked naan. You can enjoy it warm right out of the skillet.
- Customizable: You can easily tailor the flavors to your liking, whether that’s adding garlic, herbs, or spices.
- Healthier Option: Making naan at home allows you to control the ingredients, avoiding preservatives and excess sugar.
- Fun Activity: It’s a fun cooking project that the whole family can participate in.
- Impressive: Your friends will be amazed when you serve them homemade naan alongside your favorite dishes!
The Ingredient Lineup
Before we dive into the cooking process, let’s gather our ingredients. You’ll need:
- All-purpose flour: The base of our naan, providing the right texture.
- Active dry yeast: This is what helps our dough rise and gives the naan its fluffy texture.
- Warm water: To activate the yeast; it should feel like a warm bath, not hot.
- Plain yogurt: Adds moisture and a slight tang to the naan.
- Olive oil: For richness and to keep the dough from sticking.
- Salt: Enhances flavor; don’t skip it!
- Optional toppings: Garlic, herbs, or melted butter for finishing touches.
Kitchen Gear Checklist
Before you start making your naan, gather the following kitchen tools:
- Large mixing bowl: For mixing the dough.
- Dough scraper: Helpful for kneading and handling sticky dough.
- Rolling pin: To roll out the dough into the classic naan shape.
- Skillet or cast-iron pan: Ideal for cooking the naan over high heat.
- Dish towel: To cover the dough while it rises.
- Pastry brush: For applying butter or oil on the finished naan.
Homemade Naan (with step-by-step photos) Cooking Guide
Now, let’s get started with our homemade naan! Follow these steps closely for the best results.
Step 1: Activate the Yeast
In a small bowl, combine 1 cup of warm water (about 110°F or 43°C) with 2 teaspoons of active dry yeast and 1 teaspoon of sugar. Stir gently and let it sit for about 5-10 minutes until it becomes frothy.
Step 2: Mix the Dough
In a large mixing bowl, combine 3 cups of all-purpose flour and 1 teaspoon of salt. Make a well in the center and pour in the yeast mixture along with ½ cup of plain yogurt and 2 tablespoons of olive oil.
Step 3: Knead the Dough
Using a dough scraper or your hands, mix until a shaggy dough forms. Transfer it to a floured surface and knead for about 8-10 minutes until smooth and elastic. If the dough is too sticky, sprinkle a little more flour as needed.
Step 4: Let it Rise
Place the kneaded dough into a lightly oiled bowl, cover it with a damp dish towel, and let it rise in a warm area for about 1-2 hours, or until it doubles in size.
Step 5: Divide the Dough
Once the dough has risen, punch it down to release the air. Divide it into 6-8 equal portions, rolling each into a ball. Cover with a towel and let them rest for about 10 minutes.
Step 6: Roll Out the Naan
On a lightly floured surface, take one ball of dough and roll it out into an oval or teardrop shape, about ¼ inch thick. Repeat with the remaining dough balls.
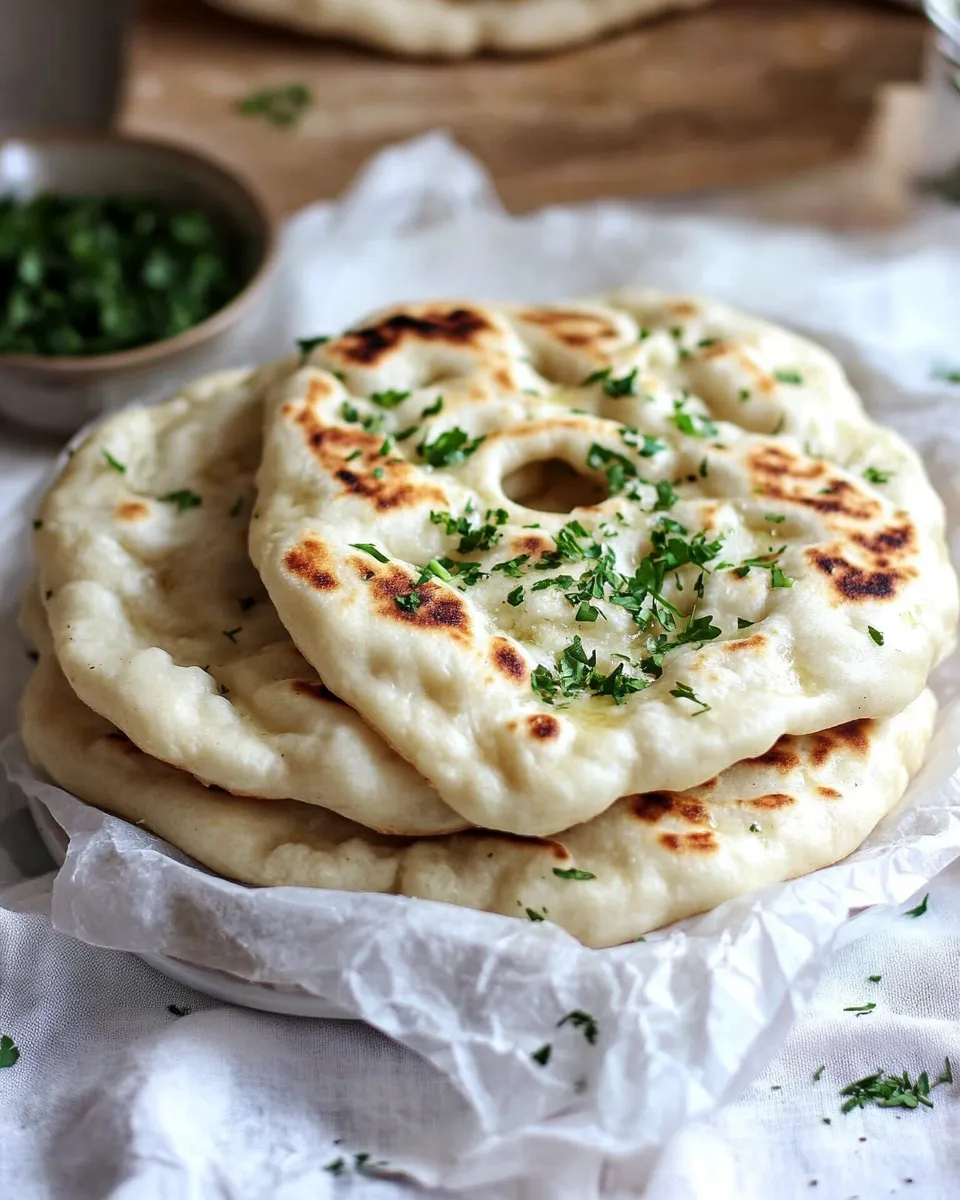
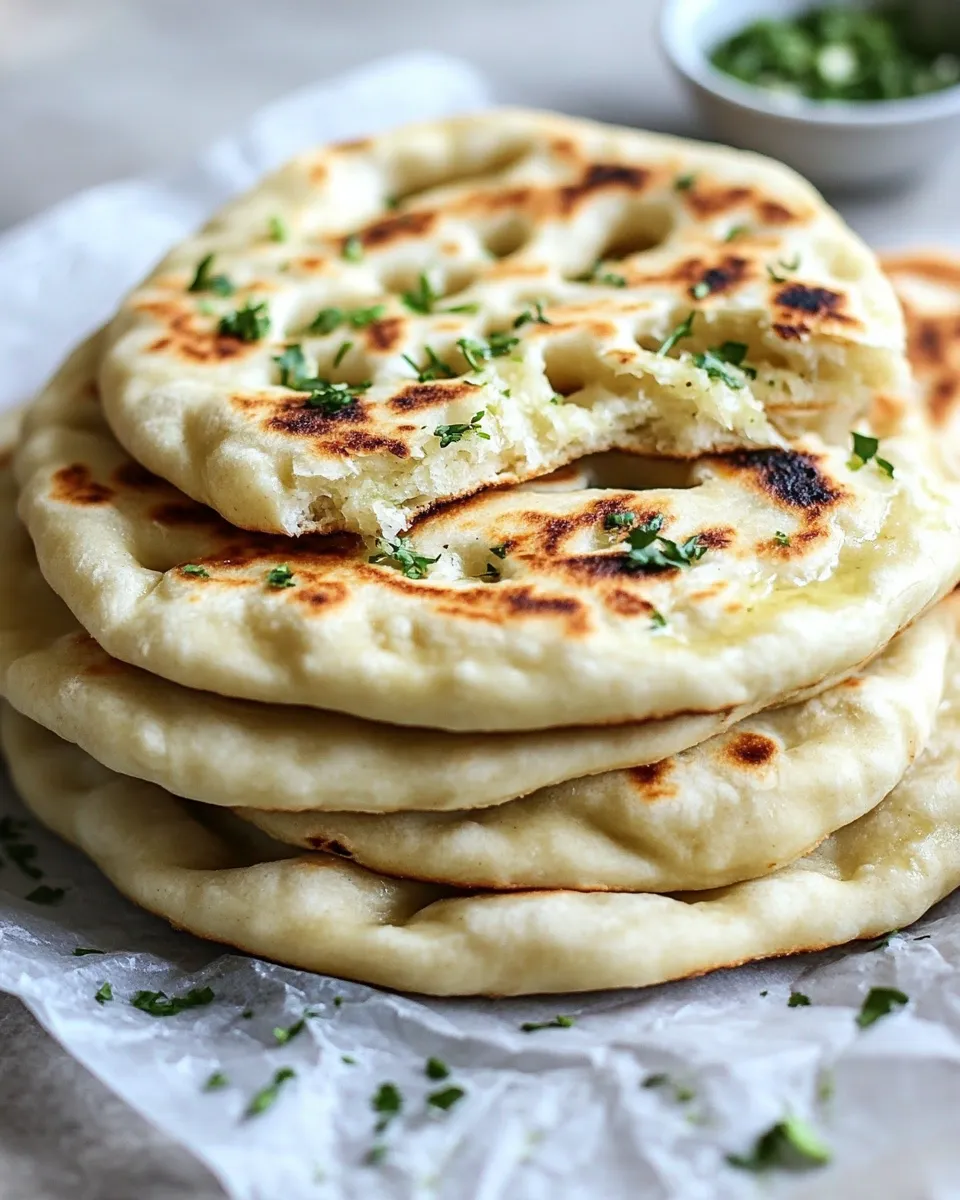
Step 7: Cook the Naan
Heat a skillet or cast-iron pan over high heat. Once hot, carefully place a rolled-out naan in the pan. Cook for about 1-2 minutes or until bubbles start to form. Flip it over and cook the other side for another 1-2 minutes until golden brown.
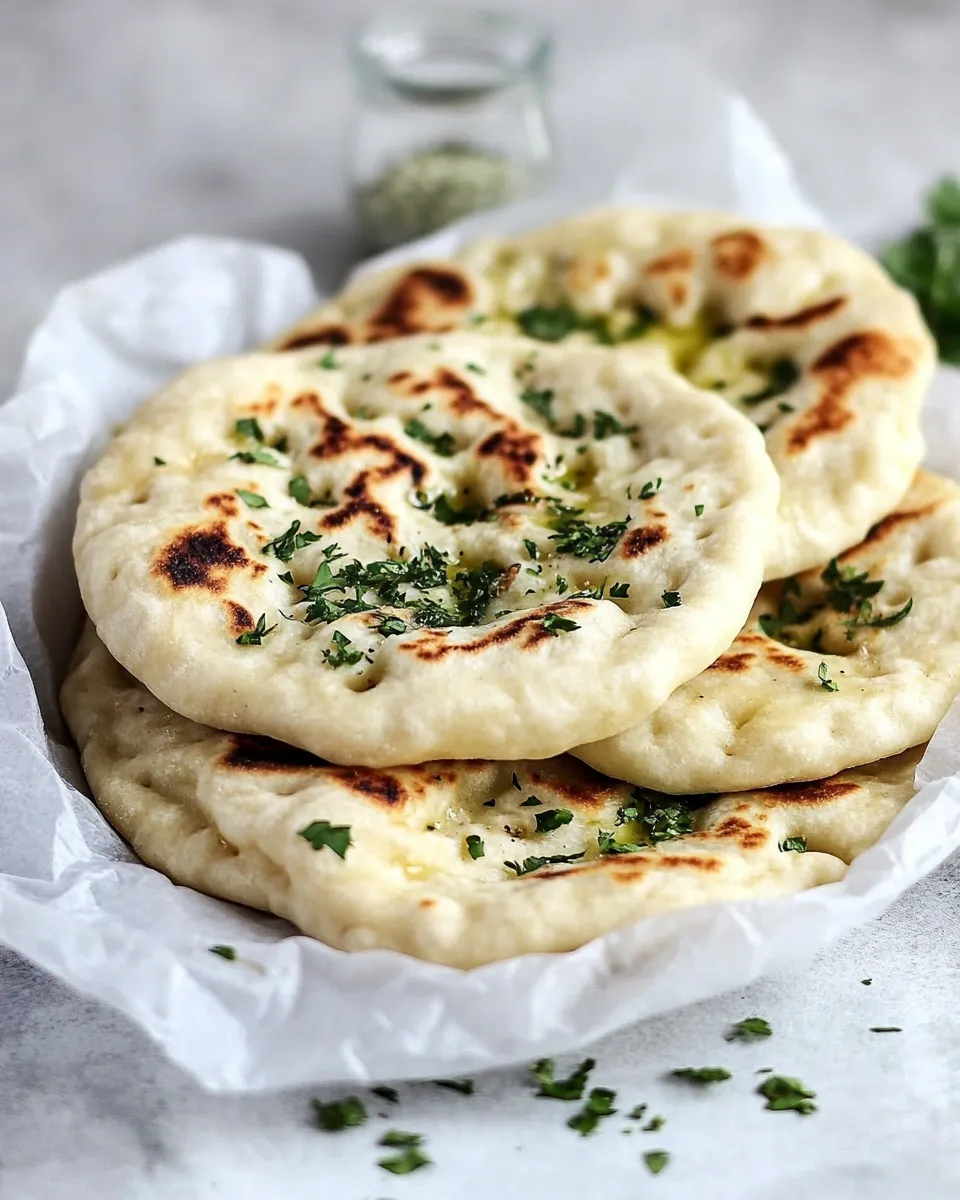
Step 8: Finish with Butter
Remove the naan from the skillet and brush it with melted butter or sprinkle with garlic or herbs if desired. Repeat the cooking process for the remaining naan.
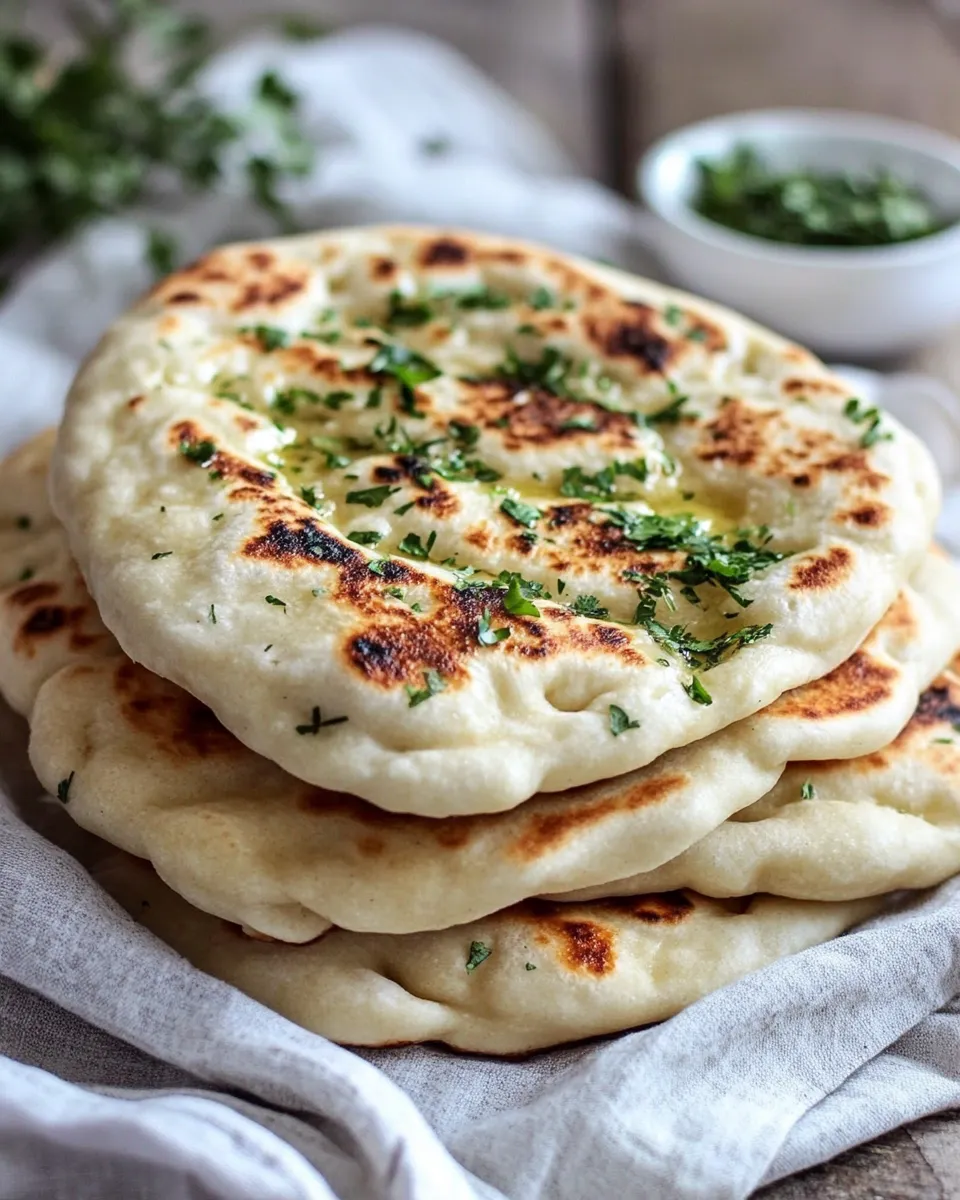
Step 9: Serve Warm
Serve your delicious homemade naan warm with your favorite curry, dips, or just enjoy it plain. It’s perfect for scooping up sauces!
Variations by Season
Get creative with your naan by trying out these seasonal variations:
- Garlic Naan: Add minced garlic to the dough or brush with garlic butter before serving.
- Herb Naan: Mix in fresh herbs like cilantro or parsley into the dough for a fresh flavor.
- Cheese Naan: Stuff the dough with shredded cheese before rolling it out for a cheesy surprise.
- Spiced Naan: Incorporate spices like cumin or coriander into the dough for added flavor.
Little Things that Matter
Here are a few tips to ensure your naan turns out perfect every time:
- Make sure your yeast is fresh for the best rise.
- Don’t skip the resting period; it helps develop the dough’s flavor and texture.
- Experiment with different flours, like whole wheat, for a nuttier flavor.
- Preheat your skillet or pan well to achieve those beautiful charred spots.
Make-Ahead & Storage
You can easily make naan ahead of time. Here’s how:
- Freezing: After cooking, let the naan cool completely. Place it in an airtight container or freezer bag, and freeze for up to 2 months.
- Reheating: To reheat, simply warm it in a skillet over medium heat or wrap it in foil and place it in a warm oven.
Handy Q&A
Can I use whole wheat flour instead of all-purpose flour?
Yes! You can substitute whole wheat flour, but keep in mind that the texture will be denser. You may need to adjust the water amount slightly.
What can I serve with naan?
Naan pairs well with a variety of dishes including curries, stews, or even as a base for flatbread pizzas. It’s also delicious with dips like hummus or tzatziki.
How do I know when my naan is cooked through?
Look for bubbles forming on the surface and a golden-brown color. The texture should be soft and slightly puffy.
Can I make naan without yeast?
Yes! You can use baking powder as a leavening agent instead of yeast. The texture will differ, but it will still be delicious!
That’s a Wrap
Making Homemade Naan (with step-by-step photos) is not just about the end product; it’s about the experience of creating something special in your kitchen. From the aroma of the dough rising to the satisfying feeling of pulling warm naan from the skillet, this recipe is sure to become a staple in your home cooking repertoire.
Get ready to impress your loved ones with your newfound naan-making skills. As you enjoy this fluffy bread, you’ll find that no store-bought naan can compare to the love and effort put into your homemade version. Happy baking!
Homemade Naan (with step-by-step photos)
Ingredients
Equipment
Method
- In a small bowl, combine 1 cup of warm water with 2 teaspoons of active dry yeast and 1 teaspoon of sugar. Stir gently and let it sit for about 5-10 minutes until it becomes frothy.
- In a large mixing bowl, combine 3 cups of all-purpose flour and 1 teaspoon of salt. Make a well in the center and pour in the yeast mixture along with ½ cup of plain yogurt and 2 tablespoons of olive oil.
- Using a dough scraper or your hands, mix until a shaggy dough forms. Transfer it to a floured surface and knead for about 8-10 minutes until smooth and elastic.
- Place the kneaded dough into a lightly oiled bowl, cover it with a damp dish towel, and let it rise in a warm area for about 1-2 hours, or until it doubles in size.
- Once the dough has risen, punch it down to release the air. Divide it into 6-8 equal portions, rolling each into a ball. Cover with a towel and let them rest for about 10 minutes.
- On a lightly floured surface, take one ball of dough and roll it out into an oval or teardrop shape, about ¼ inch thick. Repeat with the remaining dough balls.
- Heat a skillet or cast-iron pan over high heat. Once hot, carefully place a rolled-out naan in the pan. Cook for about 1-2 minutes or until bubbles start to form. Flip it over and cook the other side for another 1-2 minutes until golden brown.
- Remove the naan from the skillet and brush it with melted butter or sprinkle with garlic or herbs if desired. Repeat the cooking process for the remaining naan.
- Serve your delicious homemade naan warm with your favorite curry, dips, or just enjoy it plain.
Notes
- Make sure your yeast is fresh for the best rise.
- Don’t skip the resting period; it helps develop the dough’s flavor and texture.
- Preheat your skillet or pan well to achieve those beautiful charred spots.