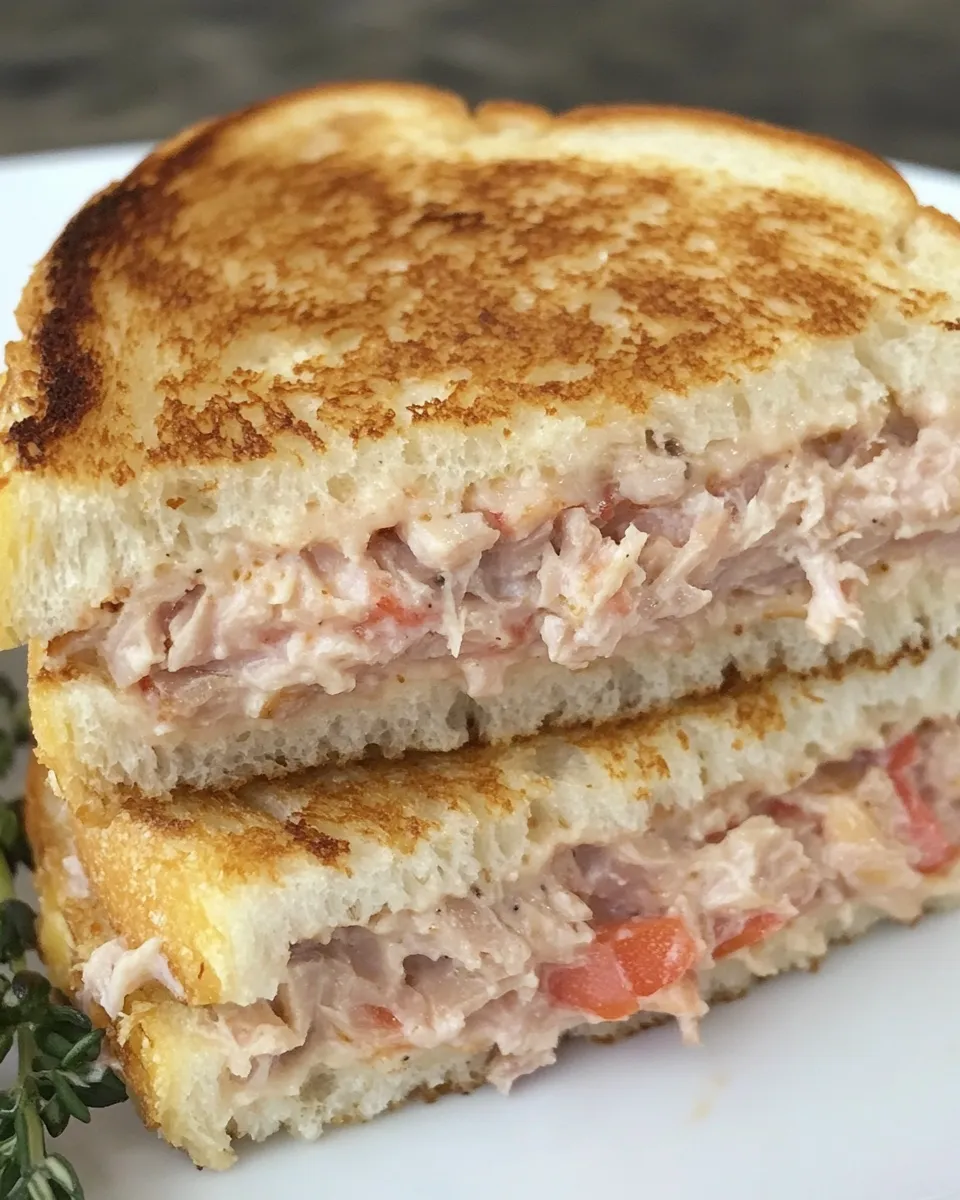
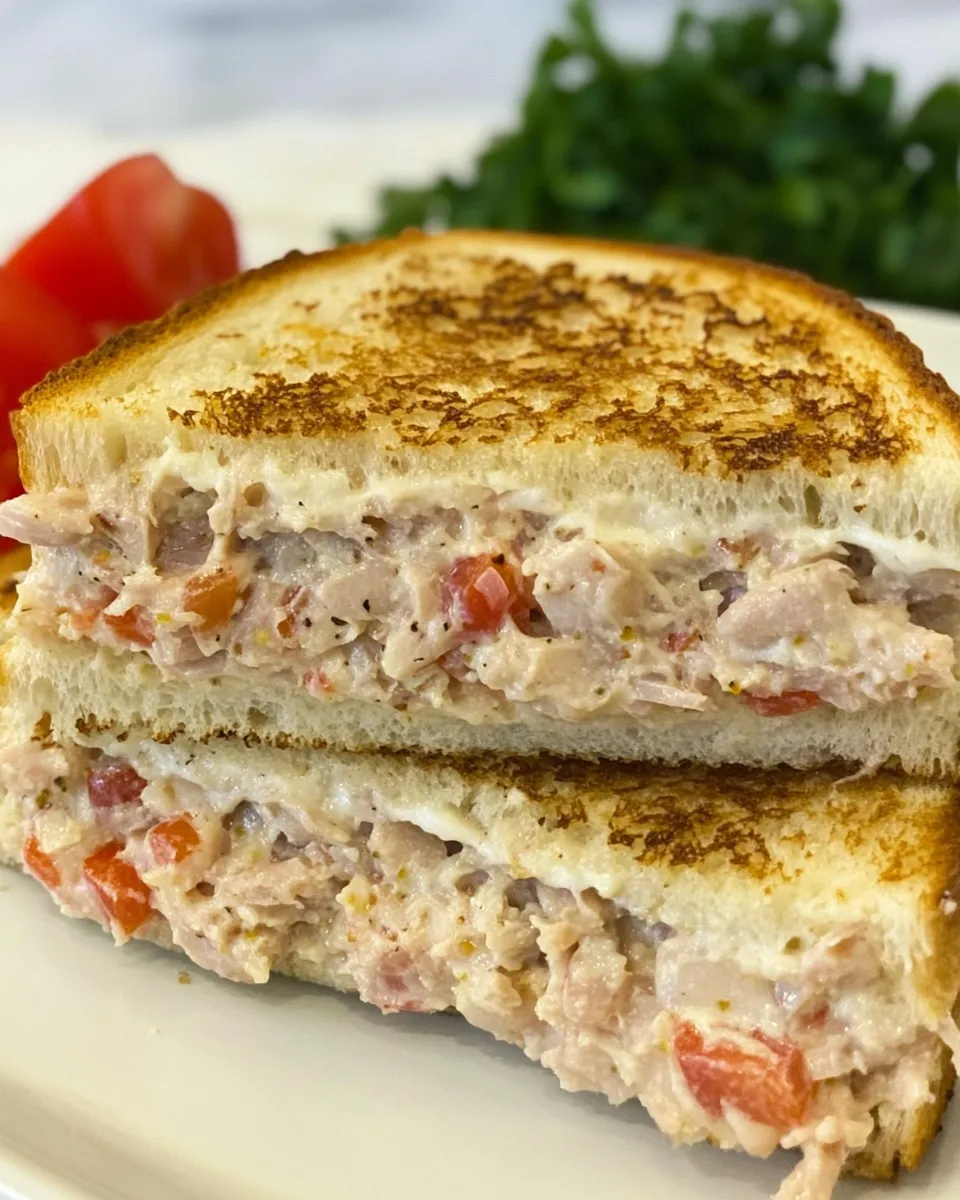
Classic Tuna Melt
There’s something undeniably comforting about a Classic Tuna Melt. This beloved sandwich combines tender tuna mixed with creamy mayonnaise and crisp vegetables, all melted together with gooey cheese. Whether you’re enjoying it for lunch or a quick dinner, it hits the spot every time. Plus, it’s incredibly easy to whip up, making it a perfect weeknight meal or a cozy snack.
The Upside of Classic Tuna Melt
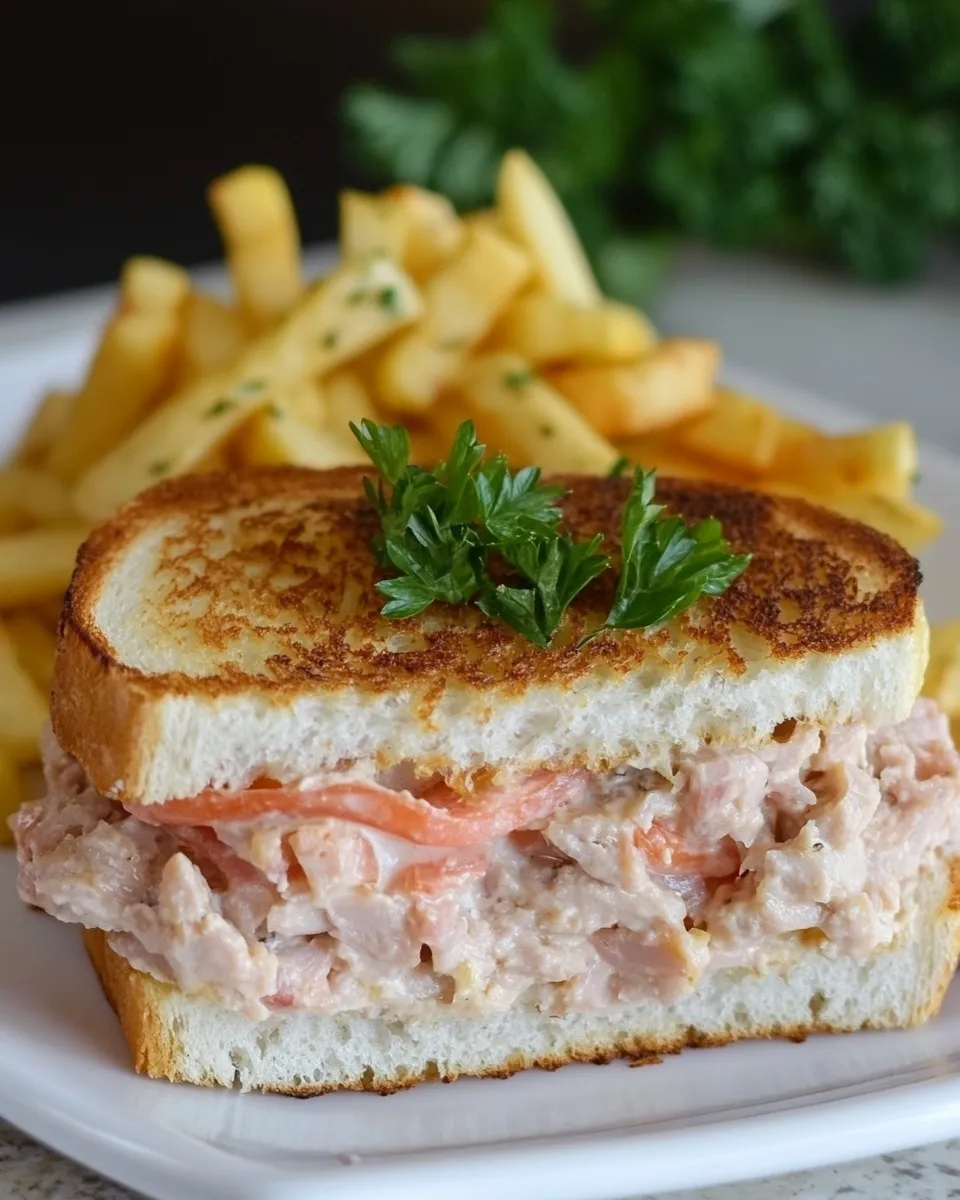
The beauty of a Classic Tuna Melt lies in its simplicity and versatility. Not only is it quick to prepare, but it also allows you to use pantry staples and customize it to your taste. The combination of creamy tuna, crunchy veggies, and melted cheese creates a delightful texture and flavor that can satisfy even the pickiest eaters. Serve it with a side of crispy chips or a fresh salad, and you’ve got a meal that’s sure to please.
Ingredient Checklist
- 1/3 cup mayonnaise – This is the creamy base that holds everything together.
- 1 celery rib, finely diced – For that satisfying crunch.
- 1/4 cup finely diced red onion – Adds a touch of sweetness and depth.
- 1 tablespoon sweet pickle relish, optional – A hint of sweetness (or omit if you prefer savory).
- 3 (2.6-ounce) pouches chunk light or albacore tuna – Use your preferred tuna for a protein punch.
- Pinch of celery seed, optional – For an extra layer of flavor.
- Salt and black pepper – To taste.
- 6 slices sturdy white bread – I recommend Pepperidge Farm for its texture and flavor.
- 1 1/2 tablespoons butter – For grilling the bread to golden perfection.
- 3 slices Swiss or provolone cheese – Melts beautifully for that cheesy goodness.
- 1 tomato, sliced – Provides freshness; place on paper towels to soak up excess water.
Equipment Breakdown
- Mixing bowl – For combining the tuna mixture.
- Spatula – For stirring and spreading.
- Skillet or frying pan – To grill the sandwich.
- Knife – For slicing vegetables and bread.
- Paper towels – To absorb excess moisture from the tomatoes.
Classic Tuna Melt — Do This Next
Step 1: Prepare the Tuna Mixture
In a mixing bowl, combine the mayonnaise, finely diced celery, red onion, and sweet pickle relish (if using). Stir until well mixed.
Step 2: Add the Tuna
Drain the tuna pouches and add the tuna to the bowl. Gently fold it into the mixture until everything is combined. Season with a pinch of celery seed, salt, and black pepper to taste.
Step 3: Assemble the Sandwiches
Lay out the bread slices, and evenly distribute the tuna mixture onto 3 slices. Top each with a slice of tomato and a slice of cheese. Place the remaining slices of bread on top.
Step 4: Grill the Sandwiches
In a skillet over medium heat, melt the butter. Once melted, place the assembled sandwiches in the skillet. Grill for about 3-4 minutes on each side, or until the bread is golden brown and the cheese is melted.
Step 5: Serve and Enjoy
Once the sandwiches are golden and gooey, remove them from the skillet. Cut them in half and serve warm, perhaps with a side of pickles or chips for that perfect crunch!
Make It Your Way
- Try adding chopped hard-boiled eggs for extra protein.
- Swap out the tuna for canned salmon for a different flavor.
- Experiment with different cheeses like cheddar or pepper jack for a kick.
- Add sliced avocado or spinach for a fresh twist.
Troubles You Can Avoid
To ensure your Classic Tuna Melt comes out perfectly every time, keep these tips in mind:
- Drain the tuna well to prevent a soggy sandwich.
- Don’t overload the sandwich with filling; it can be hard to grill.
- Let the tomato slices sit on paper towels to remove excess moisture.
- Use a sturdy bread that can hold up to the filling and grilling.
Make Ahead Like a Pro
Want to make your Classic Tuna Melt even easier? Prepare the tuna mixture ahead of time and store it in the refrigerator for up to two days. When you’re ready to eat, simply assemble the sandwiches and grill them right before serving. This is perfect for busy weeknights or unexpected lunch guests!
Handy Q&A
Can I use fresh tuna instead of canned?
Absolutely! If you prefer fresh tuna, grill or sear it and then flake it into the mixture. Just remember to season it well, as canned tuna is already seasoned.
What can I serve with a Classic Tuna Melt?
A fresh garden salad, crispy potato chips, or a bowl of soup are great accompaniments to a Classic Tuna Melt. They add a nice balance to the meal.
Can I freeze Classic Tuna Melt sandwiches?
While the tuna mixture can be frozen, it’s best to assemble and grill the sandwiches fresh. Freezing can change the texture of the bread and cheese.
How do I store leftovers?
If you have any leftover sandwiches, store them in an airtight container in the refrigerator for up to 2 days. Reheat in the skillet for the best texture.
Wrap-Up
In just a few simple steps, you can whip up a Classic Tuna Melt that is not only satisfying but also customizable to your taste. With a handful of ingredients and minimal equipment, it’s a meal you can feel good about making. Whether you enjoy it as is or put your own spin on it, this comforting sandwich is sure to become a staple in your kitchen. So, gather your ingredients, fire up that skillet, and treat yourself to a delicious Classic Tuna Melt that’s perfect for any occasion!

Classic Tuna Melt
Ingredients
Equipment
Method
- In a mixing bowl, combine the mayonnaise, finely diced celery, red onion, and sweet pickle relish (if using). Stir until well mixed.
- Drain the tuna pouches and add the tuna to the bowl. Gently fold it into the mixture until everything is combined. Season with a pinch of celery seed, salt, and black pepper to taste.
- Lay out the bread slices, and evenly distribute the tuna mixture onto 3 slices. Top each with a slice of tomato and a slice of cheese. Place the remaining slices of bread on top.
- In a skillet over medium heat, melt the butter. Once melted, place the assembled sandwiches in the skillet. Grill for about 3-4 minutes on each side, or until the bread is golden brown and the cheese is melted.
- Once the sandwiches are golden and gooey, remove them from the skillet. Cut them in half and serve warm, perhaps with a side of pickles or chips for that perfect crunch!
Notes
- Drain the tuna well to prevent a soggy sandwich.
- Don’t overload the sandwich with filling; it can be hard to grill.
- Let the tomato slices sit on paper towels to remove excess moisture.