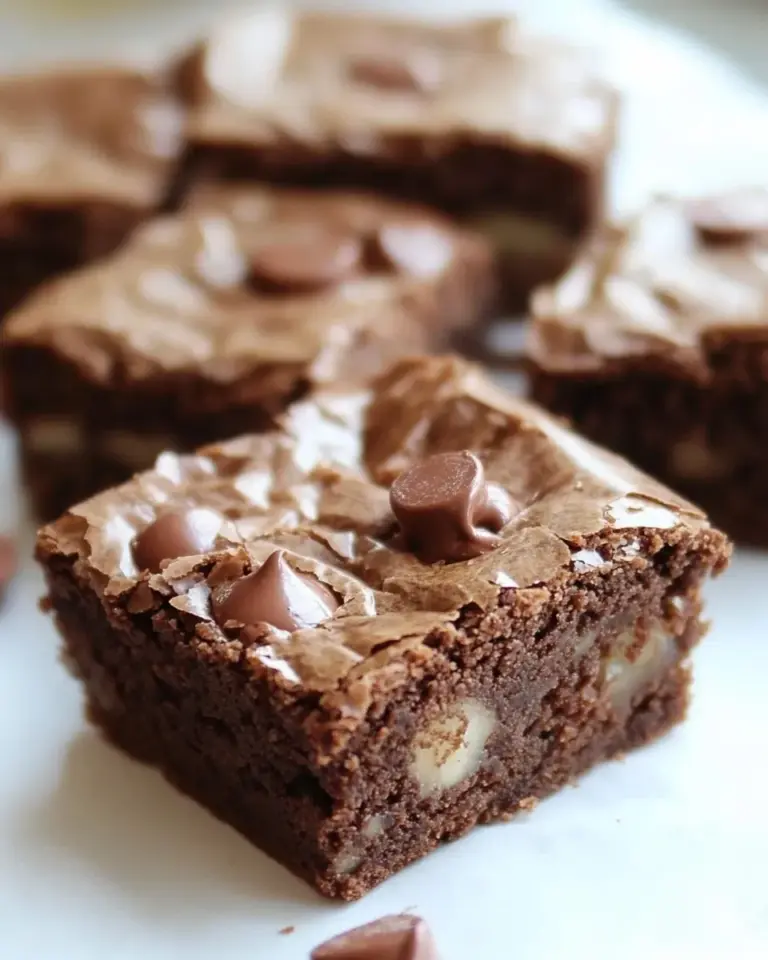
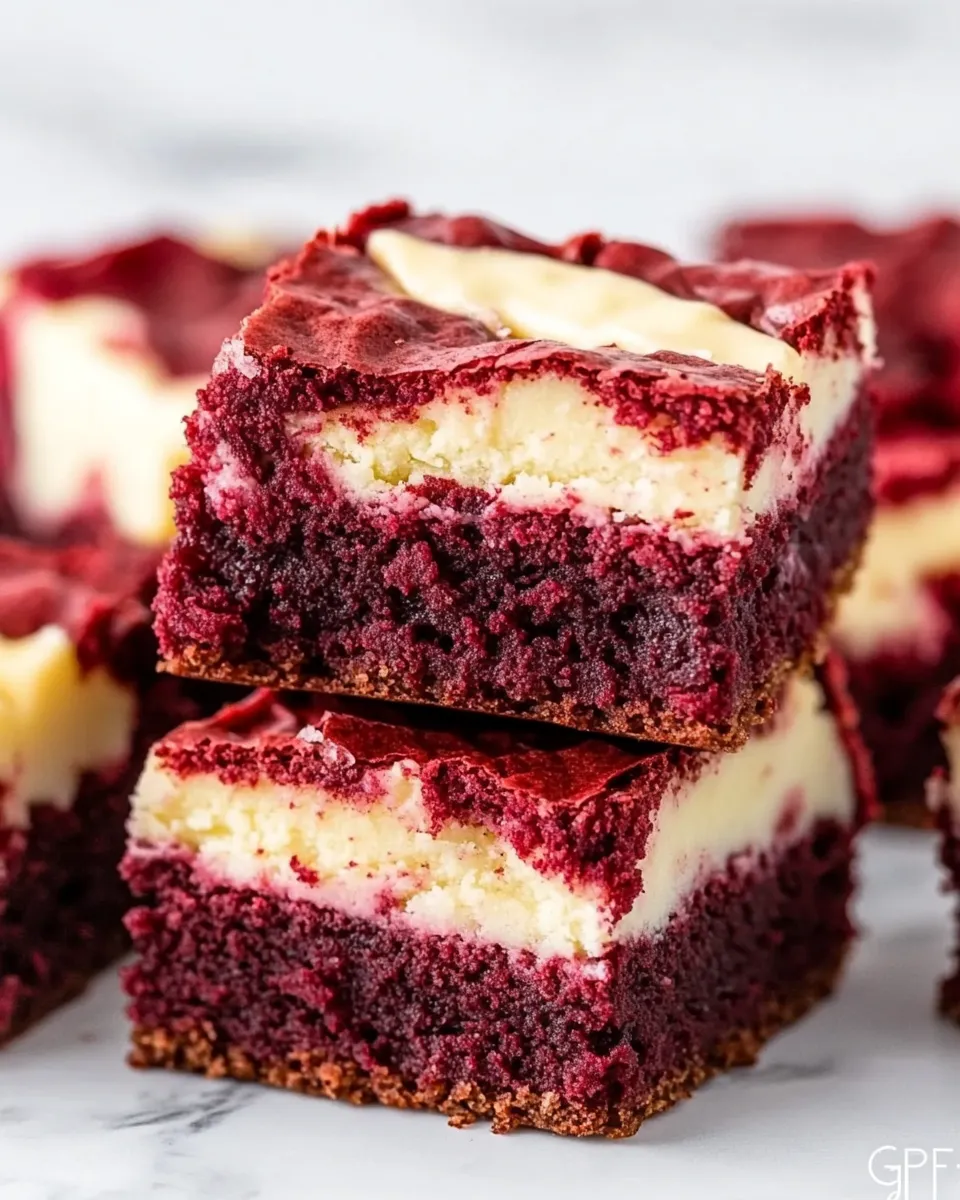
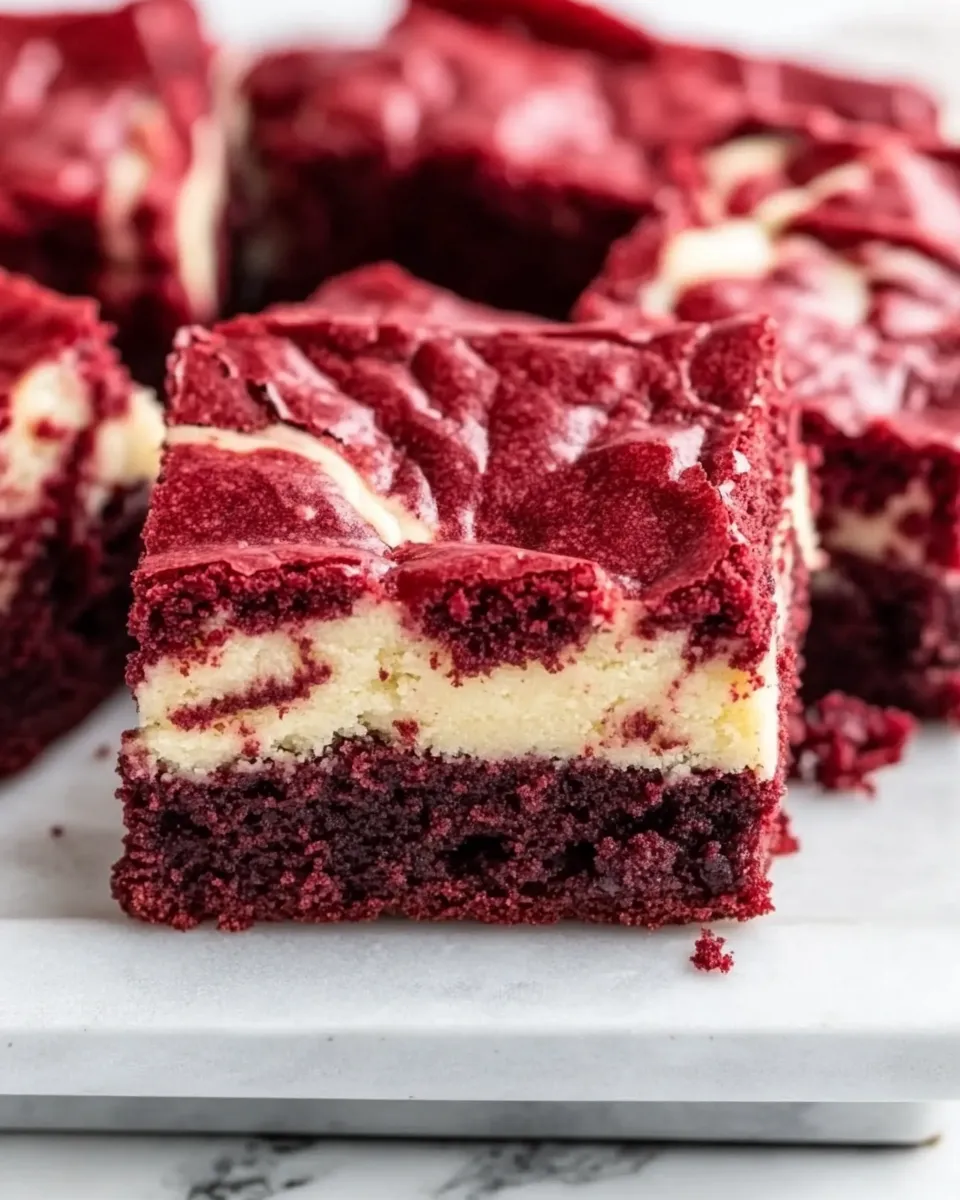
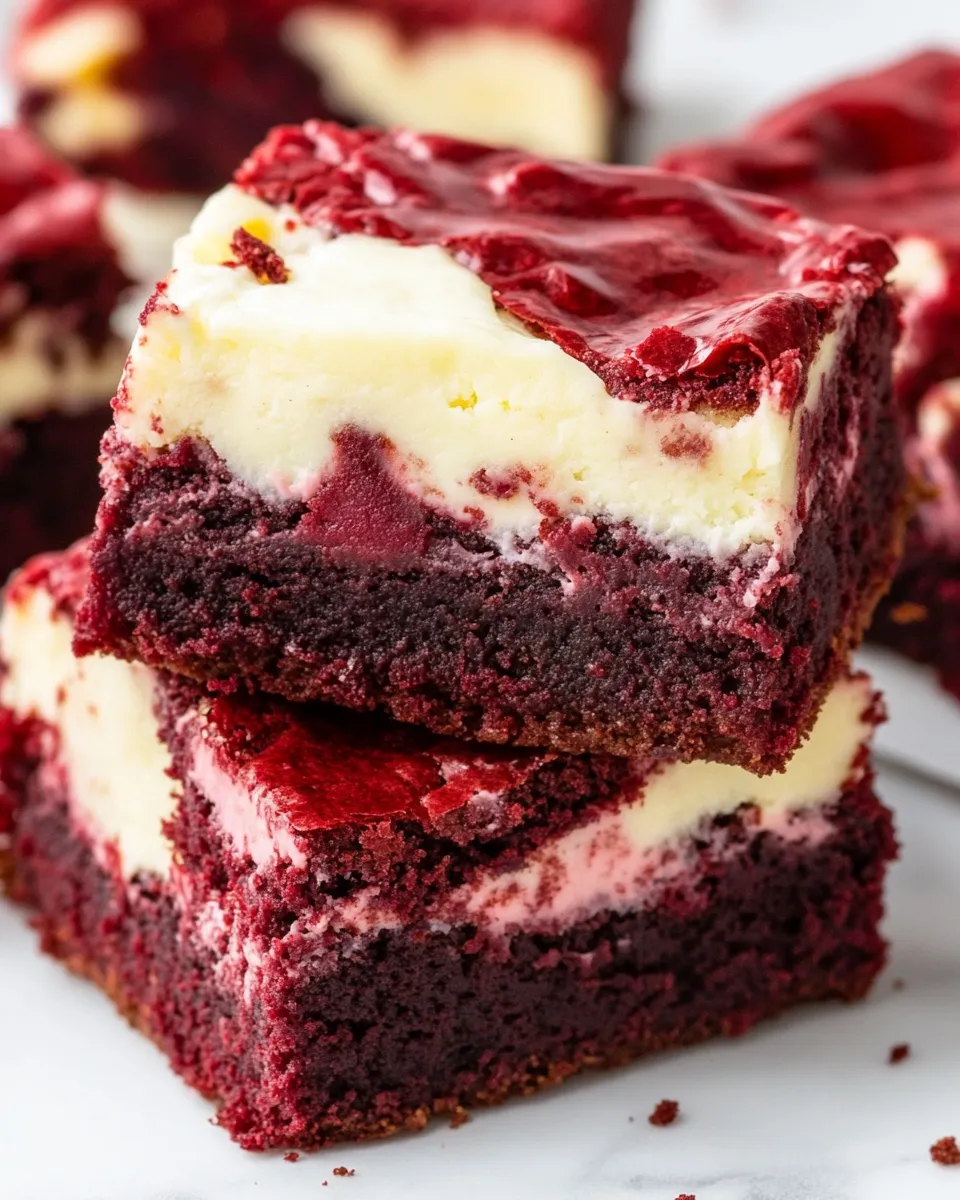
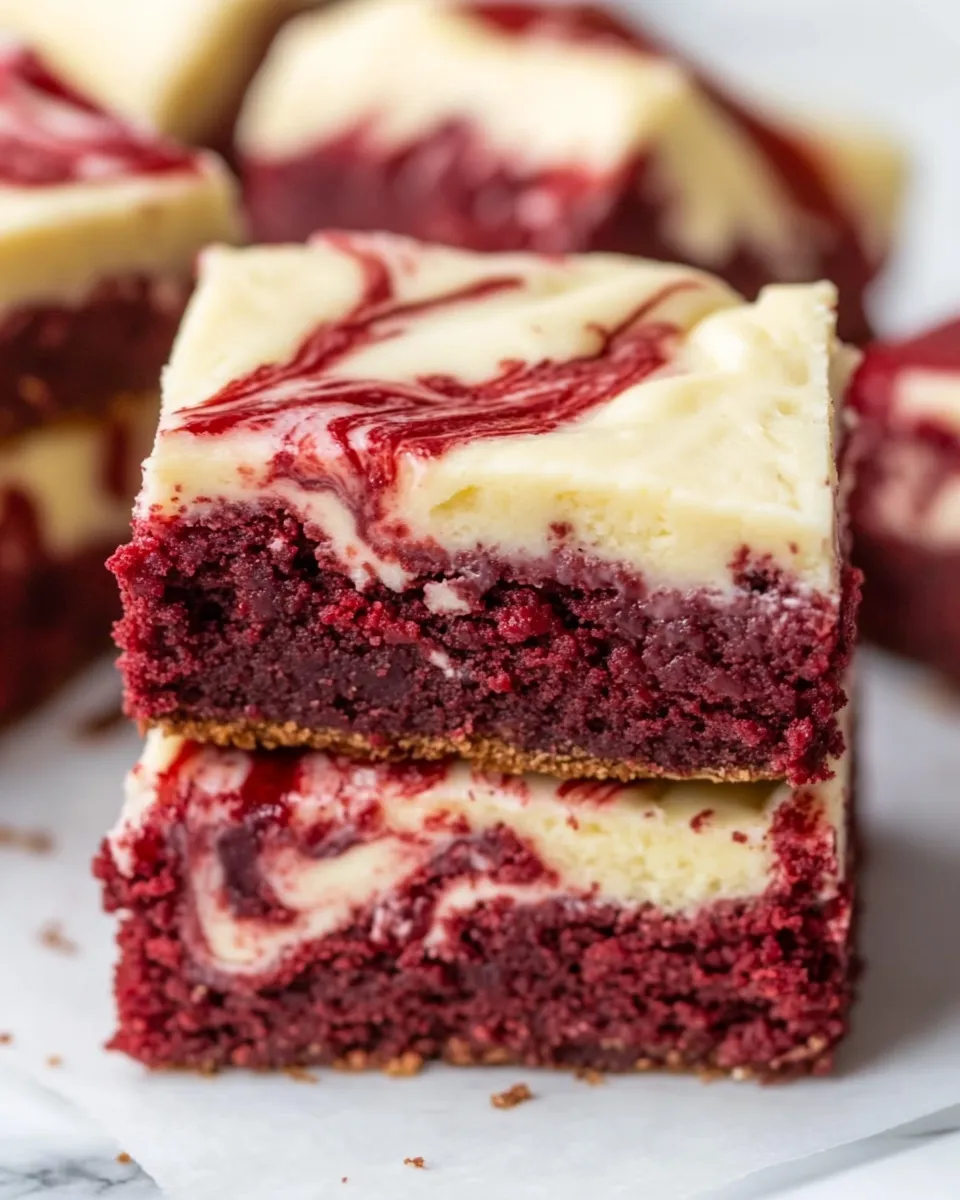
GF Red Velvet Brownies
There’s something undeniably enchanting about red velvet treats. The rich, velvety texture combined with the vibrant color makes them a showstopper at any gathering. These GF Red Velvet Brownies are no exception! They are chewy, fudgy, and packed with flavor, all while being gluten-free. Whether you’re hosting a party or simply indulging in a sweet craving, these brownies will not disappoint. Let’s dive right into the details of this delightful treat!
Why It’s My Go-To
What makes these GF Red Velvet Brownies my go-to recipe? It’s the perfect balance of rich chocolate flavor and the subtle tang of cream cheese. They are easy to whip up, require minimal ingredients, and are always a hit. Plus, the gluten-free aspect means everyone can enjoy them, making them a fantastic dessert for gatherings. These brownies are perfect for birthdays, holidays, or just because!
Gather These Ingredients
To create these luscious brownies, you will need the following ingredients:
- ½ cup unsalted butter, melted – This adds richness and moisture to the brownies.
- 1 cup granulated sugar (200 grams) – For sweetness and structure.
- 2 teaspoons vanilla extract – Enhances the flavor profile.
- 1 tablespoon red food coloring – Gives those brownies that signature red hue.
- 1 teaspoon vinegar – Reacts with the baking soda to help the brownies rise.
- 2 large eggs – Binds the ingredients together.
- ¾ cup 1:1 gluten-free flour (93 grams, I used King Arthur Measure for Measure) – The secret to making this recipe gluten-free.
- ¼ cup cocoa powder (20 grams) – Adds depth of flavor and richness.
- ½ teaspoon salt – Balances the sweetness.
- 4 ounces cream cheese, softened to room temperature (113 grams) – For the cream cheese swirl that elevates these brownies.
- 1 egg yolk – Helps to create a smooth cream cheese filling.
- 3 tablespoons granulated sugar (38 grams) – Sweetens the cream cheese mixture.
Gear Checklist
Before you begin baking, gather the necessary equipment:
- Mixing bowls – For combining your brownie and cream cheese mixtures.
- Whisk – To mix your ingredients smoothly.
- Rubber spatula – Ideal for scraping down the sides of the bowls.
- 9×9 inch baking pan – Perfect size for these brownies.
- Parchment paper – For easy removal of the brownies from the pan.
- Oven – The essential tool for baking these delicious treats!
How to Prepare GF Red Velvet Brownies
Follow these simple steps to create your GF Red Velvet Brownies:
Step 1: Preheat the Oven
Preheat your oven to 350°F (175°C). This ensures that the brownies bake evenly.
Step 2: Prepare the Baking Pan
Line your 9×9 inch baking pan with parchment paper, leaving some overhang for easy removal later. This also helps with cleanup.
Step 3: Make the Brownie Batter
In a large mixing bowl, combine the melted unsalted butter and granulated sugar. Whisk until smooth. Then, add in the vanilla extract, red food coloring, and vinegar. Mix until well combined.
Step 4: Add the Eggs
Crack in the eggs, one at a time, mixing well after each addition. The mixture should appear glossy.
Step 5: Combine Dry Ingredients
In another bowl, whisk together the gluten-free flour, cocoa powder, and salt. Gradually add this dry mixture to the wet ingredients. Stir until just combined, being careful not to overmix.
Step 6: Prepare the Cream Cheese Swirl
In a separate bowl, beat together the softened cream cheese, egg yolk, and 3 tablespoons of granulated sugar until smooth and creamy.
Step 7: Layer and Swirl
Pour half of the brownie batter into the prepared pan. Spread it out evenly. Next, dollop the cream cheese mixture over the brownie layer, and then add the remaining brownie batter on top. Use a knife or toothpick to swirl the cream cheese mixture into the brownies for a marbled effect.
Step 8: Bake
Bake the brownies in the preheated oven for 25-30 minutes, or until a toothpick inserted into the center comes out with a few moist crumbs.
Step 9: Cool and Cut
Once baked, remove the brownies from the oven and let them cool in the pan for about 15 minutes. Then, lift them out using the parchment paper and let them cool completely on a wire rack before cutting into squares.
Better-for-You Options
If you’re looking to make these brownies a bit healthier, consider these options:
- Use coconut oil instead of unsalted butter for a dairy-free alternative.
- Reduce the sugar by using a sugar substitute like coconut sugar or monk fruit sweetener.
- Incorporate chopped nuts or dark chocolate chips for added texture and flavor.
- Use a reduced-fat cream cheese to cut down on calories.
Method to the Madness
These GF Red Velvet Brownies come together effortlessly, making them perfect for both novice and experienced bakers. The key lies in mixing the wet and dry ingredients separately before combining them. This method ensures that your brownies are perfectly mixed without becoming tough or overworked. The cream cheese swirl adds a delightful tanginess that complements the sweetness of the brownies, making every bite a treat.
Meal Prep & Storage Notes
To keep your GF Red Velvet Brownies fresh and delicious:
- Store the brownies in an airtight container at room temperature for up to 3 days.
- For longer storage, place them in the refrigerator, where they will last for up to a week.
- You can also freeze the brownies! Wrap them tightly in plastic wrap and then in foil. They will keep in the freezer for up to 2 months. Simply thaw at room temperature before serving.
Your Questions, Answered
Can I use a different gluten-free flour blend?
Absolutely! While I recommend King Arthur Measure for Measure for its consistency and quality, you can use any 1:1 gluten-free flour blend. Just ensure it contains xanthan gum for the best results.
What can I substitute for cream cheese?
If you’re looking for a dairy-free alternative, try using a vegan cream cheese or a cashew cream made from soaked cashews blended with a little lemon juice for tanginess.
How do I know when my brownies are done baking?
The best way to check for doneness is to insert a toothpick into the center. If it comes out with a few moist crumbs, your brownies are perfect. If it comes out wet with batter, they need more time; if it comes out clean, they may be overbaked.
Can I add mix-ins like nuts or chocolate chips?
Yes! Feel free to fold in some chocolate chips or chopped nuts into the brownie batter before pouring it into the pan for added flavor and texture.
Final Thoughts
These GF Red Velvet Brownies are not just a feast for the eyes but also a delightful treat for your taste buds. The combination of rich chocolate and tangy cream cheese creates a symphony of flavors that will have everyone asking for seconds. Whether you’re baking for yourself or a crowd, this recipe is sure to impress. Enjoy the process, savor each bite, and share the love with those around you. Happy baking!
GF Red Velvet Brownies
Ingredients
Equipment
Method
- Preheat your oven to 350°F (175°C). This ensures that the brownies bake evenly.
- Line your 9x9 inch baking pan with parchment paper, leaving some overhang for easy removal later.
- In a large mixing bowl, combine the melted unsalted butter and granulated sugar. Whisk until smooth. Then, add in the vanilla extract, red food coloring, and vinegar. Mix until well combined.
- Crack in the eggs, one at a time, mixing well after each addition. The mixture should appear glossy.
- In another bowl, whisk together the gluten-free flour, cocoa powder, and salt. Gradually add this dry mixture to the wet ingredients. Stir until just combined, being careful not to overmix.
- In a separate bowl, beat together the softened cream cheese, egg yolk, and 3 tablespoons of granulated sugar until smooth and creamy.
- Pour half of the brownie batter into the prepared pan. Spread it out evenly. Next, dollop the cream cheese mixture over the brownie layer, and then add the remaining brownie batter on top. Use a knife or toothpick to swirl the cream cheese mixture into the brownies for a marbled effect.
- Bake the brownies in the preheated oven for 25-30 minutes, or until a toothpick inserted into the center comes out with a few moist crumbs.
- Once baked, remove the brownies from the oven and let them cool in the pan for about 15 minutes. Then, lift them out using the parchment paper and let them cool completely on a wire rack before cutting into squares.
Notes
- Store the brownies in an airtight container at room temperature for up to 3 days.
- For longer storage, refrigerate them for up to a week.
- Freeze brownies tightly wrapped in plastic wrap and foil for up to 2 months; thaw at room temperature before serving.