Homemade Chicken Tenders
There’s something undeniably comforting about biting into a crispy, juicy chicken tender. Whether you’re whipping them up for family dinner, a gathering with friends, or just a late-night snack, Homemade Chicken Tenders offer a delightful experience that store-bought versions simply can’t match. With a golden-brown crust and tender, flavorful meat, these tenders are not only delicious but also easy to make. Plus, you get to control the ingredients, making them a healthier option for your culinary adventures. Let’s dive into the wonderful world of homemade chicken tenders!
Why Homemade Chicken Tenders is Worth Your Time

Homemade Chicken Tenders are well worth the time and effort for several reasons. First and foremost, they taste infinitely better than anything you can buy from the freezer aisle. The freshness of the ingredients shines through, creating an irresistible flavor that will have you coming back for more. Additionally, making them at home allows you to customize the seasoning and breading to suit your taste preferences. You can also control the cooking method, ensuring your tenders are cooked to perfection without excessive oil or preservatives. Finally, this recipe is a fantastic opportunity to bond with family or friends, making the cooking process part of the fun!
What to Buy
Before you start, make sure you have the following ingredients on hand:
- 1 pound chicken tenderloins or boneless, skinless chicken breasts cut into 1-inch thick strips
- 1 cup all-purpose flour
- 1 teaspoon seasoned salt (for seasoning flour)
- 3 large eggs
- 1/4 cup water
- 1 teaspoon seasoned salt (for seasoning eggs)
- 2 cups plain panko bread crumbs
- 1 teaspoon seasoned salt (for seasoning breading)
- Cooking spray (olive oil or avocado oil recommended)
Before You Start: Equipment
Gather the following equipment to streamline your cooking process:
- Large mixing bowls: For preparing the flour, egg, and breadcrumb mixtures.
- Shallow dishes: Ideal for dredging the chicken tenders.
- Baking sheet: To bake the tenders once breaded.
- Oven: To cook the tenders to a crispy finish.
- Cooking spray: To help achieve that golden-brown crust.
From Start to Finish: Homemade Chicken Tenders
Step 1: Prepare the Chicken
Start by washing your chicken tenderloins or cut chicken breasts under cold water. Pat them dry with paper towels to remove excess moisture. This ensures the breading adheres well.
Step 2: Set Up the Dredging Station
In three separate shallow dishes, prepare your dredging station. In the first dish, combine the all-purpose flour and 1 teaspoon of seasoned salt. In the second dish, whisk together the eggs, water, and the additional teaspoon of seasoned salt. Finally, place the panko breadcrumbs in the third dish and mix in the last teaspoon of seasoned salt.
Step 3: Dredge the Chicken
Take one chicken tender, dip it into the flour mixture, ensuring it’s fully coated. Shake off any excess flour, then dip it into the egg mixture, allowing the excess to drip off. Finally, coat the chicken in the panko breadcrumbs, pressing gently to ensure an even coating. Repeat this process for all the chicken pieces.
Step 4: Prepare for Baking
Preheat your oven to 400°F (200°C). Line a baking sheet with parchment paper for easy cleanup, and lightly spray it with cooking spray to prevent sticking.
Step 5: Bake the Chicken Tenders
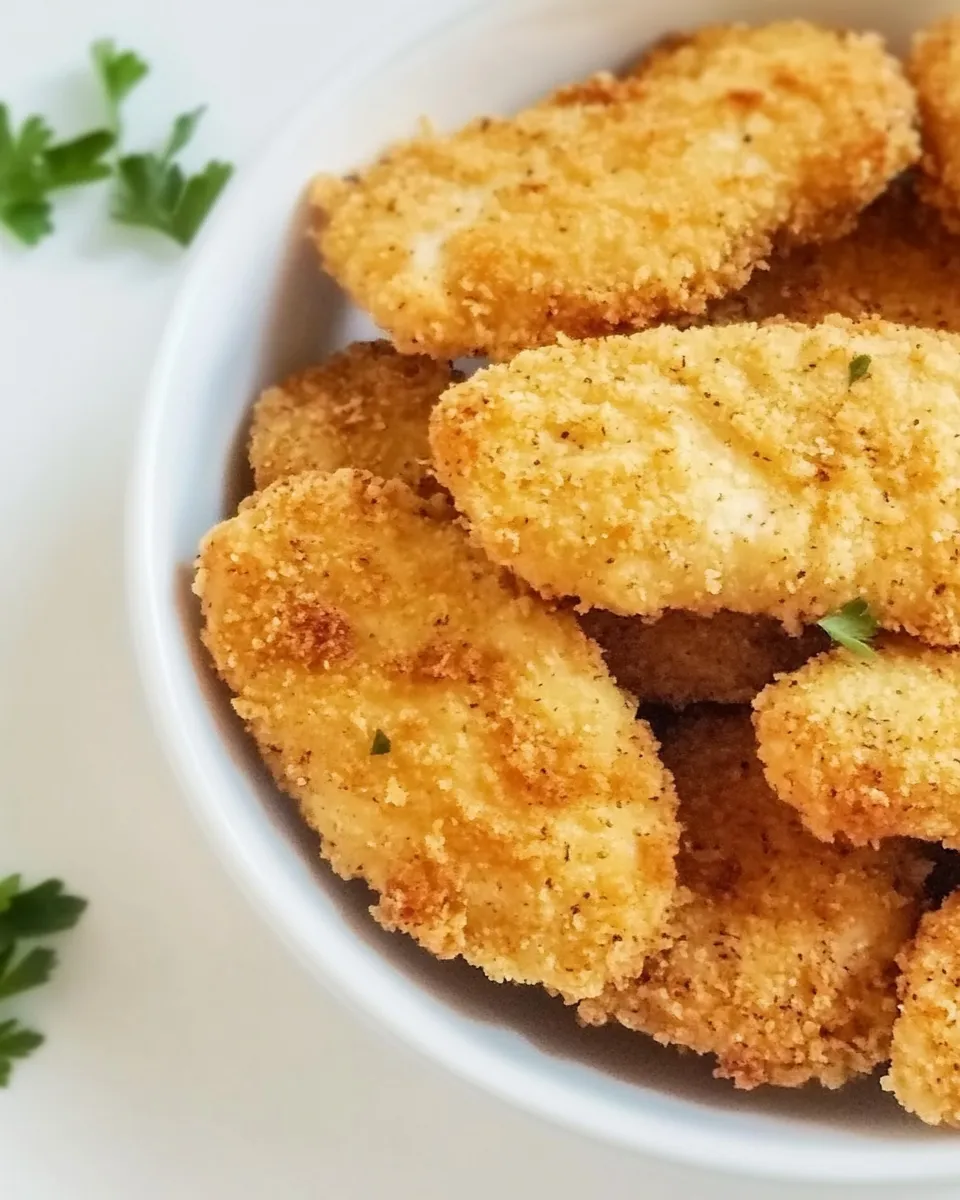
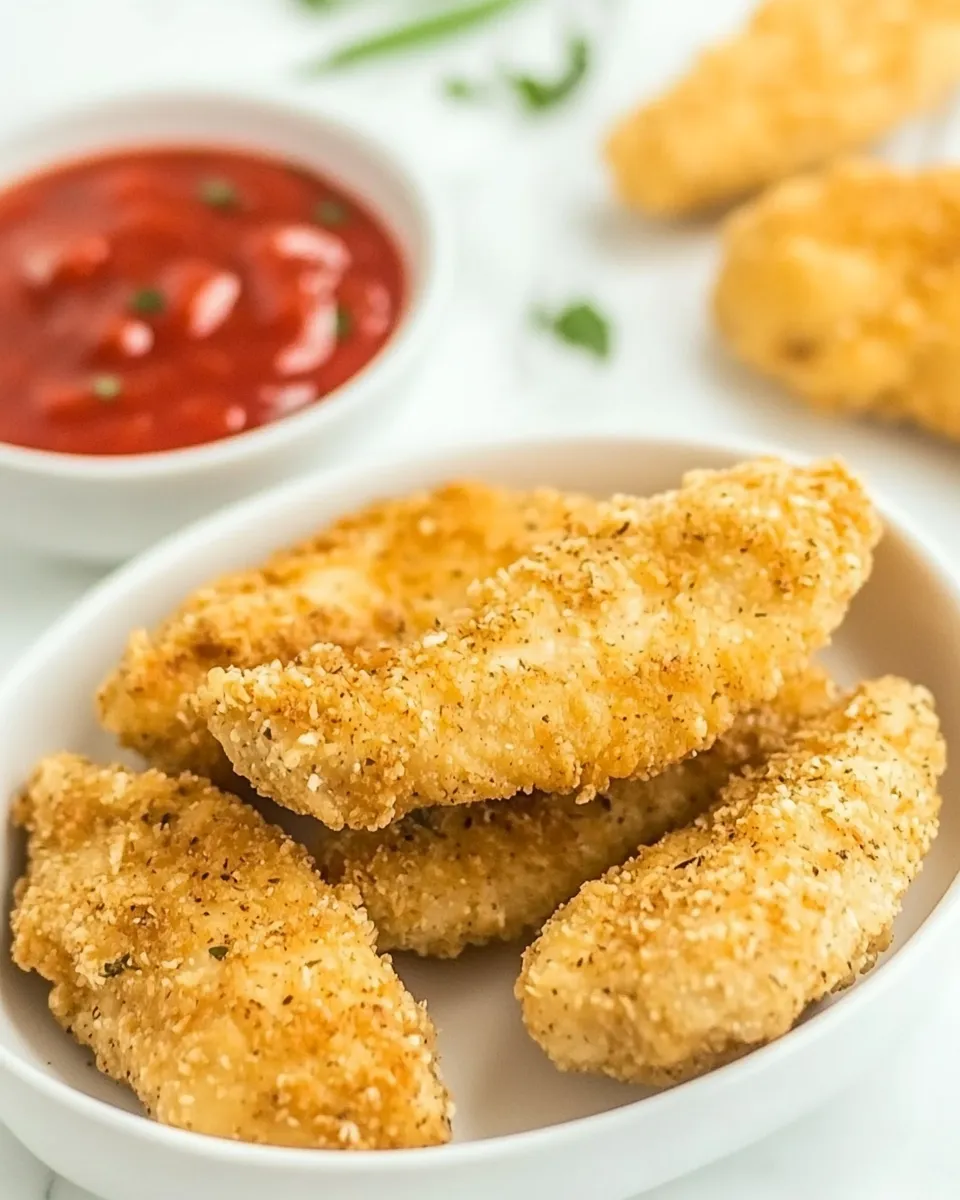
Place the breaded chicken tenders on the prepared baking sheet in a single layer. Lightly spray the tops with cooking spray to help them crisp up in the oven. Bake for 15-20 minutes, flipping halfway through, until the chicken is golden brown and cooked through (internal temperature should reach 165°F or 74°C).
Step 6: Serve and Enjoy
Once cooked, remove the chicken tenders from the oven and let them cool slightly. Serve with your favorite dipping sauces, such as honey mustard, ranch, or barbecue sauce. Enjoy your homemade chicken tenders as a delightful snack or part of a meal!
Ingredient Flex Options
Feel free to mix things up with these ingredient flex options:
- Gluten-Free Option: Substitute all-purpose flour with gluten-free flour and use gluten-free panko breadcrumbs.
- Spicy Kick: Add cayenne pepper or paprika to the flour mixture for a bit of heat.
- Herb Infusion: Mix dried herbs like oregano or thyme into the panko breadcrumbs for added flavor.
- Cheesy Flavor: Add grated Parmesan cheese to the breadcrumb mixture for a cheesy twist.
Avoid These Mistakes
To ensure your Homemade Chicken Tenders come out perfectly every time, keep these common mistakes in mind:
- Skipping the drying step: Make sure to thoroughly dry your chicken; moisture can prevent the breading from sticking.
- Overcrowding the baking sheet: Give each tender space to breathe to ensure they cook evenly and get crispy.
- Not preheating the oven: Baking in a preheated oven ensures the tenders cook properly and achieve that golden brown color.
- Using the wrong cooking spray: Avoid using non-stick spray that is not suitable for high temperatures, as it can affect the crispiness.
Keep-It-Fresh Plan
To keep your Homemade Chicken Tenders fresh and delicious, consider the following tips:
Store any leftovers in an airtight container in the refrigerator for up to 3 days. To reheat, place them in the oven at 350°F (175°C) for about 10-15 minutes until warmed through. This method helps maintain their crispy texture. If you want to freeze them, place the cooked tenders in a single layer on a baking sheet, freeze until solid, and then transfer them to a freezer-safe bag. They can be kept in the freezer for up to 2 months. Reheat directly from frozen in the oven.
Helpful Q&A
Can I use chicken thighs instead of tenderloins?
Yes, chicken thighs can be used instead of tenderloins. Just ensure they are boneless and skinless, and cut into strips of similar size for even cooking.
Can I fry the chicken tenders instead of baking?
Absolutely! If you prefer frying, heat oil in a deep skillet or fryer to 350°F (175°C) and fry the tenders in batches until golden brown and cooked through, about 3-4 minutes per side.
What dipping sauces go well with chicken tenders?
Popular dipping sauces include honey mustard, ranch dressing, barbecue sauce, and sweet and sour sauce. You can also create your own signature sauce!
How can I make these tenders healthier?
To make them healthier, you can use whole wheat flour and bake instead of frying. Additionally, consider using less oil or a cooking spray that is lower in calories.
The Last Word
Homemade Chicken Tenders are a fantastic meal option that can please everyone at the table. With simple ingredients and straightforward steps, you can create a dish that’s both satisfying and delicious. The key is in the preparation and the attention to detail, ensuring every bite is tender and flavorful. Whether enjoyed as a snack or as part of a larger meal, these tenders are sure to become a favorite in your household. So roll up your sleeves, gather your ingredients, and get ready to impress with your culinary skills!
There’s nothing quite like the satisfaction of creating something delicious from scratch. With this Homemade Chicken Tenders recipe, you’ll not only enjoy a tasty dish but also the joy of preparing it yourself. Don’t hesitate to experiment with flavors and make this recipe your own. Enjoy!

Homemade Chicken Tenders
Ingredients
Equipment
Method
- Start by washing your chicken tenderloins or cut chicken breasts under cold water. Pat them dry with paper towels to remove excess moisture.
- In three separate shallow dishes, prepare your dredging station. In the first dish, combine the all-purpose flour and 1 teaspoon of seasoned salt. In the second dish, whisk together the eggs, water, and the additional teaspoon of seasoned salt. Finally, place the panko breadcrumbs in the third dish and mix in the last teaspoon of seasoned salt.
- Take one chicken tender, dip it into the flour mixture, ensuring it’s fully coated. Shake off any excess flour, then dip it into the egg mixture, allowing the excess to drip off. Finally, coat the chicken in the panko breadcrumbs, pressing gently to ensure an even coating. Repeat this process for all the chicken pieces.
- Preheat your oven to 400°F (200°C). Line a baking sheet with parchment paper for easy cleanup, and lightly spray it with cooking spray.
- Place the breaded chicken tenders on the prepared baking sheet in a single layer. Lightly spray the tops with cooking spray. Bake for 15-20 minutes, flipping halfway through, until the chicken is golden brown and cooked through (internal temperature should reach 165°F or 74°C).
- Once cooked, remove the chicken tenders from the oven and let them cool slightly. Serve with your favorite dipping sauces.
Notes
- Store leftovers in an airtight container for up to 3 days.
- Reheat in the oven to maintain crispiness.
- For freezing, place cooked tenders in a single layer, freeze until solid, and transfer to a freezer-safe bag.