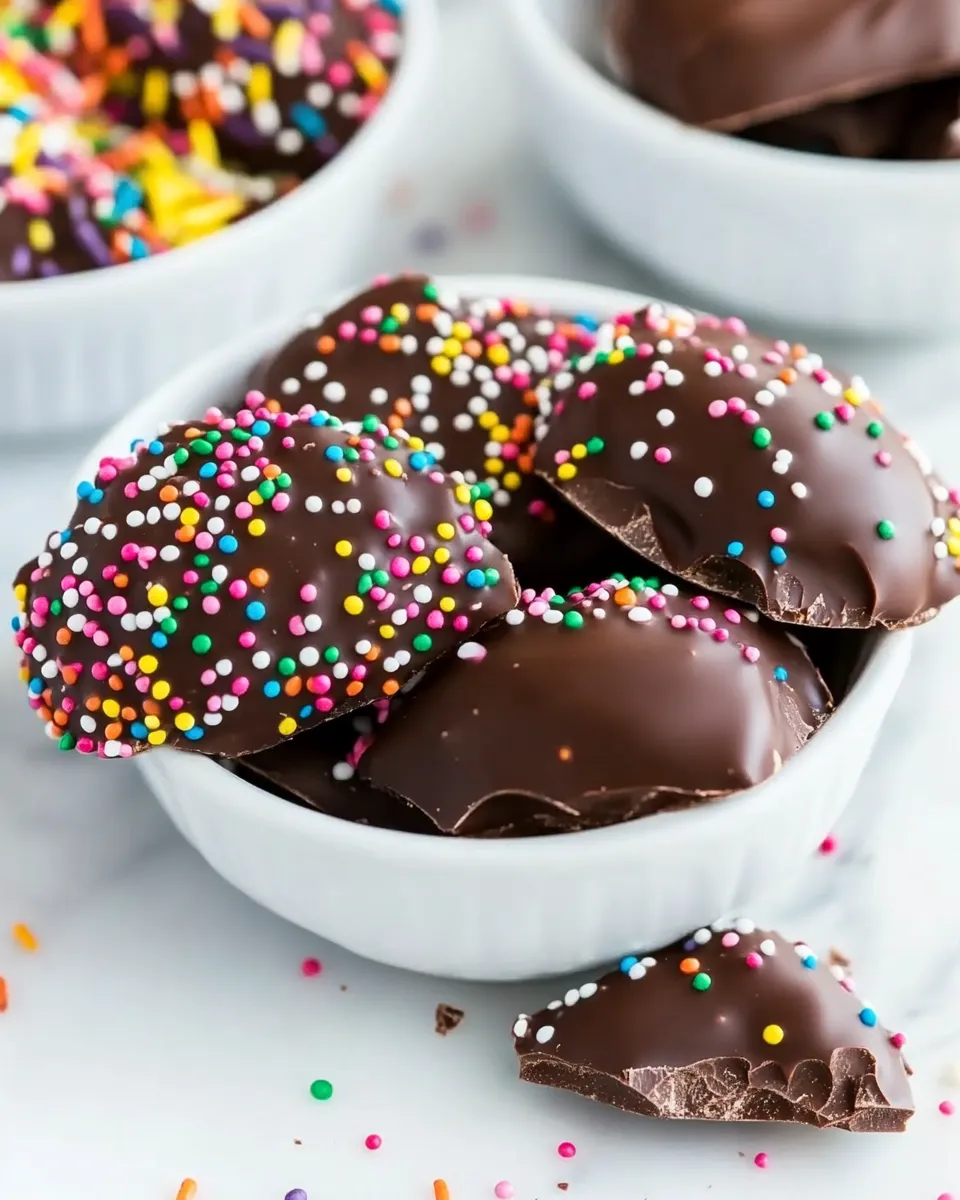
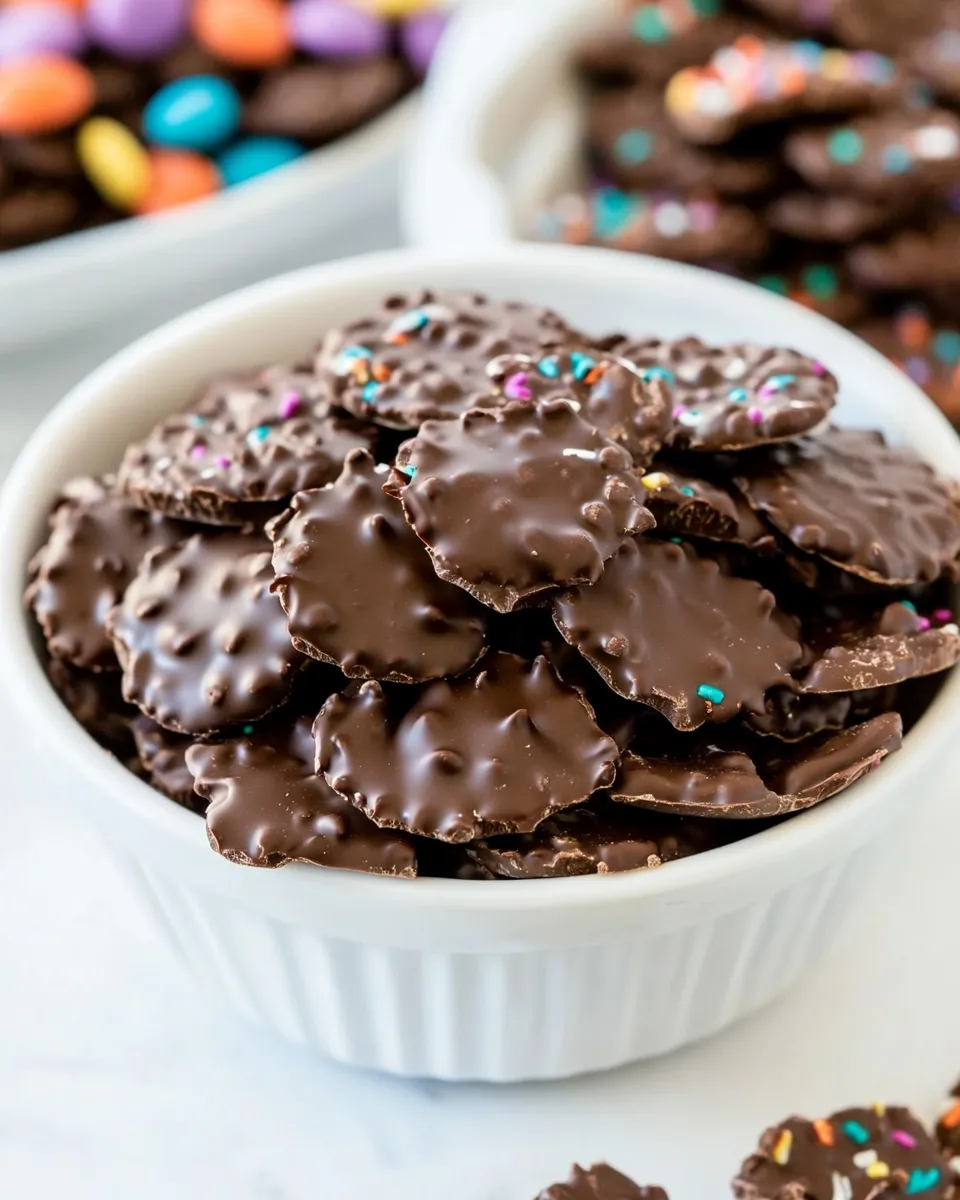
Chocolate Covered Pringles
Are you ready to take your snack game to a whole new level? Chocolate Covered Pringles are the perfect blend of sweet and salty, making them an irresistible treat for any occasion. This delightful recipe combines the crunch of classic Pringles with rich, velvety chocolate and a sprinkle of colorful fun. Whether you’re gearing up for a game day celebration or simply indulging in a sweet craving, these Chocolate Covered Pringles are sure to impress your friends and family. Let’s dive into this deliciously unique recipe!
What You’ll Love About This Recipe
Chocolate Covered Pringles are not just a snack; they’re an experience! Here’s what makes this recipe a must-try:
- Sweet and Salty Delight: The combination of chocolate and salty chips creates a mouthwatering contrast that keeps you reaching for more.
- Easy to Make: With just a few simple ingredients, you’ll whip these up in no time.
- Customizable: You can decorate them for any occasion, making them perfect for parties or holidays.
- Fun to Eat: The crunchy texture paired with creamy chocolate makes for a delightful snacking experience.
The Essentials
Before you get started, gather these essential ingredients and tools:
- 1 can regular Pringles: The star of the show! These crispy chips serve as the base.
- 2 cups semi-sweet chocolate chips: Perfect for coating the Pringles and adding a rich flavor.
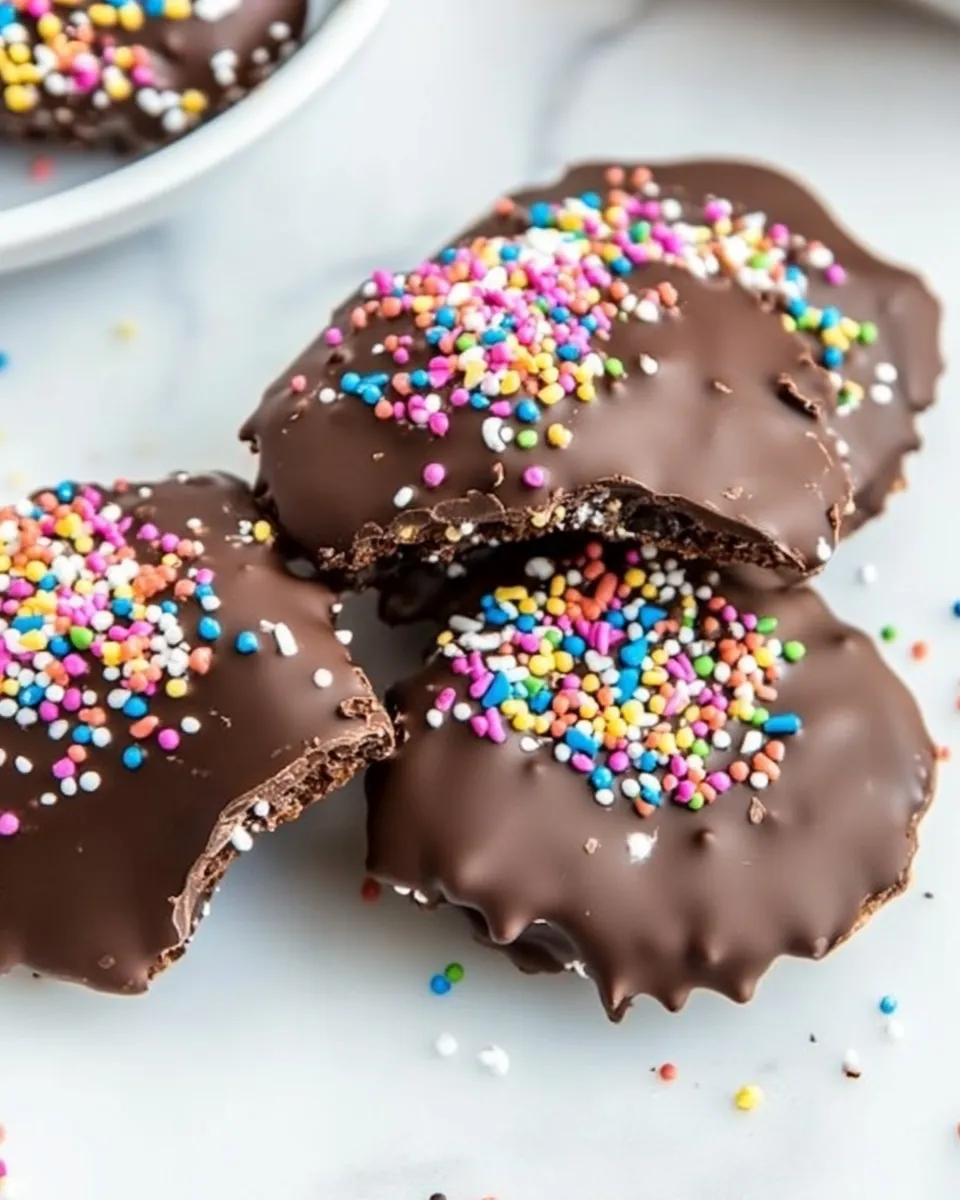
- Sprinkles: These add a pop of color and fun to your finished treats.
- 1/2 cup white chocolate chips: Used to create decorative designs, such as footballs or other fun shapes.
What You’ll Need (Gear)
- Microwave-safe bowl: For melting the chocolate chips without any fuss.
- Fork or dipping tool: To easily coat the Pringles in chocolate.
- Wax paper or parchment paper: For cooling the chocolate-coated chips without sticking.
- Double boiler (optional): For melting chocolate if you prefer a gentler heat method.
Directions: Chocolate Covered Pringles
Step 1: Prepare Your Workspace
Start by lining a baking sheet with wax or parchment paper. This will be where your chocolate-coated Pringles will cool and set, so make sure it’s ready to go!
Step 2: Melt the Chocolate
In a microwave-safe bowl, combine the semi-sweet chocolate chips. Heat them in the microwave in 30-second increments, stirring in between, until the chocolate is completely melted and smooth. If you’re using a double boiler, melt the chocolate over low heat until smooth.
Step 3: Coat the Pringles
Using a fork or dipping tool, dip each Pringle into the melted chocolate, ensuring it is fully coated. Let any excess chocolate drip off before placing the coated chip on the prepared baking sheet.
Step 4: Add Sprinkles
Before the chocolate sets, sprinkle your favorite colorful sprinkles on top of the chocolate-coated Pringles. Get creative! This is where you can really make them pop.
Step 5: Create White Chocolate Designs
Melt the white chocolate chips using the same method as before. Once melted, transfer the white chocolate to a piping bag or a plastic sandwich bag with a small corner cut off. Drizzle the white chocolate over the sprinkles for a decorative touch. You can create shapes like footballs, hearts, or zigzags—let your creativity shine!
Step 6: Let Them Set
Place the baking sheet in the refrigerator for about 30 minutes, or until the chocolate has completely hardened. This will ensure your Chocolate Covered Pringles are crispy and ready to eat.
Step 7: Enjoy!
Once the chocolate is set, it’s time to dig in! Serve these delightful snacks at your next gathering or keep them as a sweet treat for yourself.
Variations by Season
Switch things up based on the season with these fun variations:
- Halloween: Use orange and black sprinkles, and create spooky designs with melted white chocolate.
- Christmas: Decorate with red and green sprinkles, and drizzle with white chocolate to resemble snowflakes.
- Valentine’s Day: Use pink and red sprinkles, and shape the drizzled white chocolate into hearts.
- Birthday Parties: Choose colorful sprinkles that match the party theme for a festive touch!
What I Learned Testing
- The key to perfect chocolate coating is ensuring that the chocolate is smooth and not too hot, which can cause it to seize.
- Using a fork helps maintain the shape of the Pringle while allowing excess chocolate to drip off easily.
- Letting the chocolate cool slightly before dipping the chips helps the coating adhere better.
- Experimenting with different types of chocolate (like milk, dark, or even flavored chocolates) can yield exciting and delicious results!
Storage Pro Tips
To keep your Chocolate Covered Pringles fresh and delicious, follow these storage tips:
- Store them in an airtight container at room temperature for up to one week.
- Avoid refrigerating them, as this can cause the chocolate to become dull and lose its appealing shine.
- If you live in a warm climate, consider storing them in the fridge, but allow them to come to room temperature before serving.
FAQ
Can I use different types of chocolate for coating?
Absolutely! Feel free to experiment with milk chocolate, dark chocolate, or even flavored chocolates like mint or caramel for a unique twist on your Chocolate Covered Pringles.
How can I make these without using a microwave?
You can melt the chocolate using a double boiler on the stove. Just make sure the water doesn’t touch the bottom of the bowl where the chocolate is melting.
Can I use other toppings besides sprinkles?
Yes! You can use crushed nuts, coconut flakes, or even drizzle with more chocolate for added texture and flavor.
How do I prevent the chocolate from cracking as it hardens?
Make sure to temper the chocolate if you’re using it for a more polished finish. Additionally, letting the chocolate cool slightly before dipping can help create a smoother coating.
Let’s Eat
Now that you have the ultimate Chocolate Covered Pringles recipe at your fingertips, it’s time to indulge! Whether you’re sharing these treats with friends, bringing them to a party, or keeping them all to yourself, you’re sure to delight in every sweet and salty bite. Enjoy the process of making these delicious snacks and remember, the best part is eating them!
You’ve officially elevated your snacking game with these delectable Chocolate Covered Pringles. Happy munching!
Chocolate Covered Pringles
Ingredients
Equipment
Method
- Step 1: Prepare Your Workspace - Line a baking sheet with wax or parchment paper.
- Step 2: Melt the Chocolate - In a microwave-safe bowl, heat semi-sweet chocolate chips in 30-second increments until smooth.
- Step 3: Coat the Pringles - Dip each Pringle into the melted chocolate and let excess drip off.
- Step 4: Add Sprinkles - Before chocolate sets, sprinkle colorful sprinkles on top.
- Step 5: Create White Chocolate Designs - Melt white chocolate and drizzle over the sprinkles for decoration.
- Step 6: Let Them Set - Refrigerate for about 30 minutes until chocolate hardens.
- Step 7: Enjoy! - Serve and enjoy your delicious Chocolate Covered Pringles!
Notes
- Store in an airtight container at room temperature for up to one week.
- Avoid refrigerating unless necessary to maintain freshness.
- Experiment with different types of chocolate for unique flavors!