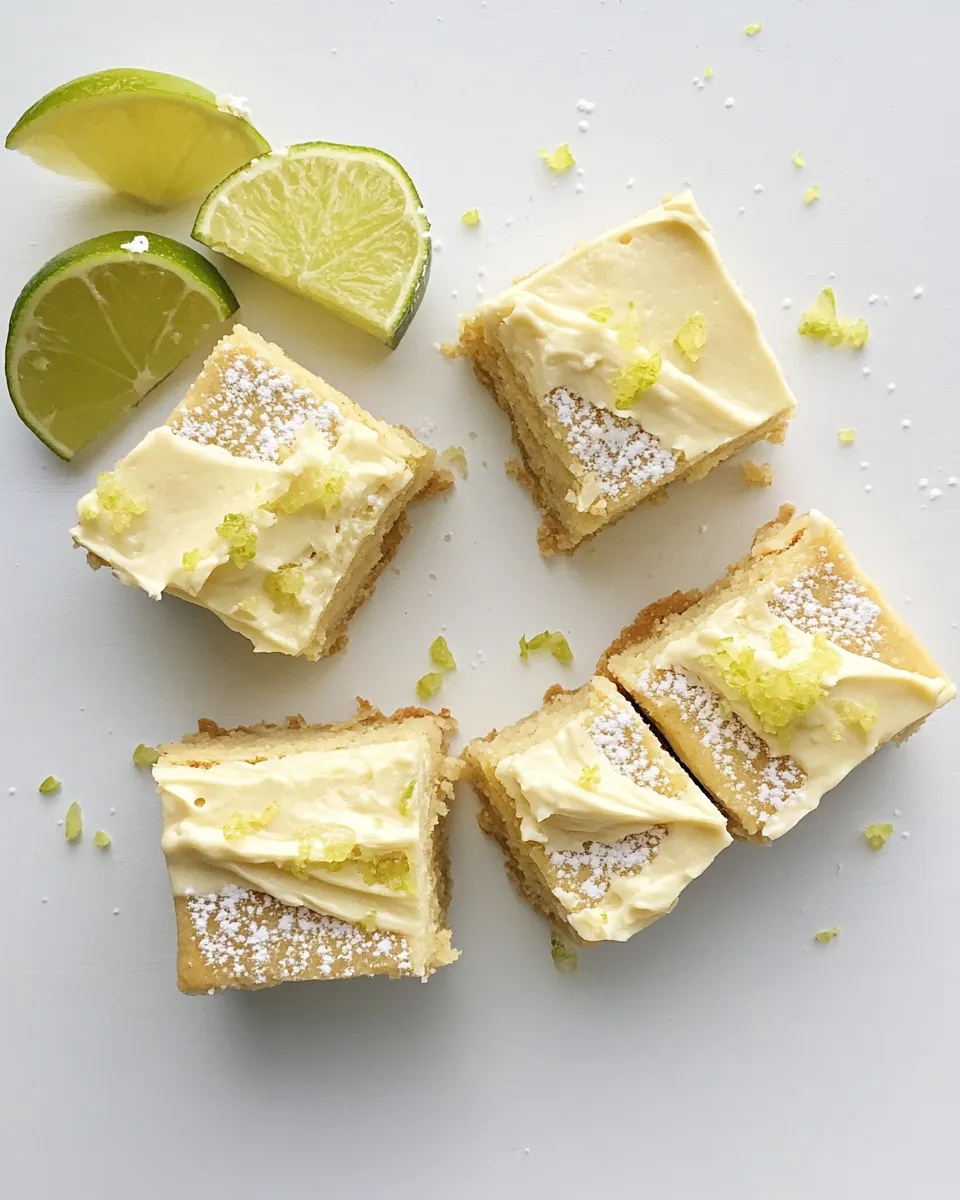
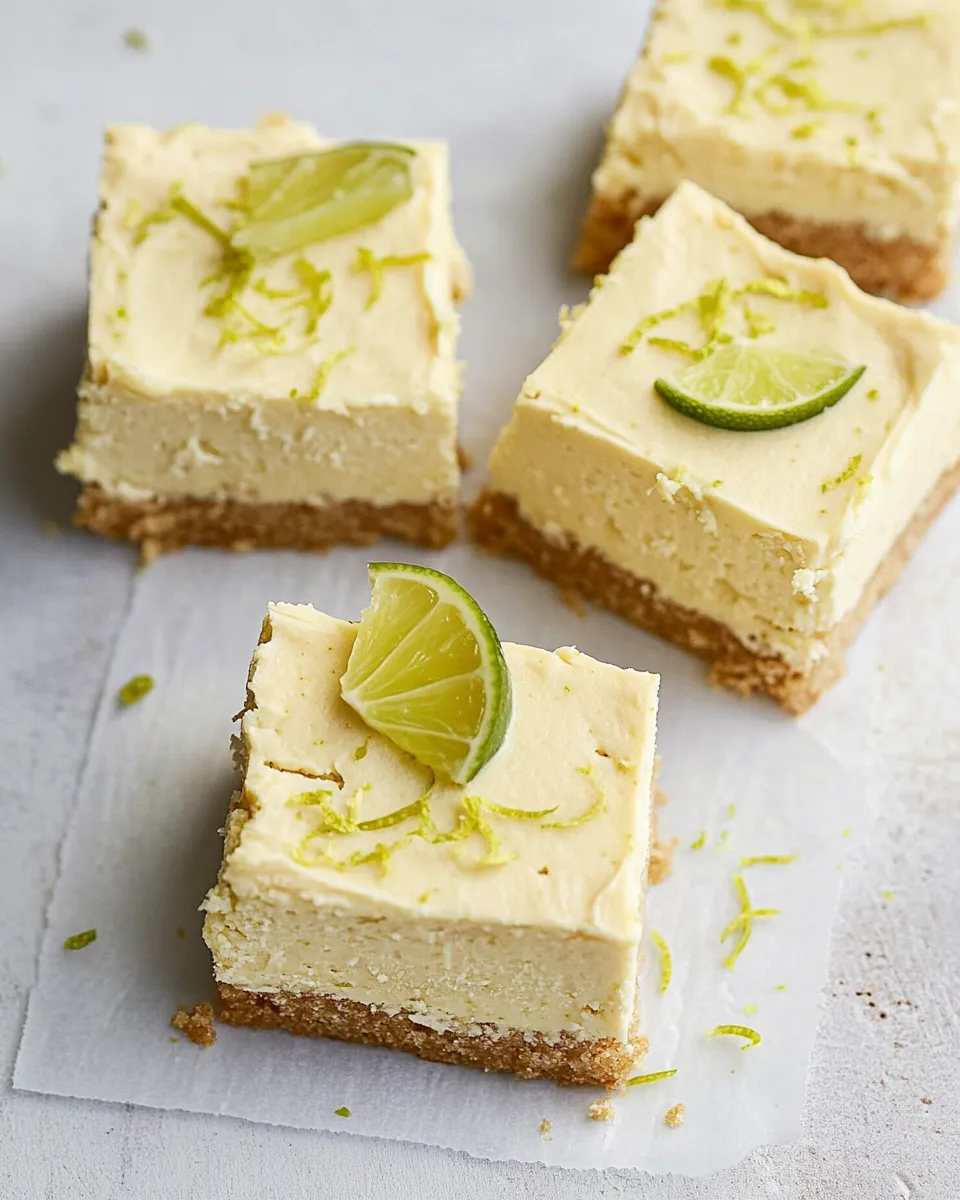
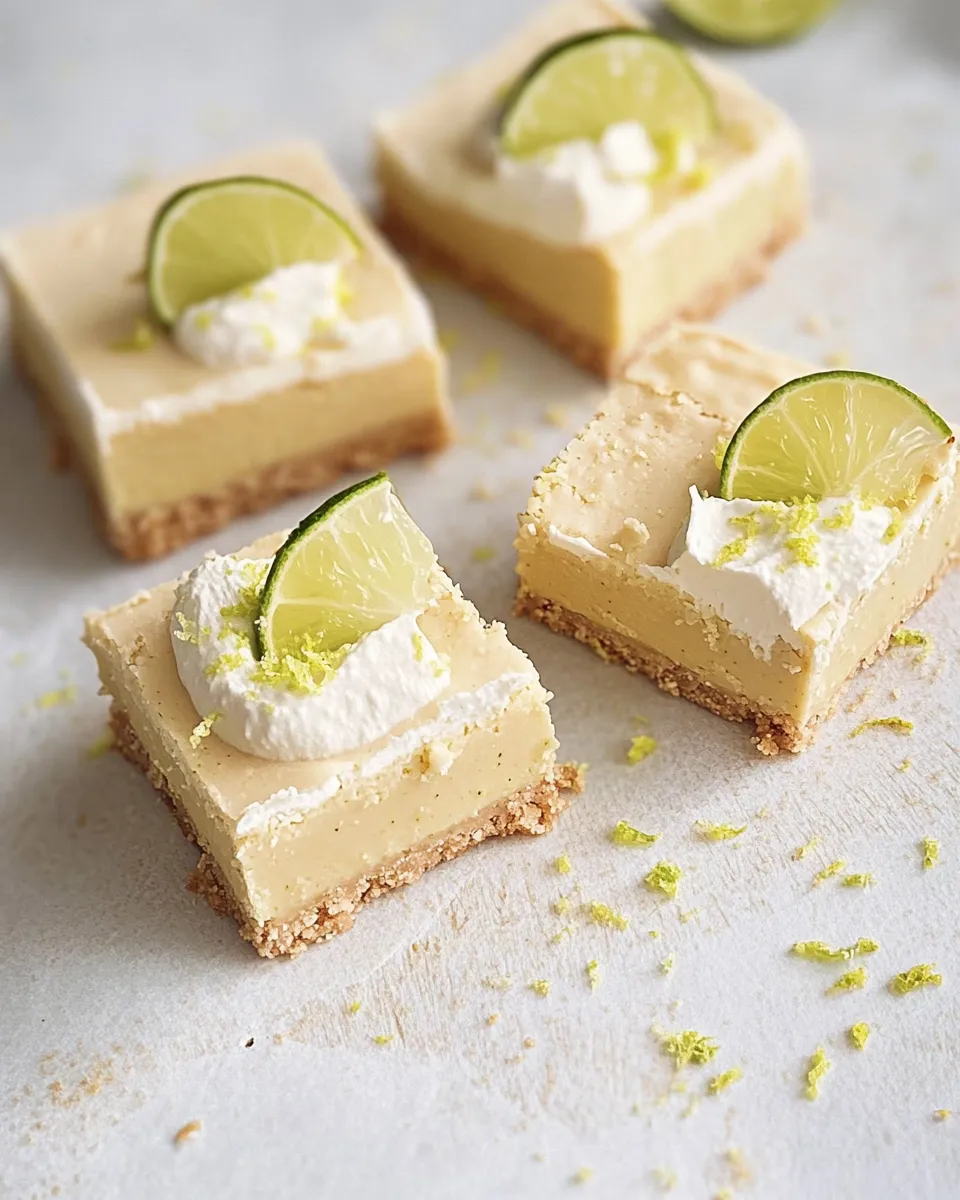
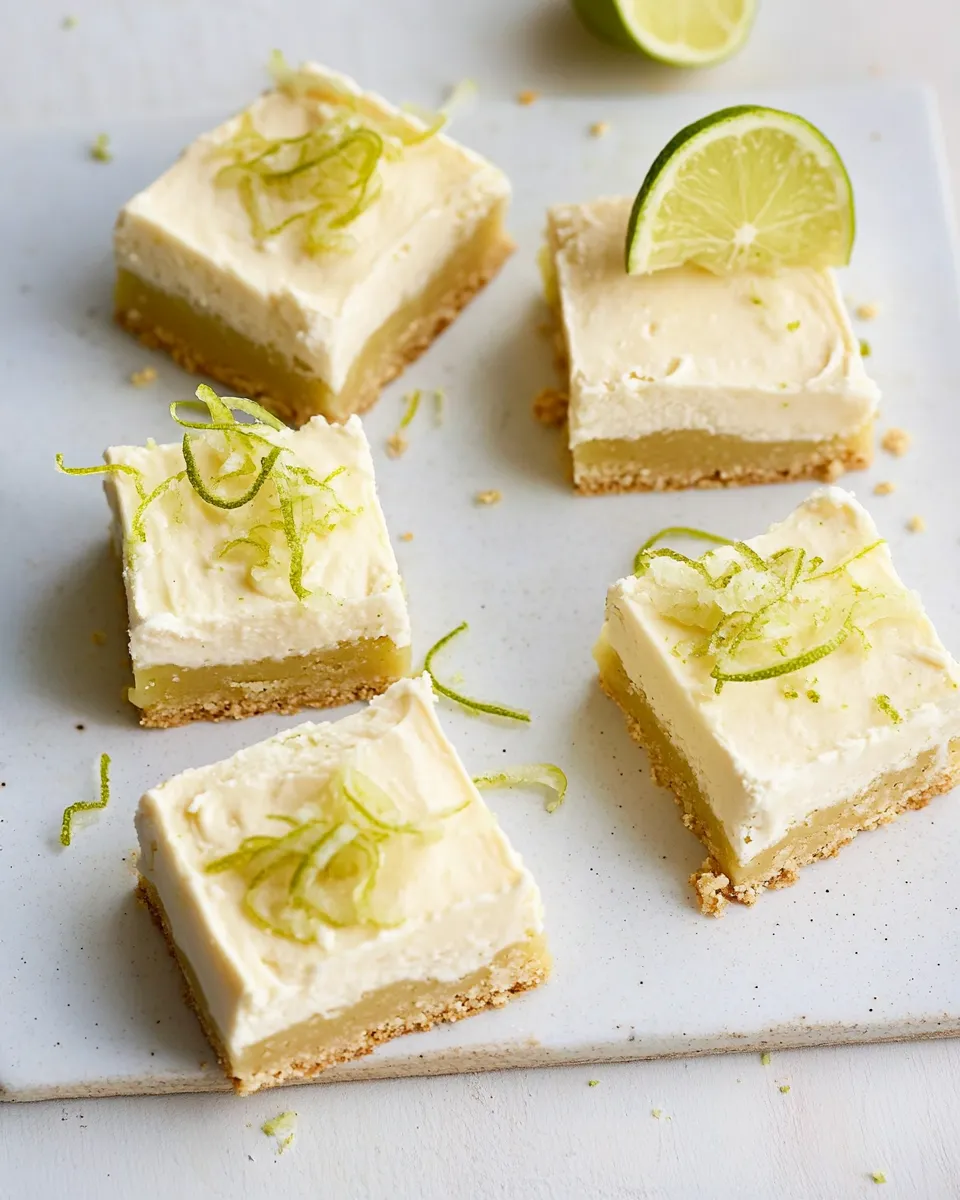
Key Lime Bars
There’s something undeniably refreshing about a slice of Key Lime Bars. With their bright, citrusy flavor and creamy texture, they perfectly balance tartness and sweetness, making them an irresistible treat for any occasion. Whether it’s a summer picnic, a holiday gathering, or simply a sweet indulgence on a cozy afternoon, these bars deliver a zesty punch that will leave your taste buds dancing.
If you’re looking to impress your friends and family with a delightful dessert that’s simple to whip up, look no further. Key Lime Bars are a classic favorite that are sure to become a staple in your baking repertoire. Let’s dive into why these bars are my go-to dessert, what you’ll need to make them, and how to master the art of creating these little bites of heaven.
Why It’s My Go-To
Key Lime Bars hold a special place in my heart for several reasons. First, they are incredibly easy to make, requiring just a handful of ingredients and minimal effort. The combination of the tangy key lime juice and the sweetness from the condensed milk creates a flavor profile that is both refreshing and satisfying. Additionally, they can be served chilled, making them perfect for warm days when you need a light and airy dessert. Lastly, the graham cracker crust adds a wonderful crunch that perfectly complements the creamy filling. These bars truly embody everything I love about baking – simplicity, flavor, and joy!
Gather These Ingredients
To make your own Key Lime Bars, you’ll need the following ingredients:
- 1 ½ cups graham cracker crumbs
- 1/3 cup granulated sugar
- 1/2 cup unsalted butter, melted
- 1 (14-ounce) can sweetened condensed milk
- 1/2 cup key lime juice
- 1/2 teaspoon vanilla extract
- 4 ounces cream cheese, softened
- 4 large egg yolks
- Pinch of kosher salt
- 1 tablespoon lime zest
- Whipped cream for garnish (optional)
Each ingredient plays a crucial role in creating the perfect balance of flavors and textures that make Key Lime Bars so delightful.
Gear Up: What to Grab
Before you start baking, here’s a list of gear you’ll need to gather:
- 9×9-inch baking pan – This is the perfect size for your bars.
- Mixing bowls – You’ll need a few for combining ingredients.
- Whisk – For blending the filling until smooth.
- Spatula – Great for spreading the graham cracker crust and filling evenly.
- Measuring cups and spoons – Accurate measurements are key to success!
- Refrigerator – For chilling the bars after baking.
With your ingredients and gear ready, you’re all set to create some scrumptious Key Lime Bars!
Mastering Key Lime Bars: How-To
Ready to bake? Here’s a step-by-step guide to mastering your Key Lime Bars:
Step 1: Preheat the Oven
Preheat your oven to 350°F (175°C). This ensures that your bars bake evenly and come out perfectly set.
Step 2: Prepare the Crust
In a mixing bowl, combine the graham cracker crumbs and granulated sugar. Pour in the melted unsalted butter and mix until the crumbs are fully coated and resemble wet sand. Press this mixture firmly into the bottom of your greased 9×9-inch baking pan, creating an even layer. Bake for 8-10 minutes until lightly golden and fragrant. Remove from the oven and let cool slightly.
Step 3: Make the Filling
In a separate bowl, beat the softened cream cheese until smooth. Gradually add the sweetened condensed milk, mixing until well incorporated. Add the key lime juice, vanilla extract, egg yolks, lime zest, and a pinch of kosher salt. Whisk until the mixture is smooth and creamy.
Step 4: Bake the Bars
Pour the filling over the pre-baked crust, spreading it evenly. Bake for an additional 20-25 minutes or until the filling is set but still slightly jiggly in the center. Remove from the oven and let cool at room temperature. Then, refrigerate for at least 3 hours or until completely chilled.
Step 5: Serve and Enjoy
Once chilled, cut the Key Lime Bars into squares. Serve with a dollop of whipped cream on top if desired, and enjoy the burst of citrusy flavor in every bite!
Spring–Summer–Fall–Winter Ideas
These Key Lime Bars can be enjoyed year-round with a few variations and serving ideas:
- Spring: Serve with fresh berries for a pop of color and added flavor.
- Summer: Chill in the freezer for a refreshing frozen treat on hot days.
- Fall: Add a hint of cinnamon to the crust for a warm, spiced flavor profile.
- Winter: Serve with a sprinkle of toasted coconut on top for a festive touch.
No matter the season, these bars are sure to shine!
Flavor Logic
The magic of Key Lime Bars lies in their harmonious blend of flavors:
- Sweetness: The sweetened condensed milk provides a creamy sweetness that balances the tartness of the lime.
- Tartness: The key lime juice delivers a zesty punch that invigorates the palate.
- Texture: The graham cracker crust adds a delightful crunch, while the filling is smooth and creamy.
- Aroma: The lime zest introduces a fragrant citrus note that elevates the overall experience.
This combination creates a dessert that is as pleasing to the senses as it is to the taste buds.
Save It for Later
Key Lime Bars can be made in advance, making them perfect for gatherings or meal prep. Here are some tips for keeping them fresh:
- Store leftovers in an airtight container in the refrigerator for up to 5 days.
- For longer storage, freeze the bars wrapped tightly in plastic wrap and then in foil for up to 2 months.
- Thaw frozen bars in the refrigerator before serving, and they’ll taste just as delicious as the day you made them.
These storage tips ensure that you can enjoy your Key Lime Bars whenever you have a craving!
Key Lime Bars Q&A
Can I use regular limes instead of key limes?
While key limes have a unique flavor, you can substitute regular limes if necessary. The taste will be slightly different, but still delicious!
Can I make a gluten-free version of Key Lime Bars?
Absolutely! Simply use gluten-free graham cracker crumbs or an alternative crust made from nuts or oats to keep it gluten-free.
How can I tell when the Key Lime Bars are done baking?
The filling should be set around the edges but still slightly jiggly in the center. It will continue to firm up as it cools.
What can I use instead of cream cheese?
If you prefer a dairy-free version, you can use a plant-based cream cheese alternative or silken tofu blended until smooth.
Time to Try It
Now that you have all the details to create your own delectable Key Lime Bars, it’s time to get baking! Gather your ingredients, follow the steps, and indulge in the refreshing flavor of these delightful bars. They’re perfect for any occasion or just as a delicious treat for yourself. Enjoy the bright burst of key lime goodness in every bite!
Key Lime Bars
Ingredients
Equipment
Method
- Step 1: Preheat your oven to 350°F (175°C).
- Step 2: In a mixing bowl, combine the graham cracker crumbs and granulated sugar. Pour in the melted unsalted butter and mix until the crumbs are fully coated. Press into the bottom of your greased 9x9-inch baking pan. Bake for 8-10 minutes until golden.
- Step 3: In a separate bowl, beat the softened cream cheese until smooth. Gradually add the sweetened condensed milk, then mix in the key lime juice, vanilla extract, egg yolks, lime zest, and kosher salt. Whisk until smooth.
- Step 4: Pour the filling over the pre-baked crust. Bake for 20-25 minutes until the filling is set but slightly jiggly in the center. Let cool at room temperature, then refrigerate for at least 3 hours.
- Step 5: Cut into squares, serve with whipped cream if desired, and enjoy!
Notes
- Store leftovers in an airtight container in the refrigerator for up to 5 days.
- Freeze wrapped tightly for up to 2 months for longer storage.
- Thaw frozen bars in the refrigerator before serving for the best taste.