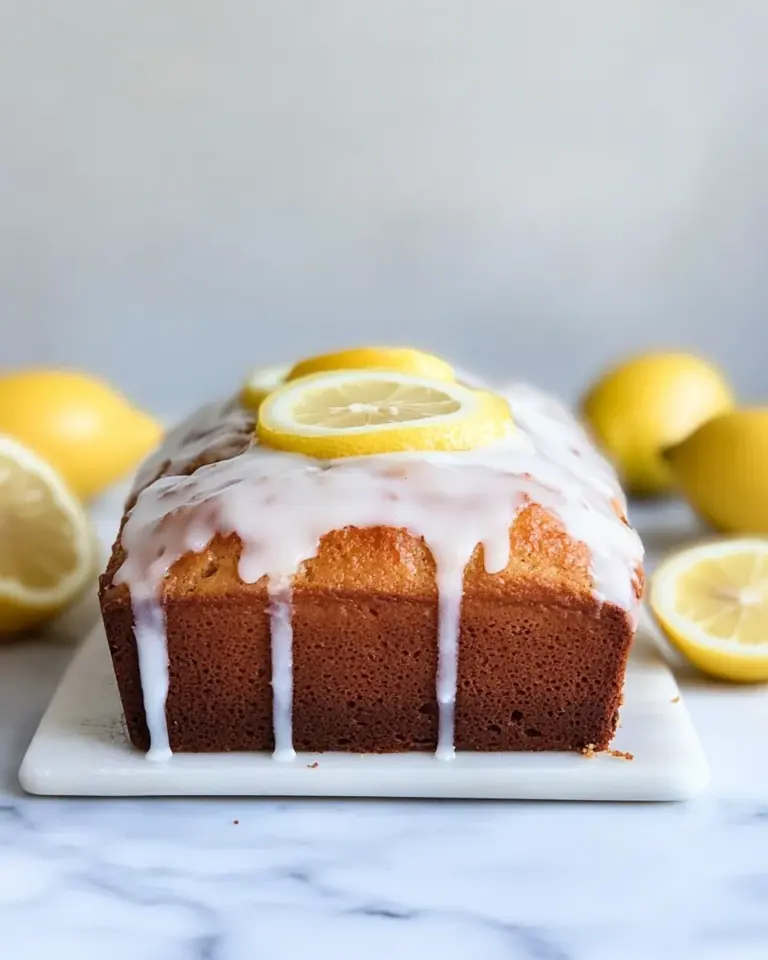
Lemon Pie
There’s something about the bright, zesty flavor of lemon that can instantly lift your spirits. Whether you’re enjoying a slice on a sunny afternoon or serving it up at a gathering, Lemon Pie is a delightful treat that never fails to impress. With its creamy filling and buttery crust, it strikes the perfect balance between sweet and tart. This recipe is simple enough for beginners yet elegant enough for special occasions, making it my go-to dessert for any season.
Why It’s My Go-To

Lemon Pie has a way of bringing people together. It’s the kind of dessert that sparks joy and evokes memories of family gatherings and sunny picnics. The refreshing flavor is a game changer, especially after a hearty meal. Plus, it’s versatile! You can enjoy it chilled or at room temperature, and it pairs beautifully with a dollop of whipped cream or a sprinkle of zest. What more could you ask for in a dessert?
What You’ll Need
To create this luscious Lemon Pie, gather the following ingredients:
- 1 (9 inch) pre-made pie crust or homemade, par-baked
- 10 ounces cream cheese, softened
- 1 cup sugar
- 4 large eggs
- 1 cup fresh lemon juice
- 2 tablespoons lemon zest
- 1 teaspoon vanilla extract
- 1 cup heavy whipping cream
- 2 tablespoons powdered sugar
- Lemon zest for topping
Toolbox for This Recipe
Before you dive into the kitchen, make sure you have these essential tools:
- Mixing bowls: For combining your ingredients.
- Electric mixer: A hand mixer or stand mixer will work wonders for achieving a smooth filling.
- Measuring cups and spoons: Accuracy is key in baking!
- Spatula: Great for scraping down the sides of your bowls.
- Whisk: Perfect for mixing the eggs and the lemon juice together.
- Pie dish: If you’re making your own crust, a good pie dish is essential.
Lemon Pie: Step-by-Step Guide

Now, let’s get into the delicious details of making this Lemon Pie. Follow these easy steps to create a dessert that will have everyone coming back for seconds.
Step 1: Preheat the Oven
Preheat your oven to 350°F (175°C). If you’re using a pre-made pie crust, place it in your pie dish and set it aside.
Step 2: Prepare the Filling
In a large mixing bowl, beat the softened cream cheese until it’s smooth and creamy. Add the sugar and continue to beat until fully incorporated and fluffy.
Step 3: Add the Eggs
Beat in the eggs one at a time, making sure each is well mixed before adding the next. This will help create a smooth filling without any lumps.
Step 4: Lemon Zest and Juice
Next, add the fresh lemon juice, lemon zest, and vanilla extract to the mixture. Beat until everything is combined and you have a luscious, bright yellow filling.
Step 5: Bake the Pie
Pour the lemon filling into your prepared pie crust. Bake for about 30-35 minutes, or until the filling is set but still has a slight jiggle in the center. Don’t overbake!
Step 6: Cool Down
Once baked, remove the pie from the oven and let it cool to room temperature, then refrigerate for at least 4 hours, or overnight if you can resist the temptation!
Step 7: Whip the Cream
When ready to serve, whip the heavy cream with the powdered sugar until soft peaks form. This will create a light and fluffy topping for your pie.
Step 8: Serve and Enjoy
Spread the whipped cream over the chilled lemon filling and garnish with additional lemon zest on top. Slice, serve, and watch your friends and family light up with delight at each bite of this delightful Lemon Pie!
Vegan & Vegetarian Swaps

For those looking for vegan or vegetarian alternatives, consider the following swaps:
- Vegan cream cheese: Use a plant-based cream cheese to keep the filling creamy.
- Flax eggs: Replace the eggs with flax eggs (1 tablespoon ground flaxseed mixed with 2.5 tablespoons water per egg).
- Maple syrup or agave: Swap sugar for maple syrup or agave for a natural sweetener option.
- Coconut cream: Substitute heavy cream with coconut cream for a dairy-free topping.
Avoid These Traps
While making Lemon Pie is straightforward, there are a few common pitfalls to avoid:
- Overbaking: Keep an eye on the pie to ensure the filling is just set; it shouldn’t be firm like a cheesecake.
- Using bottled lemon juice: Fresh lemon juice and zest make all the difference in flavor, so avoid the bottled stuff!
- Skipping the chilling time: Allowing the pie to chill is crucial for the flavors to meld and the filling to firm up.
- Not zesting properly: Make sure to zest only the yellow part of the lemon, as the white pith can add bitterness.
Keep It Fresh: Storage Guide
To keep your Lemon Pie fresh and delicious, follow these storage tips:
- Refrigeration: Store leftovers in the refrigerator, covered loosely with plastic wrap or foil. It will keep well for about 3-4 days.
- Freezing: You can freeze the pie for up to a month. However, it’s best to freeze it without the whipped cream topping. Thaw in the refrigerator before serving.
- Separate components: If possible, store the whipped cream separately to maintain its texture.
Handy Q&A
Can I use a store-bought pie crust?
Absolutely! A pre-made pie crust saves time and effort. Just make sure it’s par-baked before adding the filling.
How can I tell when the pie is done?
The pie is done when the edges are set, and the center still has a slight jiggle. It will continue to set as it cools.
Can I make this ahead of time?
Yes! Lemon Pie can be made a day or two in advance. Just make sure to store it in the refrigerator until you’re ready to serve.
What can I use instead of heavy cream for whipped topping?
You can use coconut cream or a dairy-free whipped topping for a lighter option. Both work well and still provide a delightful finish!
Ready to Cook?
Now that you’re equipped with all the knowledge needed, it’s time to roll up your sleeves and create this delightful Lemon Pie. Whether you’re baking for a special occasion or just treating yourself, this pie is sure to be a hit.
With its tangy filling and luscious whipped cream topping, it captures the essence of summer in every bite. So, gather your ingredients, follow the steps carefully, and enjoy the sweet rewards of your labor. Your taste buds will thank you!

Lemon Pie
Ingredients
Equipment
Method
- Preheat your oven to 350°F (175°C). If you’re using a pre-made pie crust, place it in your pie dish and set it aside.
- In a large mixing bowl, beat the softened cream cheese until it's smooth and creamy. Add the sugar and continue to beat until fully incorporated and fluffy.
- Beat in the eggs one at a time, making sure each is well mixed before adding the next.
- Add the fresh lemon juice, lemon zest, and vanilla extract to the mixture. Beat until everything is combined and you have a luscious, bright yellow filling.
- Pour the lemon filling into your prepared pie crust. Bake for about 30-35 minutes, or until the filling is set but still has a slight jiggle in the center.
- Once baked, remove the pie from the oven and let it cool to room temperature, then refrigerate for at least 4 hours, or overnight if you can resist the temptation!
- When ready to serve, whip the heavy cream with the powdered sugar until soft peaks form.
- Spread the whipped cream over the chilled lemon filling and garnish with additional lemon zest on top. Slice, serve, and enjoy!
Notes
- For a lighter option, use coconut cream instead of heavy cream for the topping.
- Make sure to use fresh lemon juice and zest for the best flavor.
- Store leftovers in the refrigerator, covered loosely. Enjoy within 3-4 days!