Hummus without Tahini
Are you ready to dive into a creamy, dreamy dip that’s perfect for any occasion? This Hummus without Tahini is a delightful twist on the classic recipe, offering all the rich flavors you love without the use of tahini. With simple ingredients and a quick preparation time, you’ll find yourself whipping up this delicious dip in no time. Whether you’re hosting a gathering or simply snacking at home, this hummus is sure to impress!
Why It’s Crowd-Pleasing
Hummus has become a staple in many households and for good reason. It’s versatile, nutritious, and incredibly satisfying. This Hummus without Tahini version keeps the essence of traditional hummus while catering to those who may not enjoy tahini or are looking for a lighter alternative. The combination of chickpeas, fresh garlic, and zesty lemon creates a flavor explosion that’s hard to resist. It’s perfect for dipping veggies, spreading on sandwiches, or simply enjoying with pita chips. Plus, it’s vegan and gluten-free, making it a delightful option for a variety of dietary preferences!
What’s in the Bowl
To create this delectable hummus, you’ll need the following ingredients:
- 1 (15-ounce) can chickpeas, drained and rinsed
- 2 cloves garlic, minced
- 1 lemon, zested
- 1 lemon, juiced
- 1/4 cup cashew butter
- 2 tablespoons water
- 2 tablespoons olive oil, plus more for topping
- Kosher salt, to taste
- Minced fresh parsley, for topping
- Pomegranate seeds, for topping
- Toasted pine nuts, for topping
These ingredients come together to create a smooth and flavorful dip that’s sure to be a hit!
Gear Up: What to Grab
Before you get started, make sure you have the following kitchen tools on hand:
- Food Processor: This is essential for blending the ingredients into a creamy consistency.
- Measuring Cups and Spoons: Accurate measurements ensure the right flavor balance.
- Spatula: Perfect for scraping down the sides of the food processor.
- Serving Bowl: A beautiful bowl to serve your hummus will make it even more inviting!
With these tools ready, you’re all set to create your Hummus without Tahini masterpiece!
Cooking Hummus without Tahini: The Process

Now, let’s get into the nitty-gritty of making this delicious dip. Follow these simple steps:
Step 1: Prepare the Chickpeas
Start by draining and rinsing your can of chickpeas. This will help remove excess sodium and give your hummus a cleaner taste.
Step 2: Blend the Ingredients
In a food processor, combine the drained chickpeas, minced garlic, lemon zest, lemon juice, cashew butter, water, and olive oil. Add a pinch of kosher salt to taste.
Step 3: Process Until Smooth
Blend the mixture on high speed until it becomes creamy and smooth. You may need to scrape down the sides of the food processor a few times to ensure everything is well combined.
Step 4: Adjust Consistency
If the hummus is too thick, add a little more water or olive oil until you reach your desired consistency. Taste and adjust the seasoning with more salt if needed.
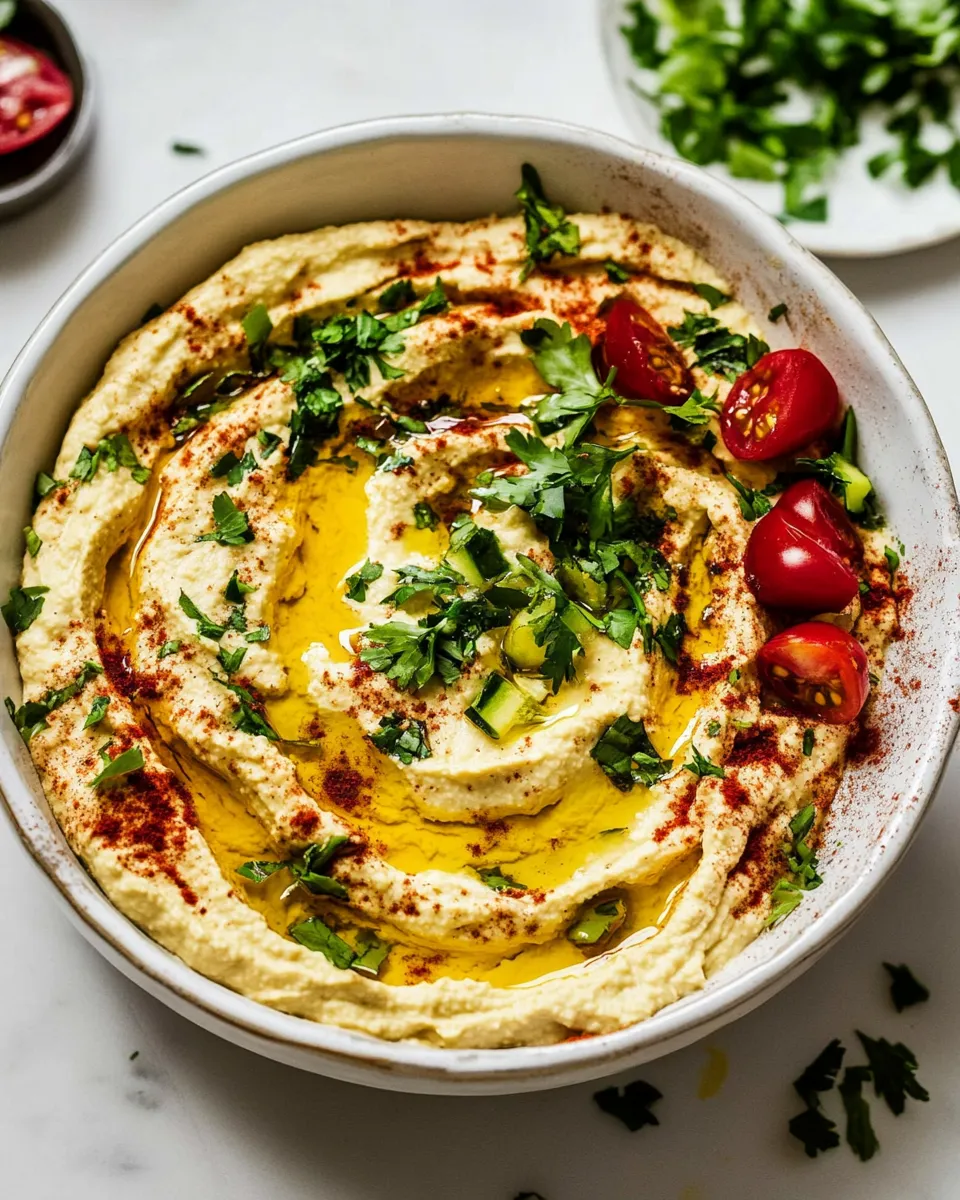
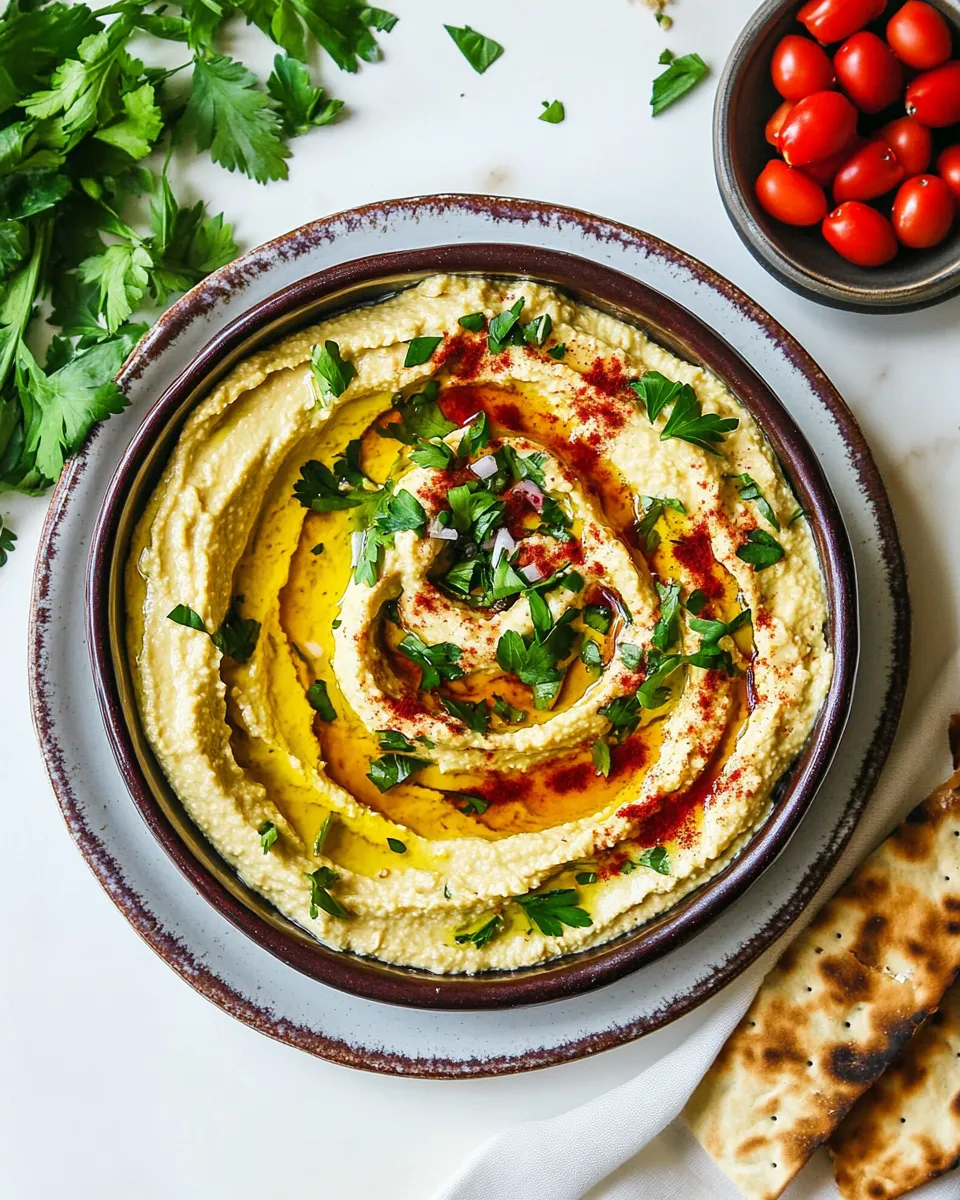
Step 5: Serve and Garnish
Transfer the hummus to a serving bowl. Drizzle with additional olive oil and sprinkle with minced fresh parsley, pomegranate seeds, and toasted pine nuts for an elegant touch.
Easy Ingredient Swaps

If you’re missing an ingredient or just want to customize your hummus, here are some easy swaps you can try:
- Cashew Butter: Almond butter or sunflower seed butter can be used as a substitute.
- Fresh Garlic: Garlic powder can be used in a pinch, but fresh garlic gives the best flavor.
- Lemon Juice: Lime juice can be a zesty alternative if you’re out of lemons.
- Pine Nuts: Substitute with chopped walnuts or sliced almonds for a different crunch.
Feel free to get creative and make this Hummus without Tahini your own!
Don’t Do This
When making your hummus, avoid these common pitfalls:
- Don’t skip rinsing the chickpeas. This step is crucial for flavor and texture.
- Don’t over-process the hummus; you want it smooth but not watery.
- Don’t forget to taste as you go! Adjusting flavors during the process can elevate your dip.
- Don’t skip the garnishes. They add flavor, texture, and visual appeal.
Steering clear of these mistakes will help ensure your hummus turns out perfectly!
Prep Ahead & Store
Planning ahead? This Hummus without Tahini can be made in advance, making it a fantastic option for meal prep or parties.
Store your hummus in an airtight container in the refrigerator for up to one week. The flavors will continue to develop, making it even tastier the next day! If you want to freeze it, place it in a freezer-safe container, leaving some space at the top for expansion. It can be frozen for up to three months. When you’re ready to enjoy it, simply thaw it in the refrigerator overnight and stir well before serving.
Handy Q&A
Can I use dried chickpeas instead of canned?
Absolutely! If you prefer using dried chickpeas, soak them overnight and then cook until tender before blending them into your hummus.
Is this hummus suitable for meal prep?
Yes, it’s perfect for meal prep! You can make a big batch and store it in the fridge for a quick snack or lunch option throughout the week.
What can I serve with hummus?
Hummus pairs wonderfully with fresh veggies like carrots, cucumbers, and bell peppers. It’s also great with pita bread, crackers, or as a spread on sandwiches.
Can I make this hummus spicier?
Definitely! Add a pinch of cayenne pepper or red pepper flakes for a spicy kick. You can also blend in roasted red peppers for additional flavor.
Ready to Cook?
Now that you have all the details for making Hummus without Tahini, it’s time to roll up your sleeves and get cooking! This dip is not only easy and quick to prepare, but it also offers a delightful way to enjoy healthy, wholesome ingredients. Whether you’re serving it at a gathering or indulging in a late-night snack, this hummus will be a hit with everyone. So grab your chickpeas and let’s get blending!
Hummus without Tahini
Ingredients
Equipment
Method
- Step 1: Prepare the Chickpeas. Start by draining and rinsing your can of chickpeas. This will help remove excess sodium and give your hummus a cleaner taste.
- Step 2: Blend the Ingredients. In a food processor, combine the drained chickpeas, minced garlic, lemon zest, lemon juice, cashew butter, water, and olive oil. Add a pinch of kosher salt to taste.
- Step 3: Process Until Smooth. Blend the mixture on high speed until it becomes creamy and smooth. You may need to scrape down the sides of the food processor a few times to ensure everything is well combined.
- Step 4: Adjust Consistency. If the hummus is too thick, add a little more water or olive oil until you reach your desired consistency. Taste and adjust the seasoning with more salt if needed.
- Step 5: Serve and Garnish. Transfer the hummus to a serving bowl. Drizzle with additional olive oil and sprinkle with minced fresh parsley, pomegranate seeds, and toasted pine nuts for an elegant touch.
Notes
- Store your hummus in an airtight container in the refrigerator for up to one week.
- If freezing, leave space at the top of the container for expansion.
- For a spicier hummus, add cayenne pepper or red pepper flakes.