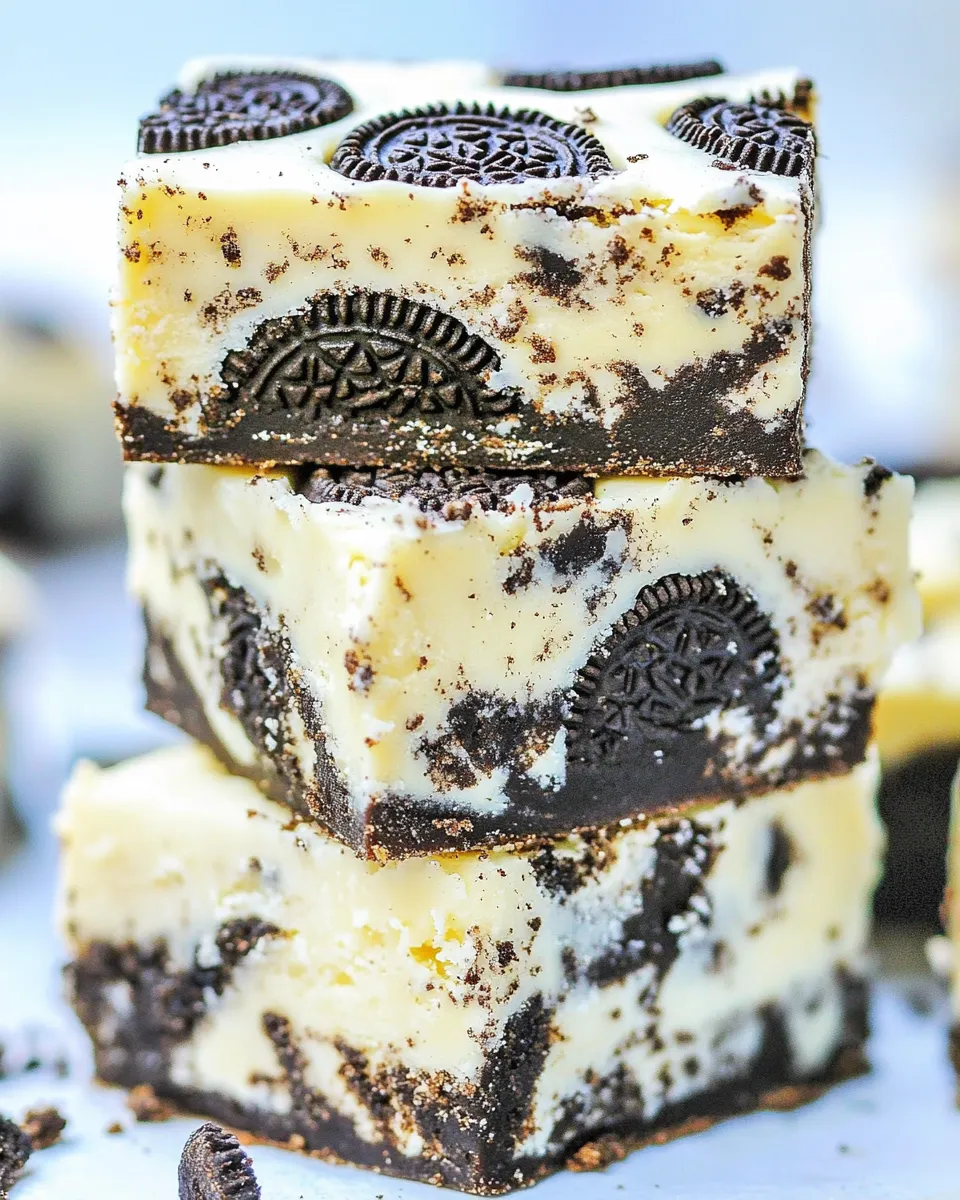
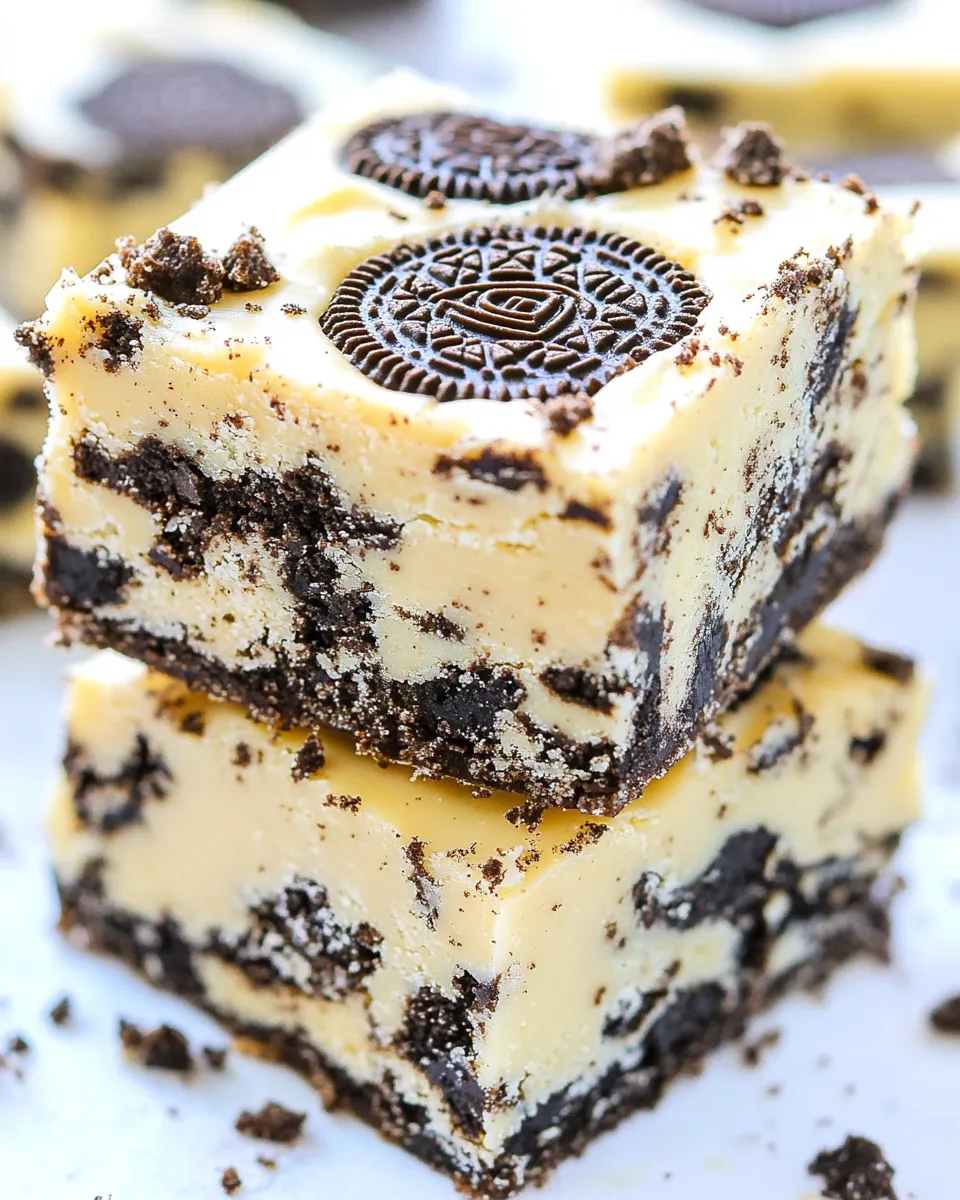
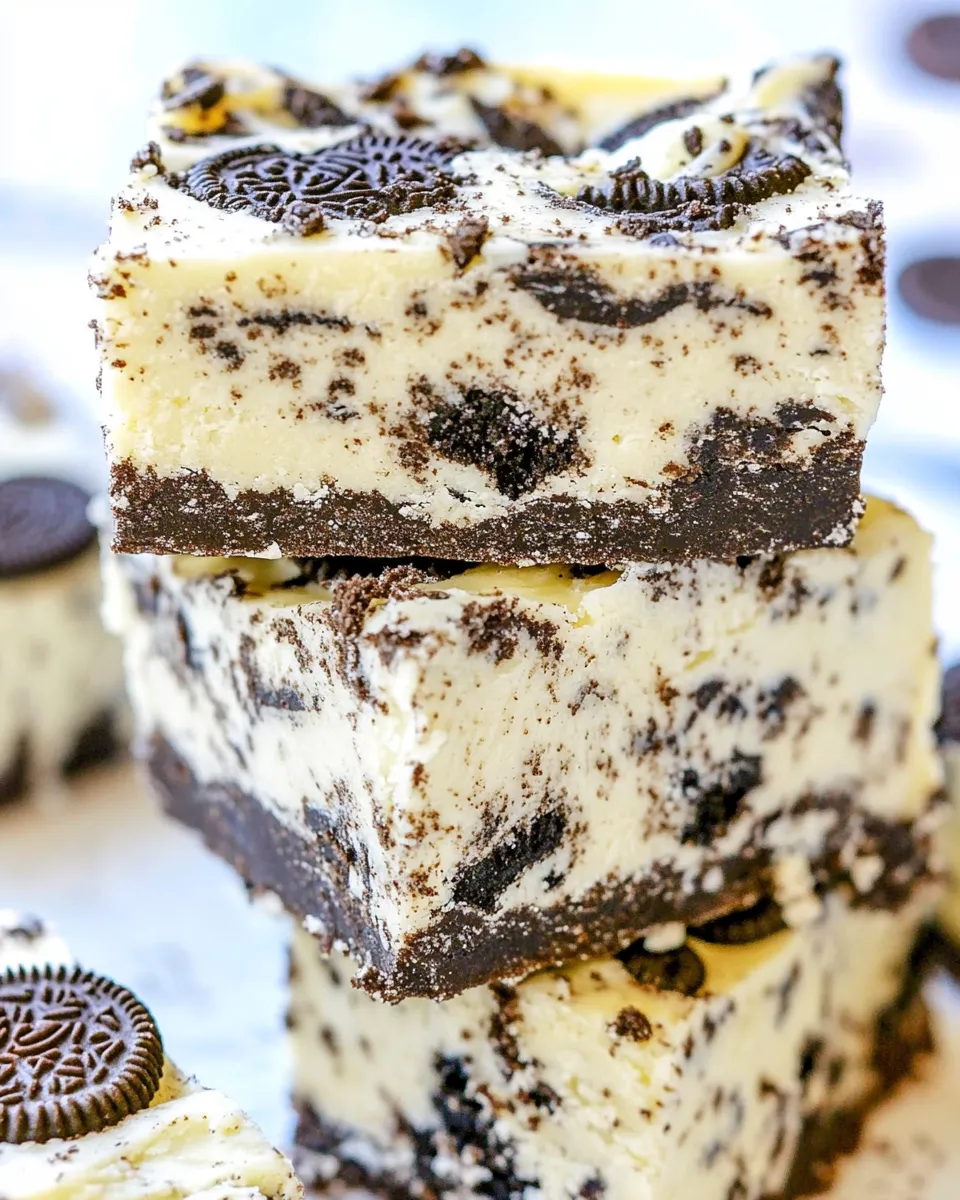
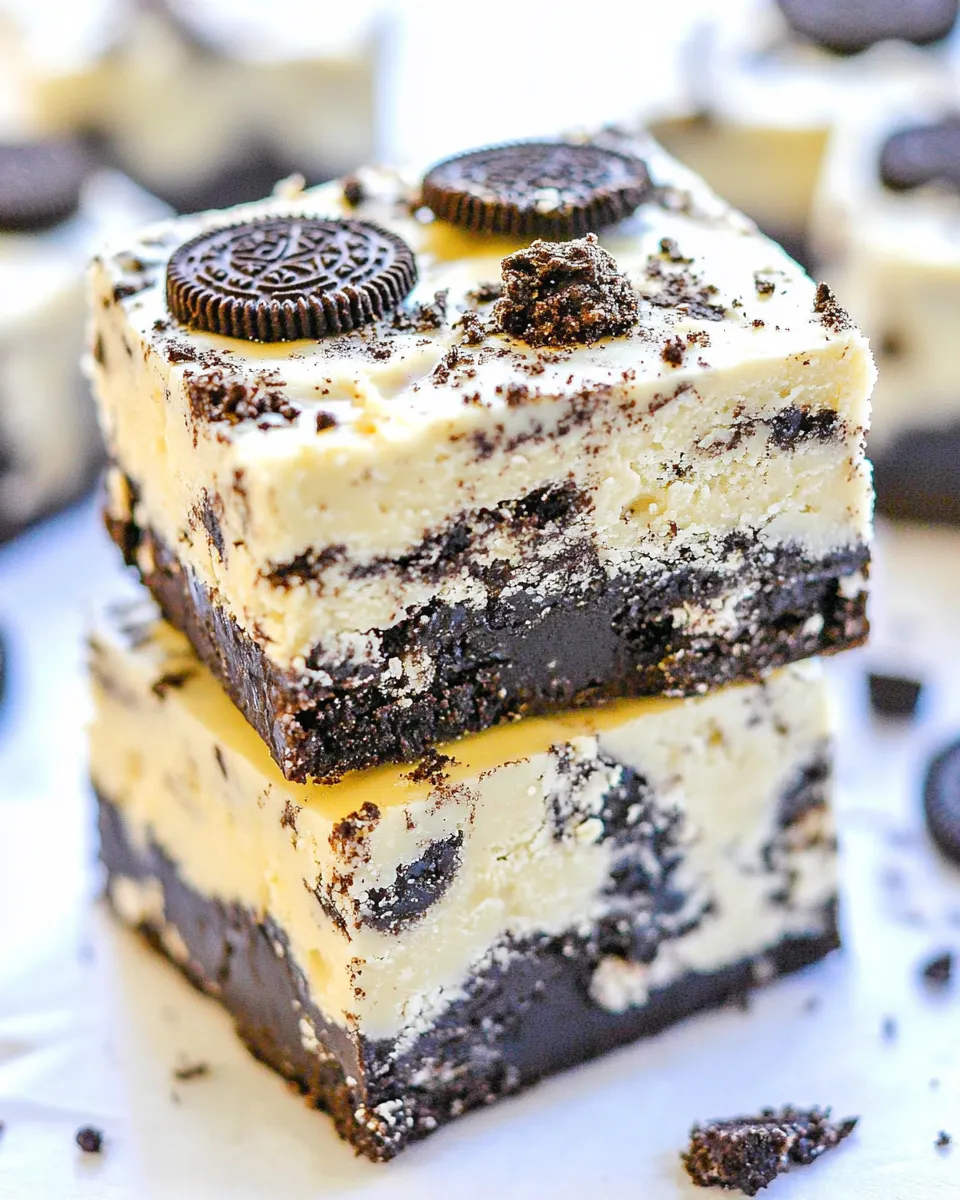
Easy Oreo Fudge
Have you ever found yourself craving something sweet, something that combines the rich, creamy goodness of chocolate with the delightful crunch of cookies? If so, then this Easy Oreo Fudge is just the treat you need in your life. With a mere handful of ingredients and a few simple steps, you can whip up a batch of this decadent fudge that is sure to impress your family and friends. The best part? It’s perfect for any occasion and only takes about 15 minutes to prepare! So, let’s dive into the world of Easy Oreo Fudge.
Top Reasons to Make Easy Oreo Fudge
There are plenty of reasons to indulge in this delicious treat. Here are just a few:
- Quick Preparation: With minimal prep time, you can have this fudge ready in no time.
- Few Ingredients: You only need four ingredients to create this delightful dessert.
- Endless Variations: Feel free to customize with your favorite add-ins or toppings.
- Perfect for Sharing: Fudge makes a great gift, especially during holidays and celebrations.
- Kid-Friendly: Kids love Oreos, and they’ll enjoy helping you make this treat!
What’s in the Bowl
To create this Easy Oreo Fudge, you will need the following ingredients:
- 14 oz can sweetened condensed milk: This rich base helps create a creamy texture.
- 18 oz white chocolate or chocolate chips (chopped): For that luscious chocolatey flavor.
- 24 Oreo cookies: The star of the show, adding crunch and flavor.
Tools of the Trade
Gather these essential tools to make the process smooth and simple:
- Medium saucepan: For melting the chocolate and mixing the ingredients.
- Spatula: To stir and scrape down the sides for even mixing.
- 9×9 inch baking dish: To pour and set your fudge.
- Parchment paper: Helps with easy removal of the fudge once set.
- Knife: For cutting the fudge into squares once it has set.
From Start to Finish: Easy Oreo Fudge
Let’s get started on making this delectable Easy Oreo Fudge. Follow these simple steps:
Step 1: Prepare Your Baking Dish
Line a 9×9 inch baking dish with parchment paper, leaving some overhang on the sides. This will make it easier to lift the fudge out later.
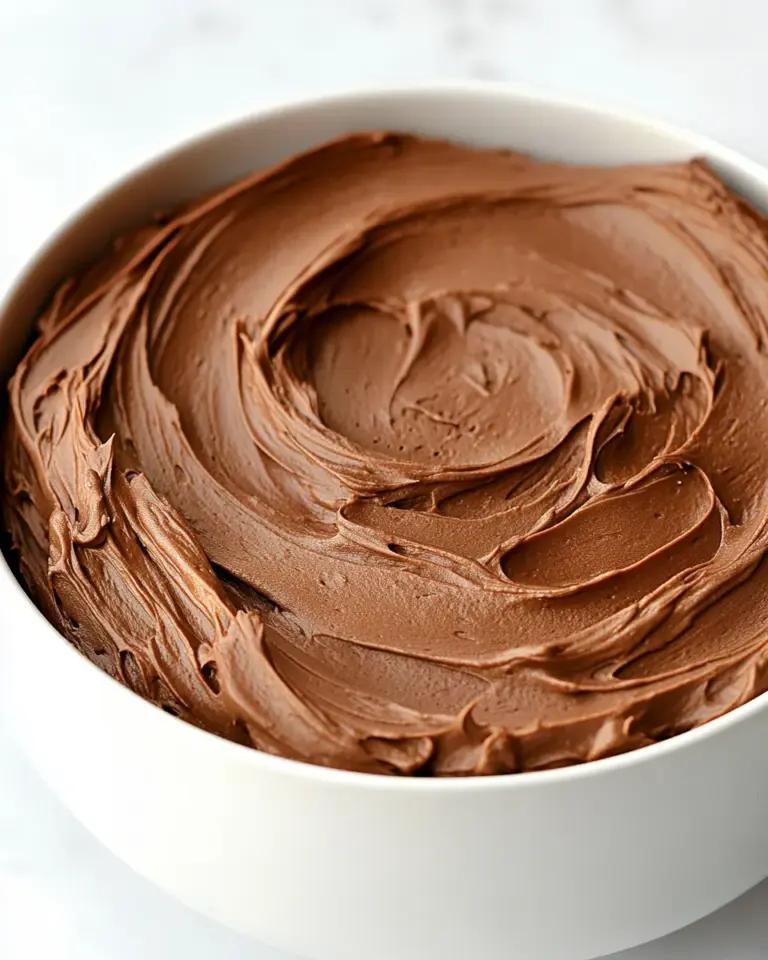
Step 2: Melt the Chocolate
In a medium saucepan over low heat, combine the sweetened condensed milk and the chopped white chocolate (or chocolate chips). Stir continuously until the chocolate is completely melted and the mixture is smooth.
Step 3: Crush the Oreos
While your chocolate mixture is melting, take your Oreo cookies and crush them into small pieces. You can use a food processor for this or place them in a zip-top bag and crush them with a rolling pin.
Step 4: Combine Ingredients
Once the chocolate is melted, remove the saucepan from the heat. Stir in the crushed Oreos, mixing well to ensure they are evenly distributed throughout the fudge mixture.
Step 5: Pour into the Baking Dish
Pour the Oreo fudge mixture into the prepared baking dish. Use a spatula to smooth the top and make it as even as possible.
Step 6: Chill and Set
Refrigerate the fudge for at least 2-3 hours, or until it is completely set. If you are in a hurry, you can place it in the freezer for about an hour.
Step 7: Cut and Serve
Once the fudge is set, lift it out of the dish using the parchment paper overhang. Cut it into squares and serve. Enjoy your Easy Oreo Fudge!
Low-Carb/Keto Alternatives
If you’re looking for a low-carb or keto-friendly version of this Easy Oreo Fudge, consider the following alternatives:
- Use sugar-free white chocolate or chocolate chips.
- Replace the sweetened condensed milk with a sugar-free version or a homemade keto-friendly version made from heavy cream and sweetener.
- Opt for keto-friendly cookies that mimic the flavor of Oreos.
Insider Tips
To ensure your Easy Oreo Fudge turns out perfectly, keep these tips in mind:
- Be sure to use low heat when melting the chocolate to avoid burning it.
- For a fun twist, consider adding a sprinkle of sea salt on top before chilling for a sweet and salty combination.
- Allow the fudge to sit at room temperature for a few minutes before cutting for cleaner edges.
Prep Ahead & Store
This Easy Oreo Fudge can be made ahead of time, making it a great option for parties or holiday gifting. Here’s how to store it:
- Store the fudge in an airtight container in the refrigerator for up to two weeks.
- You can also freeze the fudge for up to three months. Just be sure to wrap it tightly to prevent freezer burn.
- To serve, thaw in the refrigerator overnight before cutting and enjoying.
Common Questions
Can I use dark chocolate instead of white chocolate?
Absolutely! Dark chocolate will give a richer flavor to the fudge, making it a delightful twist on the classic recipe.
What if I don’t have Oreos?
You can use any chocolate sandwich cookies or even graham crackers for a different flavor profile. Just make sure to crush them well before mixing.
How thick should the fudge be?
The fudge should be thick enough to hold its shape when set, but still creamy. If it seems too runny after mixing, you can add more chopped chocolate to thicken it up.
Can I add other mix-ins to the fudge?
Definitely! Feel free to get creative by adding nuts, dried fruit, or even sprinkles to customize your Easy Oreo Fudge.
Final Thoughts
Making Easy Oreo Fudge is not only a fun process but also a rewarding one. The creamy, sweet, and slightly crunchy treat is perfect for satisfying your sweet tooth or sharing with loved ones. Whether it’s for a special occasion or simply a treat for yourself, this fudgy delight will surely be a hit.
So grab your ingredients, put on your favorite apron, and let the fudge-making adventure begin. Trust us, once you make this Easy Oreo Fudge, you’ll want to make it again and again!
Easy Oreo Fudge
Ingredients
Equipment
Method
- Step 1: Prepare Your Baking Dish. Line a 9x9 inch baking dish with parchment paper, leaving some overhang on the sides. This will make it easier to lift the fudge out later.
- Step 2: Melt the Chocolate. In a medium saucepan over low heat, combine the sweetened condensed milk and the chopped white chocolate (or chocolate chips). Stir continuously until the chocolate is completely melted and the mixture is smooth.
- Step 3: Crush the Oreos. While your chocolate mixture is melting, take your Oreo cookies and crush them into small pieces. You can use a food processor for this or place them in a zip-top bag and crush them with a rolling pin.
- Step 4: Combine Ingredients. Once the chocolate is melted, remove the saucepan from the heat. Stir in the crushed Oreos, mixing well to ensure they are evenly distributed throughout the fudge mixture.
- Step 5: Pour into the Baking Dish. Pour the Oreo fudge mixture into the prepared baking dish. Use a spatula to smooth the top and make it as even as possible.
- Step 6: Chill and Set. Refrigerate the fudge for at least 2-3 hours, or until it is completely set. If you are in a hurry, you can place it in the freezer for about an hour.
- Step 7: Cut and Serve. Once the fudge is set, lift it out of the dish using the parchment paper overhang. Cut it into squares and serve. Enjoy your Easy Oreo Fudge!
Notes
- Use low heat to melt the chocolate to avoid burning.
- Add a sprinkle of sea salt on top before chilling for a sweet and salty combination.
- Let the fudge sit at room temperature for a few minutes before cutting for cleaner edges.