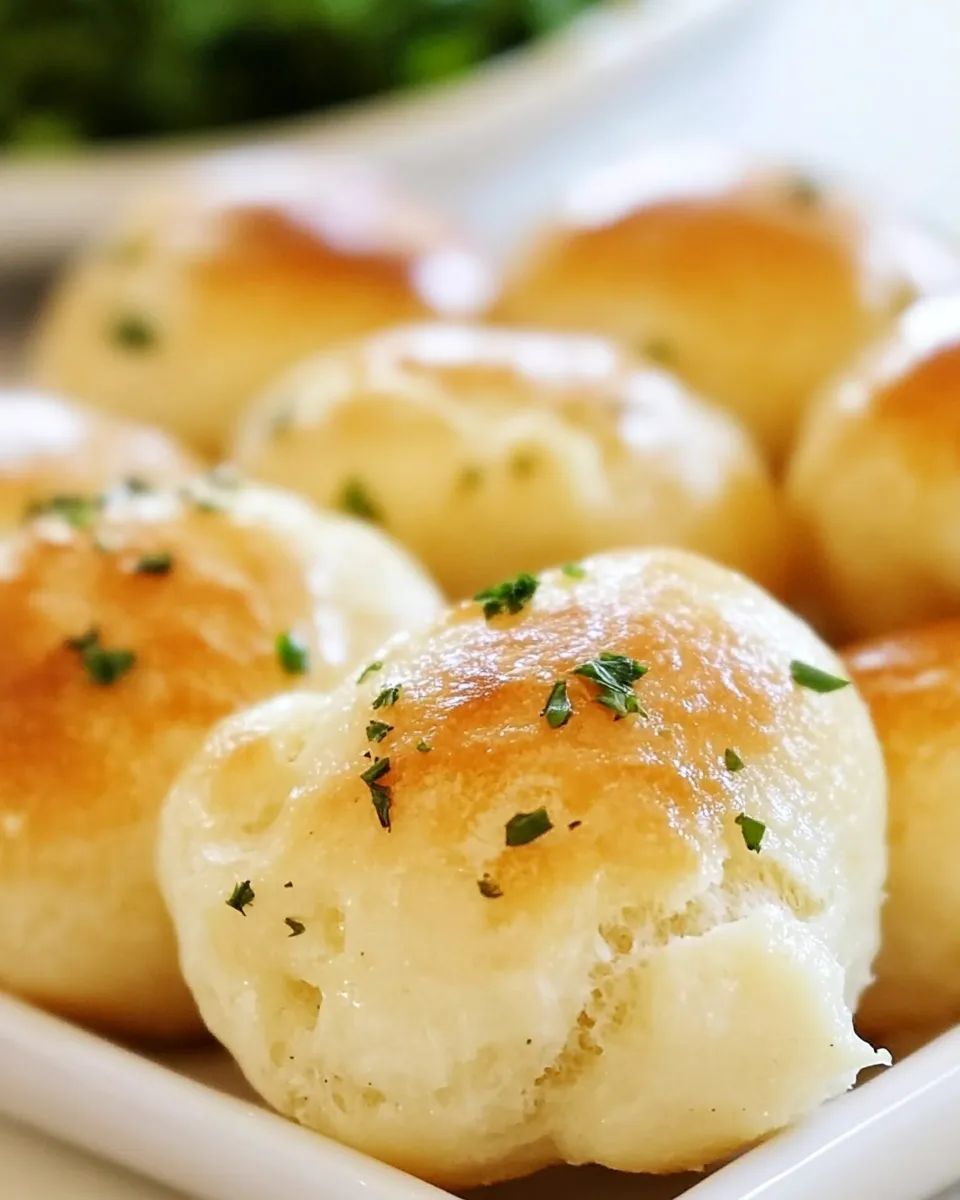
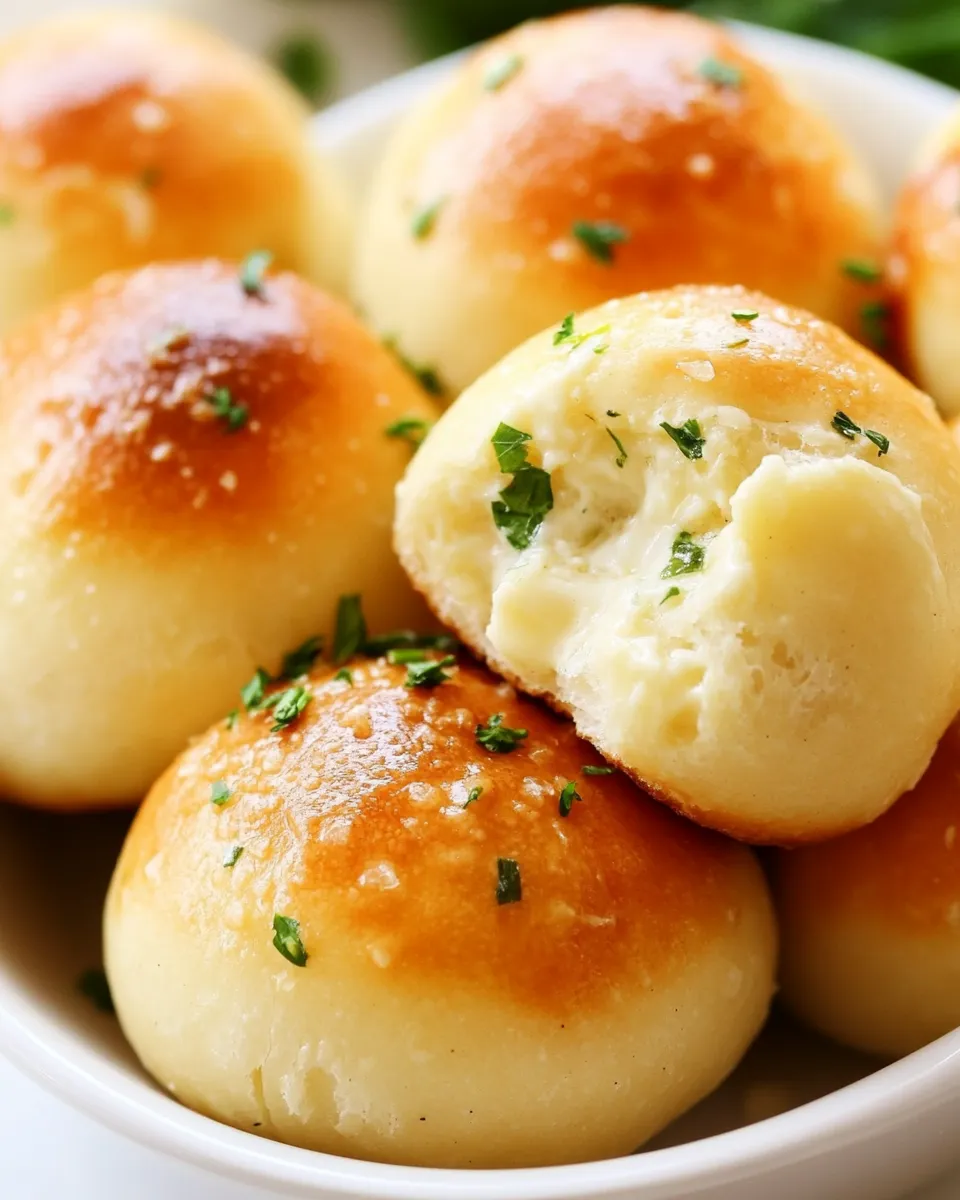
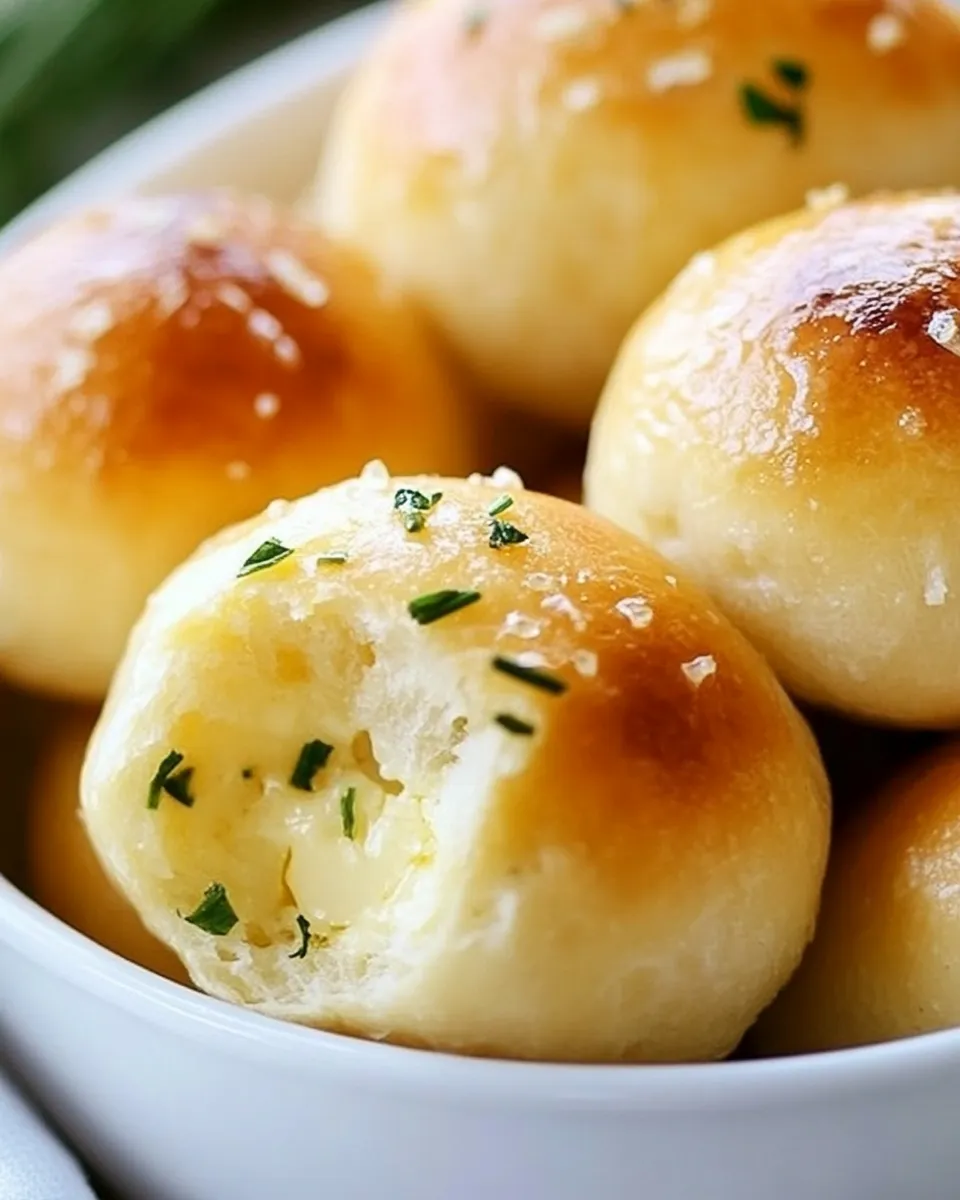
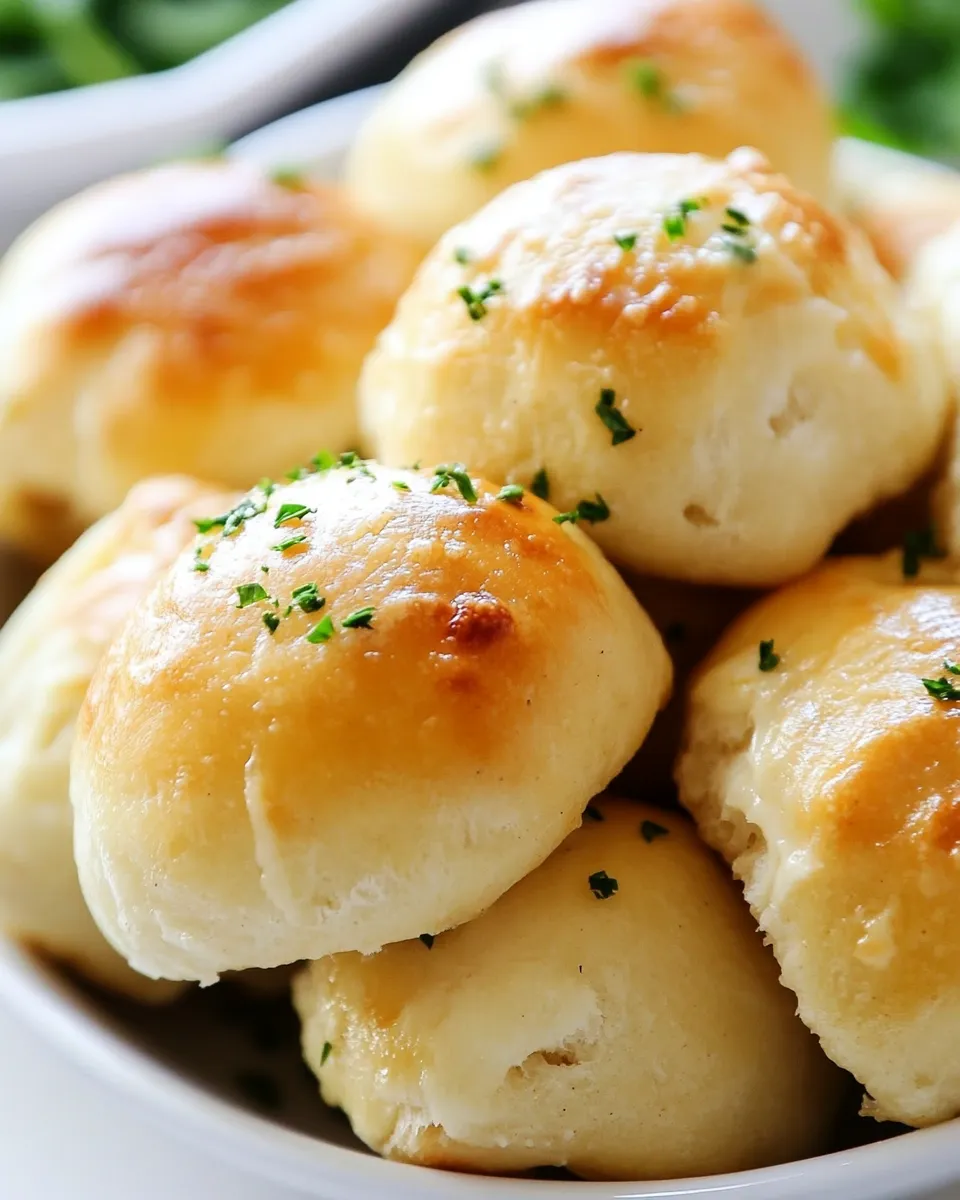
Garlic Herb Cheese Bombs
Imagine sinking your teeth into a warm, buttery biscuit that bursts with gooey mozzarella cheese and fragrant herbs. These Garlic Herb Cheese Bombs are not just a treat; they are an experience that transforms any gathering into a celebration. Perfect as an appetizer, snack, or even a side dish, these cheesy delights are simple to make and utterly irresistible. Let’s dive into this delightful recipe that will leave your guests asking for more!
Why This Recipe Works
The beauty of these Garlic Herb Cheese Bombs lies in their simplicity. Using refrigerated biscuits as a base means no complicated dough-making processes, making this recipe accessible for everyone. The combination of melted butter, garlic powder, and fresh parsley imparts a rich flavor that elevates the humble biscuit to gourmet status. Additionally, the mozzarella cheese creates that perfect melty texture that everyone loves. This recipe is perfect for both novice cooks and seasoned chefs looking for a fun, crowd-pleasing dish.
Ingredient Rundown
To create your Garlic Herb Cheese Bombs, you will need the following ingredients:
- 2 cans refrigerated biscuits (7.5 oz. each) – These are the foundation of your cheese bombs, providing a soft and flaky texture.
- 4 oz (125g) mozzarella cheese – Cut into 20 cubes, this cheese is the star ingredient that makes each bite heavenly.
- 4 tablespoons butter, melted – Adds richness and helps the herbs stick, enhancing the overall flavor.
- 1/2 teaspoon garlic powder – Infuses the biscuits with a delightful garlic flavor.
- Fresh parsley leaves, finely chopped – Brings freshness and a pop of color to the dish.
- 1 pinch salt – Balances the flavors and enhances the taste of the other ingredients.
Equipment at a Glance
Before you start, gather the necessary equipment:
- Baking sheet – To bake the cheese bombs to golden perfection.
- Parchment paper – For easy cleanup and to prevent sticking.
- Mixing bowl – To combine the melted butter with the garlic powder and parsley.
- Knife – For cutting the mozzarella cheese into cubes.
- Spoon – To help coat the biscuits in the delicious butter mixture.
Garlic Herb Cheese Bombs in Steps
Step 1: Preheat the Oven
Begin by preheating your oven to 375°F (190°C). This ensures that your cheese bombs bake evenly and develop that golden crust.
Step 2: Prepare the Baking Sheet
Line a baking sheet with parchment paper. This will make for easy cleanup and prevent your cheese bombs from sticking.
Step 3: Cut the Cheese
Take your mozzarella cheese and cut it into 20 equal cubes. This will allow you to wrap each cube inside the biscuit dough, creating those delightful cheesy centers.
Step 4: Prepare the Butter Mixture
In a mixing bowl, combine the melted butter, garlic powder, chopped parsley, and a pinch of salt. Stir until well mixed and set aside.
Step 5: Assemble the Cheese Bombs
Take a biscuit from the can and flatten it in your hand. Place a cube of mozzarella in the center, then fold the biscuit dough around the cheese, pinching the edges to seal it completely. Roll the ball gently in your hands to ensure it’s well sealed.
Step 6: Coat in Butter
Dip each cheese-filled biscuit ball into the butter mixture, ensuring it is fully coated. This will add flavor and help achieve a beautiful golden color when baked.
Step 7: Bake
Place the coated cheese bombs on the prepared baking sheet, leaving enough space between each one. Bake in the preheated oven for 15-20 minutes or until they are golden brown and puffed up.
Step 8: Serve and Enjoy
Once baked, remove the Garlic Herb Cheese Bombs from the oven. Let them cool for a few minutes before serving. These are best enjoyed warm, so gather your friends and family, and dig in!
Fresh Takes Through the Year
These Garlic Herb Cheese Bombs are versatile and can be adapted to suit various seasons and occasions:
- Fall – Add a pinch of nutmeg and swap the parsley for sage for a cozy autumn flavor.
- Winter – Incorporate a sprinkle of Italian seasoning and serve with marinara sauce for dipping.
- Spring – Mix in some finely chopped chives or dill for a fresh, vibrant twist.
- Summer – Use fresh basil instead of parsley and serve alongside a tomato salad for a light meal.
Pitfalls & How to Prevent Them
While making Garlic Herb Cheese Bombs is straightforward, here are some common pitfalls and how to avoid them:
- Overfilling: Avoid adding too much cheese, as it can make sealing the biscuits difficult. Stick to one cube per biscuit.
- Not sealing properly: Ensure the biscuit dough is well sealed around the cheese to prevent leaking during baking.
- Underbaking: Keep an eye on the baking time; they should be golden brown on the outside and cooked through on the inside.
- Using cold cheese: Ensure the mozzarella is at room temperature for easier handling and wrapping.
Make-Ahead & Storage
If you want to prepare these Garlic Herb Cheese Bombs in advance, here are some tips:
You can assemble the cheese bombs up to a day ahead of time. Place them on the baking sheet, cover with plastic wrap, and refrigerate. When ready to bake, simply remove the wrap and bake as directed. Alternatively, you can freeze the assembled cheese bombs. Arrange them in a single layer on a baking sheet, freeze until solid, then transfer to a freezer-safe bag. Bake from frozen, adding a few extra minutes to the baking time.
Common Questions
Can I use a different type of cheese?
Absolutely! While mozzarella is traditional for its meltiness, feel free to experiment with cheddar, pepper jack, or even cream cheese for a different flavor profile.
How do I know when they are done baking?
The cheese bombs are done when they are golden brown on the outside and puffed up. You can also check by inserting a toothpick; it should come out clean if the dough is cooked through.
Can I make these dairy-free?
Yes! You can substitute dairy-free cheese alternatives and use a plant-based butter to make these Garlic Herb Cheese Bombs dairy-free.
What can I serve with these cheese bombs?
These cheesy delights pair beautifully with marinara sauce for dipping, a light salad, or a charcuterie board featuring cured meats and fresh vegetables.
Final Bite
Garlic Herb Cheese Bombs are the perfect blend of simplicity and indulgence. They are an excellent addition to any gathering, ensuring that your guests will be raving about them long after the last bite. With their golden, flaky exteriors and cheesy, herb-infused centers, these bombs are more than just a snack; they are a celebration of flavor that brings everyone together. So roll up your sleeves, gather your ingredients, and get ready to impress with this delightful recipe!
There you have it! A deliciously simple recipe for Garlic Herb Cheese Bombs that is guaranteed to be a hit. Whether you’re serving them at a party or enjoying them as a cozy evening snack, these little bites of joy are sure to please. Happy cooking!
Garlic Herb Cheese Bombs
Ingredients
Equipment
Method
- Preheat your oven to 375°F (190°C).
- Line a baking sheet with parchment paper.
- Cut the mozzarella cheese into 20 equal cubes.
- In a mixing bowl, combine the melted butter, garlic powder, chopped parsley, and a pinch of salt. Stir until well mixed.
- Flatten a biscuit in your hand, place a cheese cube in the center, and seal it completely by pinching the edges.
- Dip each cheese-filled biscuit ball into the butter mixture.
- Place the coated cheese bombs on the prepared baking sheet, leaving space between each one. Bake for 15-20 minutes.
- Remove from the oven and let cool for a few minutes before serving.
Notes
- Make-ahead: Assemble up to a day in advance and refrigerate.
- Freezing: Freeze assembled cheese bombs for later baking.
- Cheese alternatives: Experiment with different cheeses like cheddar or cream cheese.